Monday, February 7, 2011

You Heard Me, It's a Belgian Chocolate Giveaway!

Though I haven't actually filled it out myself, the creepy snoop in me loves perusing through the "info" section of people's Facebook profiles.  The other day, I came across a friend who I hadn't spoken to in probably 20 years.  If you haven't spoken to someone in that long, are they still considered a friend?  In any case, she listed a "things I love" section which really made me smile and wonder what I'd put on my own list.

...white wine in the summer, hot chocolate in the winter...wagging doggie tails and running to the dog park...laughing until my stomach hurts...girls weekends and slow weekends with hubby.  giggling babies... ice cream and cake.  Cake and chocolate. ...Chocolate.

Guylian Chocolates
My very unscientific hypothesis states that a majority of you ladies and gentlemen may put chocolate right up there on your list as well.  And if chocolate makes you happy, it's chocolate that I'll give you! Details on the Guylian Belgian Chocolates giveaway at the end of this post.

Meanwhile, I have a great non-chocolate dessert recipe to share.  I'm aiming for sugar overload here, folks.
Apple Pie Bread
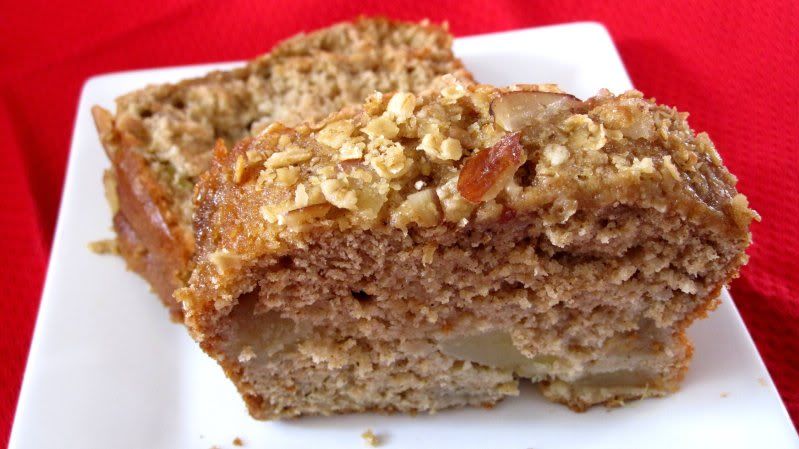
Confession time: I have never made any type of fruit pie...not cherry pie, not apple pie, not even the God of all pies: key lime pie.   Something about making homemade pie crust and pastries just thoroughly intimidates me.  Add it to the cooking bucket list, I suppose.  Well, if you're like me and love apple pie but are also dreadfully lazy, this quick bread recipe just might fit the bill.  It's filled with the good things in life - cinnamon, gooey apples and a nice nutty crunch without all the hassle.  If you have a great apple pie recipe that is delicious and not too time consuming to make, please send my way!


Apple Pie Bread
3 cups flour
1/2 teaspoon salt
1 teaspoon baking soda
1/2 teaspoon baking powder
1/2 teaspoon ground cinnamon
2 teaspoons apple pie spice
4 eggs, beaten
1 21 oz can apple pie filling
1 cup apple sauce
3/4 cup packed brown sugar (divided)
2/3 cup canola oil
1/2 cup sliced almonds

Preheat oven to 350 degrees.  Grease and flour two loaf pans.

1. In a large bowl combine flour, salt, baking soda, baking powder, cinnamon and apple pie spice.  In a separate bowl, combine eggs, apple pie filling, apple sauce, 1/2 c. brown sugar and canola oil.  Add egg mixture slowly to eggs, stirring until just combined.

2. Divide batter evenly among pans.  Top each loaf with remaining brown sugar and almonds.

3.  Bake for 55 minutes or until a toothpick inserted in the center comes out clean.  Cool in pans on a wire rack.

-------------------------------------------------------------------------------------------------------------

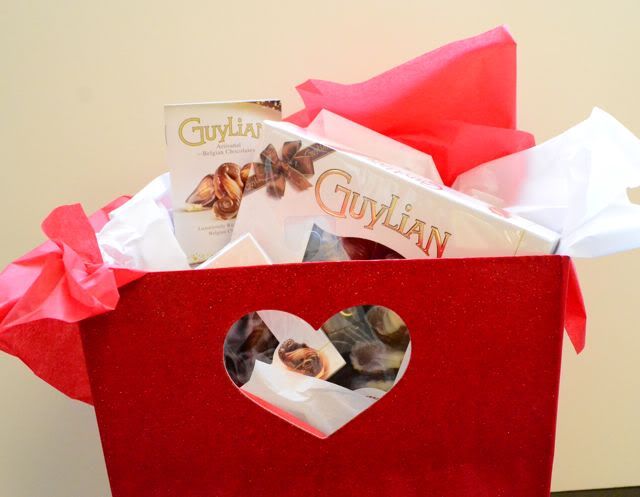
And now on to the good stuff.  The fine folks at Guylian Chocolates have graciously offered to send one of my awesome readers a Valentine's gift basket of chocolates. They sent me some chocolates to sample, and I must tell you that this stuff is divine.  Just think about this...chocolate seashells with milk, dark and white Belgian Chocolate filled with rich, decadent creamy chocolate praline truffle. um,YEA. Seriously.  If you don't have a Valentine's day gift yet, here's your chance.  Or...if you're selfish like me, you can just keep the chocolates to yourself :)
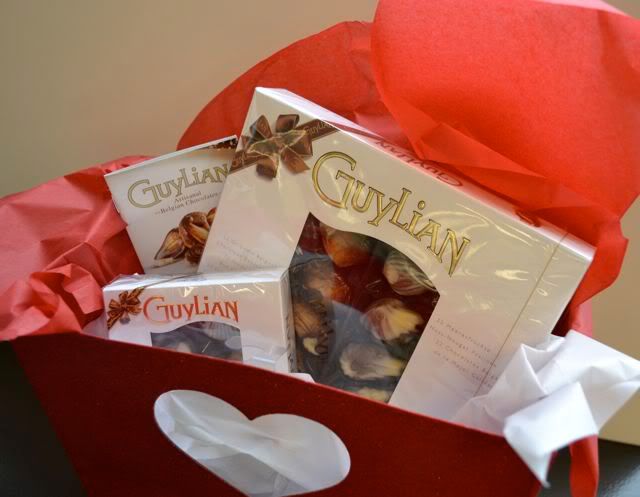
Guylian Chocolates

Giveaway: Guylian Belgian Chocolates!

Starts today and ends Friday, February 11 at midnight (EST). Winner will be chosen at random through random.org

To enter into the giveaway:
Leave a comment letting me know what truly makes you happy or list your favorite chocolate dessert

Additional Entries can be earned by:
1. Tweeting about this post: Guylian Belgian Chocolate Giveaway http://bit.ly/gdVimS @newlywedcook Please RT!

2. Follow @newlywedcook on Twitter, then come back to this page and leave a separate comment telling me you did so. (if you already follow, let me know, that counts!)

3.  Share a link to this post via Facebook or email and leave a separate comment telling me you did so.

Monday, December 20, 2010

Basil, Mozzarella and Sausage Skewers

As of today, December 20th 2010 I am officially done with Christmas shopping! I must say that this is a new record for me and I pretty much have Amazon and all the ridiculously creative people on Etsy to thank for this year's efficiency.  If you've never been over to Etsy, I suggest you head there right now.  Yes, leave my post - it's ok.  The site's that good and full of amazing presents  :)  How's your holiday shopping progressing this year?

Mozzarella Skewers
With all my newly discovered free time, I'm back in the kitchen.  Though that sounds oddly 1940's domestic I'm happy to get back to baking and into the warmest room in our house.  Seriously, folks.  If you ever find your toes getting cold, just head into the kitchen and bake something.  You'll feel much better about life AND your house will smell good.

Mozzarella Skewers
Today's recipe is easy and perfect for the holidays.  I love this recipe because not only is it Christmas colors, but it also comes together quickly and is an excellent finger food.  All too often, I find myself at a party trying to eat an appetizer and having it fall all over my white clothing.  Who wears white clothing in the winter besides me?  Lesson learned.  Put finger foods on toothpicks to make life easy for klutzes like me!  Unfortunately, not too much "heat cooking" is involved so you'll just need to put some snuggle socks on instead.

1 clove garlic, smashed
1/4 teaspoon kosher salt
1/8 teaspoon crushed red pepper flakes
3 tablespoons extra-virgin olive oil
12 bocconcini (small mozzarella balls)
1 pint cherry or grape tomatoes
12 basil leaves, preferably large
12 toothpicks or short wooden skewers
2 -3 sausage links of your choice

Combine the garlic, salt, pepper flakes, and olive oil in a medium glass bowl. Cover and microwave on high until the garlic is golden, about 2 minutes. Cool. Add the bocconcini and refrigerate for at least 1 and up to 24 hours.

Pan fry sausages and allow to cool slightly.  Slice sausages.

Thread a tomato onto a skewer, wrap a bocconcini in a basil leaf and add to the skewer; finish with a sausage

Repeat with the remaining cheese and tomatoes.

Wednesday, December 8, 2010

Safeway Home Delivery Review

I've never thought of myself as a control freak, but when it comes to grocery shopping I must say that I am classic type-A.  I really do love grocery shopping and I have some crazy primal need to pick and choose what goes into my basket.  So, when I was offered the chance to try out Safeway's grocery home delivery service I was both excited and frightened at the same time.  Would I really be able to let a stranger pick and pack my groceries when ahem, there is a Safeway basically across the street from my house?
Safeway Grocery Haul
Along with my control freakness, I tend to be an impulse buyer at the grocery and can't really leave without spending at least $50 so I figured this if anything, this would be a good exercise in purchasing what I actually need. Luckily, the shopping purchase was pretty easy as I picked a recipe (Creamy Lemon Soup with Lamb Mint Meatballs - amazing!) and went to town from there. For good measure I picked out some produce to see what I'd get.

Result? It was a bit hard for me to wait for the groceries to arrive. Luckily, they give you a pretty short window for delivery and my driver was kind enough to call on his way over.  The process was quick and easy and the next time it is too cold for me to leave the house, I'm thinking this ain't too bad of an option.  Finding ground lamb isn't always and easy task so I was happy to be able to order this online and not travel from store to store in search of such an elusively good item.  All in all a great service - one I can imagine would be uber helpful in the big city!

Disclosure: Thanks to Safeway and Foodbuzz for the chance to review. I was not compensated for the review but did receive a stipend to try out their fantabulous service.  The opinions are my own.

Wednesday, November 10, 2010

Cherry Pie Pecan Bars

I admit it. I cut coupons...AND I think its fun. Some habits die hard and while growing up my Mom and I would sit on the couch on Sundays and go through the ads and coupons. In my grade school days, I think finding a coupon acted as leverage and a perfect excuse to convince my mom that it was a good idea to buy the latest junk food or kid-geared snack. To this day, I must say I still enjoy this activity though I must also admit I probably only use 1- 2% of the coupons I so diligently cut out, save and file.  It's the effort that counts!

Cherry Pie Bars

Last Sunday I saw a recipe for Cherry Pie Pecan Bars in the coupons section. I am not a fan of cherry pie, and I don't like pecans but the recipe reminded me that Lucky Leaf had sent me a few samples of their pie fillings.  Since I don't make pies very often, this recipe seemed just about perfect.  Um, except for the stick or so of butter that I was missing!  I subbed apple butter for quite a bit of butter so I had no idea how these would turn out.

Maybe I just thought I didn't like cherry pie, because this dessert was one of my favorites in a long time. I can't say the apple butter substitution made these all that healthy, but just like my coupon cutting, it's the effort, right?

Cherry Pie Pecan Bars
Adapted from Lucky Leaf recipe

2 cups all purpose flour
2 cups uncooked quick cooking oats
1 1/2 cups granulated sugar
13 tablespoons butter
7 tablespoons apple butter
1/2 cup chopped pecans
1 tsp baking soda
1 21 oz can cherry pie filling
1 cup minature marshmallows

1.  Preheat oven to 350 degrees.  Combine all ingredients except pie filling and marshmallows in a large mixing bowl.  Beat at low speed, scraping bowl often until mixture resembles coarse crumbs.

2. Reserve 1 1/2 cups of the crumb mixture for the topping.  Press remaining mixture into ungreased 13x9 inch baking pan.  Bake for 12-15 minutes or until lightly browned.  Gently spoon pie filling over hot crust.  Sprinkle with marshmallows then sprinkle with remaining crumb mixture.

3. Continue baking for 25-30 minutes or until lightly browned.  Cool completely on a rack.

Wednesday, October 27, 2010

Chicken with Mushrooms in Marsala Wine Sauce

True story. I once tried to make Chicken Marsala with Two Buck Chuck. I know. Right? Well I wont spend too much time here spewing excuses for why this ill-fated experiment seemed like a good idea. There's really no good, or even average excuse. Just take it from me - folks, don't try this at home.

Chicken Marsala

Well, now that I'm all grown up and can shell out the big bucks for marsala wine (really, it's not that expensive...) I figured I'd revist what was once a black sheep dish in our household and do things right. Growing up, I loved going to Rich and Charlie's and ordering the Chicken Marsala. Something about seeing "wine" listed in the description made me feel daring and older. No one bothered to tell me at such a young age that the wine cooks off. Now that I know the truth, I still love it.  Just not made with Two Buck Chuck, I suppose. :)

This version has oodles of mushrooms (porcini, shiitake, and button)- probably more than I ever could have handled as a child. Serve this chicken up with some egg noodles and you have yourself quite a gourmet meal!

Chicken Marsala
1/2 cup dried porcini mushrooms
1 cup dried shiitake mushrooms
Kosher salt & pepper
4 boneless chicken breasts, pounded thin
1/4 cup flour
1 Tablespoon Emeril's Essence (go here for recipe if you don't have it)
2 tablespoons olive oil
1/2 cup chopped onion
1/4 teaspoon crushed red pepper
5 garlic cloves, minced
1 1/2 cups sliced white mushrooms
1/2 teaspoon kosher salt
1 teaspoon dried oregano
3/4 cup dry Marsala wine
1 cup chicken broth
1 tablespoon butter
1/4 small basil leaves

1. Place Porcini and Shiitake mushrooms in a small bowl.   Cover with boiling water.  Let stand for 20 minutes or until tender.  Drain and rinse.

2. Lightly season the chicken breasts with salt & pepper to taste. In a shallow plate or bowl, combine Essence seasoning and flour. Dredge the chicken breasts in the flour and shake off excess.

3. Heat a large skillet over medium high heat. Add olive oil to pan. Add chicken and saute until brown on each side, but not fully cooked through. Remove from pan and cover with foil.

4. Add more olive oil to pan and saute onion, red pepper and garlic, until onion is lightly browned. Add 1/2 teaspoon salt, mushrooms and oregano. Saute until mushrooms darken and have given off moisture. Sprinkle with 1 teaspoon flour; cook 1 minute, stirring constantly. Add the marsala wine and allow to reduce. Add broth and bring to a boil. Reduce heat and simmer for about 3 minutes or until sauce starts to thicken.

5. Add chicken to the pan and continue to cook until heated through. Prior to serving add 1 tablespoon butter and stir to combine. Garnish with small basil leaves.

Monday, October 4, 2010

Pumpkin Spice Chocolate Chip Bars

Feels just like two weeks ago, I had the A/C on full blast and loaded up on dedorant/water bottles/ice coffees whenever I dare venture out into the 90+ degree sweltering temps.  Today?  I'm donning my ever so fashionable pink snuggle socks and a hoodie to keep myself warm.  And I admit, I even schlepped the portable heater down from the attic.  I'm a certified cold weather wuss.

Pumpkin Spice Bars

While many adore Fall for it's cooling temps and beautiful foliage, I personally love the Fall for all things pumpkin - beer, hand towels, decorations, cookies - the list goes on and on.  Every year, I stock up on organic canned pumpkin and create more than a reasonable amount of pumpkin flavored baked goods, usually while drinking a pumpkin beer. And wearing pumpkin socks.

If you make anything this week, I'm telling you these bars are SO worth it.  They're light and fluffy while not being too cakey like many pumpkin desserts.  In need of a quick dessert, I found this pumpkin bar recipe on Martha Stewart.  With just the right amount of spice complemented with chocolate, you too can make a pumpkin lover out of just about anyone!  Happy October!

Pumpkin Chocolate Chip Bars
Adapted from Martha Stewart

2 cups all-purpose flour (spooned and leveled)
1 tablespoon pumpkin-pie spice
1 teaspoon baking soda
3/4 teaspoon salt
1 cup (2 sticks) unsalted butter, room temperature
1 1/4 cups sugar
1 large egg
2 teaspoons vanilla extract
1 cup canned pumpkin puree
1 3/4 cup chocolate chips

1. Preheat oven to 350 degrees.  Line a 9x13 baking pan with foil on all sides with overhang. In a medium bowl, whisk together flour, pie spice, baking soda, and salt; set aside.

2. With an electric mixer, cream butter and sugar on medium-high speed until smooth; beat in egg and vanilla until combined. Beat in pumpkin puree (mixture may appear curdled). Reduce speed to low, and mix in dry ingredients until just combined. Fold in chocolate chips.

3. Spread batter evenly in prepared pan.  Bake until a toothpick inserted in the center comes out with just a few crumbs, about 35 minutes.

4.  Allow cake to cool completely in pan placed on rack. Lift cake from pan, peel off foil and cut into squares

Wednesday, September 22, 2010

Pesto Gnocchi with Shrimp and Asparagus

No, I haven't disappeared again.  I just, well...lost my camera....sort of.  You see, those who know me would probably agree that I'm a pretty put together person.  However, when it comes to electronics I seem to be cursed.  Just this year, my iPhone disappeared.  Yes, disappeared at a friend's apartment of all places.  When the iPhone 4 came out, I bought it to replace my MIA phone.  Lo and behold, the pretty little thing shattered into pieces after 3 days of ownership (a combination of klutziness + a glass phone = disaster). Arrrgh.

Pesto and Shrimp Gnocchi
Then, I thought I lost my camera.  Again, a strange disappearance, but entirely more depressing of a loss than than the iPhone.  Pictures and videos of predominantly food and the dog....gone!  Panicked, I posted ads on Craigslist's lost and found and just about every "Lost Camera" website I could find.  At least I learned that I do need to take pictures of things other than Sadie and things I cook....

Well folks you'll be happy to hear that this story ends with a happy ending. I found the camera yesterday sitting in my closet on top of a pair of black pants.  Since the camera is also black you can see how fooled I must have been by the camouflage.  Tricky, tricky electronics.  Always gettin' me down.

I LOVED this pesto gnocchi so much that hubby & I finished it in one setting.  When you make it yourself, you can see how disturbing this is.  Gnocchi is quite filling and delicious but we did rationalize our gluttony by reveling in the fact that I used whole wheat gnocchi in this recipe.  Purchased at Trader Joe's, land of all good things, wheat gnocchi - unlike some whole wheat pastas, tastes exactly the same as normal gnocchi.  Eat away!  If you can't find whole wheat gnocchi, I'm sure normal would be just as good if not better.  Also, if you're feeling lazy bottled pesto sauce would make this into a 15 minute cooking adventure!

Gnocchi with Shrimp, Asparagus, and Pesto
Adapted from Cooking Light, September '10

1 pound peeled and deveined shrimp, coarsely chopped
Old Bay seasoning
1 16 oz. package whole wheat gnocchi
1 tablespoon olive oil
1 garlic clove, minced
1 bunch (about 1 lb) asparagus, cut in 1-inch slices
Pesto: (in a hurry, use bottled pesto sauce)
1 cup basil leaves
2 tablespoons pine nuts, toasted
2 tablespoons Parmesan cheese
2 tablespoons fresh lemon juice
2 tablespoons minced garlic
4 tablespoons olive oil

1. Season shrimp with Old Bay Seasoning.
2. In a dutch oven, bring water to a boil. Add a pinch of salt. Add gnocchi to pot; cook about 5 minutes or until gnocchi rises to the top. Remove with a slotted spoon and rinse with cold water. Set aside.
3. In a large skillet, heat olive oil over medium heat.  Add garlic and asparagus to pan.  Cook 2 minutes.  Add shrimp and cook until heated through, about 3 -4 minutes. 
4. Combine 1 tablespoon of water, basil and next ingredients (through garlic) in a food processor; process until smooth, scraping sides.  Drizzle oil with food processor on; process until well blended.
5.  In a large bowl, toss gnocchi, shrimp and pesto until combined.  Serve immediately.

Monday, August 30, 2010

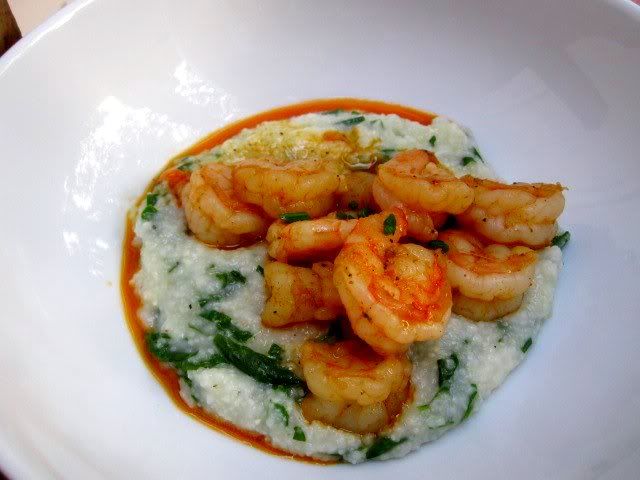
Smoky Shrimp and Grits

A wise man* once said, "Instead of writing a post about how you've been too busy to update your blog, just delete your f'ing blog."  Ouch, but so very true as I sit here trying to think of what to say after a 3 month hiatus!  Is anyone actually reading these words?  Does anyone still care?  Well, if you've stuck around this long (and thanks to those of you who inquired whether I went on vacation and decided never to come back), here's an action packed update on my life since my last post:  Visited Indonesia. Bought a new house. Lived in an empty house in San Diego. Moved to DC/Virginia.  Flew the world's best dog across the country. Unpacked.  Spent good chunk o' money on knick knacks, new water heater and vanity for new house.  Finally started cooking again.

Whew.

Shrimp Grits
Clearly the list goes on (and on and on), but I figure that's more than enough personal mumbo jumbo.  On to the good stuff!

Since moving I've attempted to embrace local cuisine - some of which I've never even seen before.  Grits may be a quintessential southern food that I fully admit that I've never even seen before, save a Paula Deen episode.  I spotted this recipe in the latest issue of Food and Wine and figured it'd be worth a shot.  If it's sinful enough for Paula, it's gotta be good, right?

Well, I'd say half of this household is still undecided about grits.  The shrimp, sauce and grits tasted amazing but the texture may be odd to those who are sensitive to well, mushy stuff.  Me?  I love it.  I'm sold.  California girl goes southern?  We'll see about that as I still miss sushi and fish tacos.  But, I'm gettin' there.  Be sure to use a flavorful, smoky paprika to add good flavor.  Otherwise, I thought the recipe was spot on.

Well, I can only hope that it will not be too long until I write again.  After a long hiatus from not only the blog, but from cooking as well I think I'm back in the swing of things. The new kitchen has taken some getting used to (more on that later...) but I think things are on the right track and am looking to purchase some extra storage - post to follow about the progress!

Smoky Shrimp and Grits
Recipe adapted from  Food and Wine

1 pound shelled and deveined medium shrimp
Old Bay Seasoning
3/4 cup quick-cooking grits
Kosher Salt and freshly ground black pepper
2 ounces sharp white cheddar cheese, shredded (3/4 cup)
1 1/2 cups baby spinach, coarsely chopped
1/4 cup snipped chives
1/4 cup canola oil
2 large garlic cloves, thinly sliced
1/2 teaspoon hot paprika
1/4 cup dry white wine

1. Place shrimp in a medium sized bowl. Sprinkle with Old Bay seasoning to taste. Toss & set aside.

2. In a medium saucepan, bring 3 cups of water to a boil. Gradually add the grits and a generous pinch of salt. Cover and cook over low heat, stirring occasionally, until the grits are thick and porridge-like, about 7 minutes. Season with salt and black pepper and stir in the cheddar cheese, baby spinach and chives; stir until the cheese is melted and the spinach is wilted. Cover the grits and keep warm.

2. In a large skillet, heat the canola oil with the garlic over high heat until fragrant, about 30 seconds. Add the shrimp and paprika, season with salt and black pepper and cook until the shrimp are opaque, about 2 minutes. Add the white wine and cook until the shrimp are white throughout and the garlic-paprika sauce is slightly reduced.

3. Spoon the grits into bowls, top with the shrimp and sauce; serve.

*Quote from Aaron Karo of Ruminations.  Funny, funny man.

Thursday, May 6, 2010

NomNom's Lemongrass Chicken Banh Mi

Today is one of those quintessential picture perfect, sunny San Diego days that remind me why we spend so much money to live here. I want nothing more than to be outside, but I'm realizing that most of my day will be spent inside. Why, you ask? ...because I'm going on vacation (um, and I haven't started packing!)  Don't feel too sorry for me.

Lemongrass Banh Mi

Drowning in packing madness, I have no recipes for you this fine day. I have been spending the week trying with all restraint possible to resist that daily trip to the grocery store and basically finish up whatever is left in the fridge. Though this difficult task of mine has not ended up in any gourmet meals, I do have an amazing culinary experience to share with you. Even better, right?

Do you have food trucks in your city? Apparently this is the "new thing" in cities like Portland and San Fran though I haven't found it to be too prevalent here in SD (yet). Well, lucky us - the NomNom Truck based out of LA came for a little weekend visit. I randomly spotted them not once, but twice in one weekend - quite a feat for a banh mi truck that posts its ever changing location on its website, twitter and FB.

Lemongrass Banh Mi

The first time I spotted NomNom, I giggled with glee. But, I was basically wearing pajamas out in public. Usually my attire does not prevent me from consuming delicious food, but wouldn't ya know... Food Network had their cameras rolling. No matter how much I love good food, I was not going to be seen on Food Network in my PJs. I sulked away, imagining how good the food must be and cursing myself for leaving the house in my sweats from the early 2000s.

Luckily, I visited the Farmer's Market across from our house the next day, and there they were-- no cameras rolling! I treated myself to this amazingly delicious and tasty Lemongrass Chicken Banh Mi sandwich. I'm embarassed to admit - I've never tried one of these traditional Vietnamese sammmies (usually filled with pork) but now I know, I have been truly missing out. Nom Nom's version is pure bliss: toasty baguette + cilantro + carrot and daikon radish + lemongrass chicken (I skipped the jalapenos). If you can locate this truck, try it. Pajamas or no pajamas -- its worth it.  Plus, the truck is uber cute.

Check it out:
Nom Nom Truck
Location in LA area varies by day!

I'll be out for a few weeks but keep eating good food in my absence!

Thursday, April 29, 2010

Black and Tan Guinness Brownies

I have a Thursday confession for y'all. I just don't LOVE brownies. Now that's not to say I won't eat them. I just can't eat a lot of brownie, and perhaps it has to do with the fact that I sneeze profusely on each first bite of strong chocolate. Does that mean I'm allergic? Because if so, let's just pretend like nothing ever happened.

Black and Tan Guinness Brownies

Well, when I first saw this recipe, I couldn't help but feel intrigued. For starters, Guinness in dessert adds a whole new dimension of deliciousness.  To top it all off, this looks like a brownie on top of a blondie. Just like mini versions of food, there's just something cute about combining two desserts and making them sit on each other.  Why, you ask?  I don't know.  Just try it.

Black and Tan Guinness Brownies

The brownie-blondie combo worked well for me - so well, in fact that I dont think I sneezed even once while eating these. If you're a fan of the uber rich chocolately chocolate brownie, this may not be your favorite, but these tasted light enough that I could not just stop at one. Now, is that a good thing or a bad thing? :)  My brownies are a little on the gooey side, but that's how hubby likes them.  If you're more of a well-done brownie connoisseur some extra oven time might do you good.

Black and Tan Brownies
Tan brownies:
6 tablespoons butter,softened at room temp
1 1/2 cups packed brown sugar
2 large eggs
1 teaspoon vanilla extract
1 cup all-purpose flour
1 teaspoon baking powder
1/4 teaspoon salt
1/4 - 1/2 cup chopped pecans
1/4 teaspoon cinnamon
Cooking spray

Black brownies
3 ounces unsweetened chocolate, finely chopped
4 tablespoons butter
1 cup granulated sugar
2 large eggs
1 teaspoon vanilla extract
1 cup Guinness Stout
1 cup all purpose flour
1/4 teaspoon salt

1. Place one rack in lower third of oven; place another rack in center of oven. Preheat oven to 350°.

2. To prepare Tan Brownies, place 6 tablespoons butter and brown sugar in a medium bowl; beat with a mixer at medium speed until light and fluffy. Beat in 2 eggs and 1 teaspoon vanilla. Weigh or lightly spoon 4.5 ounces (about 1 cup) flour into a dry measuring cup; level with a knife. Combine flour, baking powder, cinnamon and 1/4 teaspoon salt, stirring well. Add flour mixture and pecans to sugar mixture, beating just until combined. Spoon into a 13 x 9–inch baking pan coated with cooking spray, spreading evenly with a knife or rubber spatula (mixture will be thick). Bake at 350° in lower third of oven for 15 minutes.

3. To prepare Black Brownies, melt chocolate and 4 tablespoons butter in a large microwave-safe bowl on HIGH for 1 minute or until melted, stirring after every 20 seconds until smooth. Add granulated sugar, stirring until well combined. Add 2 eggs, 1 teaspoon vanilla, and Guinness, stirring with a whisk until well combined. Weigh or lightly spoon 4.5 ounces (about 1 cup) flour into a dry measuring cup; level with a knife. Combine 4.5 ounces flour and 1/4 teaspoon salt, stirring well. Add flour mixture to chocolate mixture, stirring to combine. Pour mixture evenly over Tan Brownies.

4. Bake on the center rack at 350° for 25-30 minutes or until a wooden pick inserted into center comes out almost clean. Cool in pan on a wire rack; cut into squares.

Source: Cooking Light, March 2010

Friday, April 16, 2010

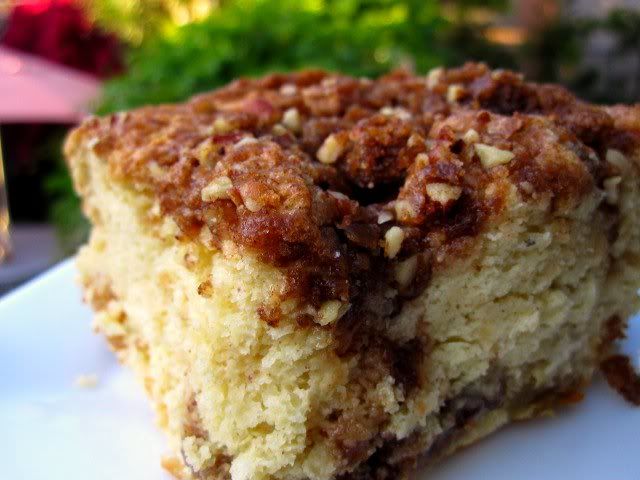
Brown Sugar Pecan Coffee Cake

The winner of the Wok Giveaway is lucky Linda from Silly Little Mischief! Congrats, and enjoy.  Let us know what you make!  Big thanks to everyone who entered.

Crumb Cake

Yesterday my dear, amazing brother left a comment on the blog after he got to be a lucky first hand witness to what's called "kitchen drama" in our house. Though I absolutely love cooking, I tend to get well, let's just a say...a bit cranky when things don't go perfectly in the kitchen. Last weekend, I tried to make one (ok maybe, two!) too many things at once, with too little time and of course, there were ingredients forgotten, things spilled and a few swear words here and there and everywhere. Luckily, brother and hubby watched the Masters while things (including me) imploded in the kitchen. I suppose my kitchen inelegance may be reason #1 that I could never be on Top Chef or any other live cooking show for that matter!

Sour Cream Coffee Cake

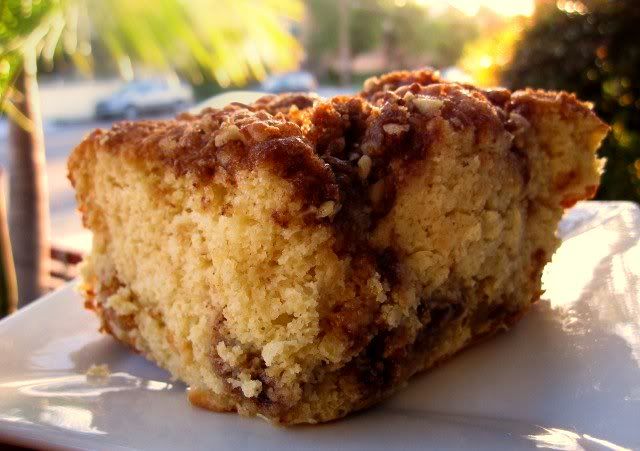
Hubby is quite used to this kitchen drama and to his credit, he patiently puts up with my it like a saint and gets rewarded with his very own cake! This sour cream based coffee cake is a much more decadent version than the healthy one I baked not too long ago. Though I'd like to say both versions were equally delicious, c'mon that'd be a lie and I'm no liar! Since we're all being honest, who doesn't agree that baked goods hit a new level with some good old fashioned butter and eggs?

Oh well. I did use fat free sour cream which hopefully cuts down the fat content just a bit. And there's less than 2 cups sugar total so we have that going for us as well, right?! Regardless, this is one of my new favorite recipes and a great treat to bring to a party. Its quite pretty with a brown sugar pecan topping and stays unbelievably moist.

Brown Sugar Pecan Coffee Cake
topping:
3/4 cup light brown sugar, packed
1 tablespoon all-purpose flour
1 teaspoon cinnamon
2 tablespoons cold unsalted butter, cut into pieces

In a medium bowl, combine the brown sugar, flour, and cinnamon. Add the butter and, using your fingertips, pinch the ingredients together into a sandy, crumbly mixture.

cake:
8 tablespoons (1 stick) unsalted butter, softened at room temperature
1 cup granulated sugar
3 eggs
2 cups sifted all-purpose flour
1 teaspoon baking soda
1 teaspoon baking powder
1/2 teaspoon cinnamon
1/4 teaspoon salt
1 cup sour cream
1/2 cup golden raisins
topping, recipe above
1/4 cup chopped pecans, pulsed in the food processor (you can up this if you're more of a pecan fan)

1. Preheat the oven to 350 degrees. Butter a 8 by 8-inch cake pan, line with parchment paper and butter the paper. In a mixer fitted with a paddle attachment, cream the butter until smooth. Slowly add the sugar and mix. Add the eggs and mix until light and fluffy.

2. Sift the flour, baking soda, baking powder, cinnamon and salt together. Working in batches, add flour mix to the butter/sugar mixture, alternating with dollops of sour cream. Stir in the raisins.

3. Pour the batter into the prepared pan. Sprinkle the topping mixture over the cake. Sprinkle pecans on top. Bake until risen and browned, about 45-50 minutes depending on your oven. Let cool 10 minutes in the pan. Serve in squares.

Adapted from Gale Gand

Friday, April 9, 2010

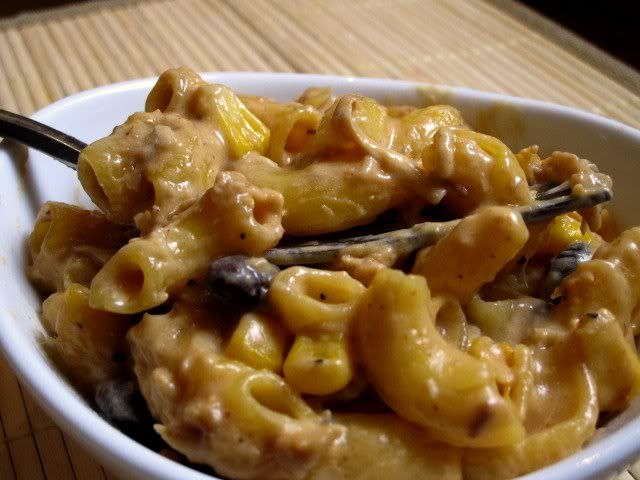
Calphalon Giveaway and BBQ Chicken & Ranch Mac 'n Cheese!

Have you ever heard of the Paleo diet? It's sort of a movement back to the diet of our ancestral caveman where you eat well, what a caveman would. Yep, what you're thinking is correct: no pop tarts, no froyo, not even cereal. Just plain ol' meat and veggies and some nuts for good measure. I suppose its kind of like a manly version of the South Beach diet.

{caption: this dish is not part of the Paleo diet}
BBQ Chicken Mac n Cheese
Well, as much as I agree with the reasoning behind this diet, I just love me some sugar and some carbs. Hubby mentioned experimenting with this movement, and I felt myself shudder with caffeine-withdrawal-like shakes. The only thing that could calm my nerves? BBQ Chicken Mac 'n Cheese.  Of course, I made this for myself while he was away which actually left me wanting to adapt a caveman diet.  Leaving me home alone with a vat of mac 'n cheese is never smart.

Don't fret.  This dish isn't all bad for you.  I try to use quinoa pasta for almost all my pasta dishes now.  It's super high in protein, gluten free and all around tasty nonetheless.  Though this has to be one of my top 5 recipes, it ended up being a clear the pantry, spur of the moment meal I cobbled together with some leftovers (shredded bbq chicken, corn and beans).   The corn and beans were an interesting addition, though the mac 'n cheese purist in me will probably leave them out next time.
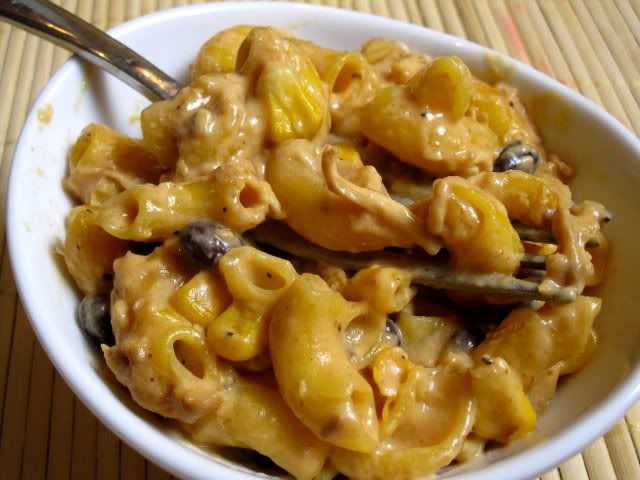
BBQ Chicken Mac n Cheese
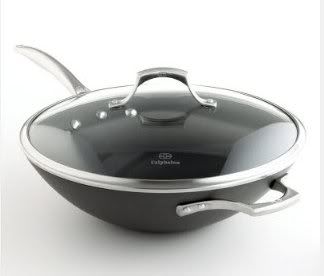
Now, on to the exciting stuff....a free Calphalon wok! 

Wok
Thanks to the good folks at CSN Stores who have everything from Corner TV Stands to Le Creuset, to mattresses, I got to pick out a fun prize for my readers!  Because I'm such a lover of Asian food, I chose this sweet Calphalon 13" Flat Bottom Wok.  I actually selected this prize because I have this wok and love it.

Comments are now closed for this contest.  Thanks to all who entered. I will be announcing the winner shortly!!


Open to U.S. residents only.  If you don't have a blog, please leave your email address so I can contact you if you're the winner.
    The winner will be chosen randomly by Random.org on Tuesday, April 13th - 9pm Pacific.  Good luck!!

    BBQ Chicken Mac 'n Cheese
    Recipe by Sharon
    I made this for myself so the measurements are kind of weird.  For a bigger group, double the recipe. 

    1 8 oz. box quinoa pasta (available at health food stores like Henry's, Whole Foods), cooked according to package directions (plus a few minutes boiling time)
    1 tbsp butter
    1/6 cup flour
    3/4 cup milk
    1/8 cup chicken broth
    1/2 cup low fat sour cream
    2 tbsp ranch dressing
    1/4 lb Velveeta, cut into cubes
    1/4 tsp ground mustard
    1/4 tsp ground black pepper
    1/4 tsp coarse garlic salt
    1 cups reduced fat shredded cheddar
    1/4 cup black bean and corn (optional - I added this b/c I had some leftover, but not sure i would use again)
    1/2 cup- 3/4 cup shredded bbq chicken (bought at TJ's)

    Preheat oven to 350 degrees.

    1. Melt butter over medium heat until almost bubbling. Add flour and stir until smooth. Gradually add milk and broth. Bring to a boil; cook and stir for about 2 minutes or until smooth & thickened. Reduce heat.

    2. Add sour cream, ranch, Velveeta chunks, ground mustard, pepper & garlic salt. Continue stirring until smooth and cheese melts (this may take awhile). Once cheese is melted, add shredded cheddar and stir until melted.
    Add drained pasta and chicken to pot and stir until combined with cheese sauce.

    3. Spray a 9x9 glass baking dish with cooking spray. Transfer pasta to the dish and bake for 15 minutes or until heated through.

    Monday, April 5, 2010

    Chipotle Chicken Salad

    Southwest Chicken Salad

    Call me an earthquake virgin.  As a relative newcomer to SoCal, I found myself a bit confused, not scared by yesterday's Easter earthquake.  While I felt the floor gently sway, it took me a few moments to decipher whether I was still feeling the effects of our Saturday Funday or whether we were having a very long earthquake.  During these moments of profound thought, I stood in the absolute worst place in our house: underneath our hanging pot rack, next to our cabinets full of glasses and plates.  Hmm, not smart.  Thank goodness most are safe and sound and chalking this up to a learning experience...including me!  Other than that, I enjoyed the sunny weekend with some good friends who drove down to visit and a big Easter brunch full of pancakes, sausage and kale (yes, kale!) with hubby.  He proclaimed we were probably the only people in America dining on kale during our Easter brunch.  Anyone want to prove him wrong?

    After a long and eventful weekend I wanted to make something super simple for dinner tonight.  After rummaging through random cooking magazines on my bookshelf, I found a winner from a 2006 Cooking Light.  Can you say hoarder?  ha.  I have held on to this magazine for 4 years now, and am finally made something from it. Luckily, it was a winner of a recipe so I didn't have to feel like such a loser.  It's super simple to throw together and if you're feeling lazy, buying pre-cooked chicken will speed up the already speedy recipe.

    **I have a great giveaway coming up later this week so check back in!**

    Chipotle Chicken Salad
    Cooking Light, 8/06

    Dressing:
    1/3 cup chopped fresh cilantro
    2/3 cup light sour cream
    1 tablespoon minced chipotle chile, canned in adobo sauce
    1 teaspoon ground cumin
    1 teaspoon chili powder
    4 teaspoons fresh lime juice
    1/4 teaspoon salt

    Chicken:
    2 large chicken breasts
    Creole seasoning
    Kosher salt
    pepper

    Salad:
    4 cups romaine lettuce, chopped (I used a mix of chopped spinach and romaine)
    1 cup cherry tomatoes, halved
    1/2 cup diced avocado
    1 can black beans, rinsed and drained
    1 can corn, rinsed an drained

    1. Combine dressing ingredients in a bowl. Set aside.

    2. Season chicken breasts with creole seasoning, salt and pepper to taste. Heat olive oil in a skillet and saute chicken on both sides until fully cooked through.

    3. To make salad, combine all salad ingredients in a large bowl. Add chicken. Toss with dressing and serve immediately.

    Thursday, March 25, 2010

    Sweet Sadie Dog and a Wine Winner!

    I fully admit: I have not been cooking much lately, and when I have been cooking I've also been too lazy hungry to take photos.  So, today I'm treating you to a Sadie post.

    As I browsed through old photos, I realized I have not posted any new pics of Sadie since we adopted her.  You see, the poor thing had been attacked by another dog before we adopted her.  She had to have surgery, stitches, and came to us skinny, with a shaved back and a fear of all other dogs.  Look at her now.

    Sadie
    With a lot of love and patience Sadie has certainly come out of her shell and grown back a beautiful coat!  She is such a little love; I cannot imagine coming home without seeing her absurdly long tail wagging uncontrollably in excitement.  She now loves other dogs and continues to love people.  ....and she went for a few dips in the ocean for the first time last weekend, her fear of water conquered!

    {photos taken by iPhone so pardon any suckiness!}
    Sadie

    Sadie

    And thanks to all who entered the Wine Spectator Giveaway!  The winner is..............................Lauren from Head Over Heels !  Congrats, sweetie.  Enjoy!

    Monday, March 22, 2010

    Wine Spectator Giveaway Reminder!

    After spending an entire beautiful, sunny weekend outside, sitting inside feels kinda lame. Monday Blues. Well, just reminding you to enter in the Wine Spectator Giveaway if you haven't already! You only have until this evening so get to it!

    I've enjoyed reading the favorite wines of those who've already responded.  Based on all your great recommendations, it looks like someone {me} will need to make a trip to the local wine store to stock up the reserves!

    Friday, March 19, 2010

    Weekend Wine Spectator Giveaway!

    Happy Friday!  It's sunny and warm outside and I cannot begin to describe how excited I am for the weekend.  Tomorrow, I have a doggie beach date with some former coworkers.  The rest of the weekend I just plan on relaxing and enjoying the sun and laughing at my March Madness picks.

    Mini Lemon Poppy Seed Muffins
    Can you tell I'm in a good mood?  In the hopes of putting you in a good mood as well, I've decided to do a weekend giveaway!  One lucky reader will receive a year subscription to Wine Spectator....a $49.95 value for those counting :)  I've always loved this magazine since I enjoy wine, but can't really say I'm any type of vino expert.  Having good wine recommendations when heading into the store always helps save me from wasting money on "eh" wine.

    How to Enter:

    • US Residents only (sorry my international friends)

    • Leave a comment telling me your favorite bottle of wine


    Extra entries (leave a separate comment for each):

    • For an extra entry, become a Twitter follower or let me know you already are following my mindless babble

    • For another extra entry, become a Google Friend (click "join this site" in the right sidebar)

    • For another extra entry, tweet about this giveaway using this link: http://bit.ly/bnRrMr

    Entries due Monday, March 22nd at 9PM Pacific.  Good luck!
    *This contest is not sponsored by any parties. Winner chosen by random.org

    Wednesday, March 17, 2010

    Guinness Beef Stew for St. Patty's Day

    Surely you will see countless Guinness recipes on this St. Patty's Day.  However, I must tell you that this one is special!  As I (attempted to) reorganize my tags in a fit of boredom and bad TV, I noticed how very few 'beef' recipes I've posted on the site.  Truth is, of all the things I love in this world, I just don't love beef.  I know, I know...I've come around on a lot of foods, and perhaps this just may be one of them.

    Mini Guinness Beef Stew

    Though I put on my best show - cringing and making faces while cooking the stew, once I dug in I had to sheepishly admit that damn, this stuff is pretty good! This stew is chock full of flavor, hearty veggies and of course, hunks of beef.

    Speaking of hearty veggies, I had never cooked with parsnips or really knew what they looked liked.  Luckily the friendly guy working produce at Henry's was so kind as to not only show me what they were, but also pull some fresh ones from the back.  Have I mentioned that I love Henry's?

    Mini Guinness Beef Stew

    Apparently I am the last person in the world to enjoy parsnips as I received not two but three comments on my purchase from other customers inquiring what I was making and mentioning the deliciousness of parsnips. For those in the dark like me, don't let the odd paint smell of parsnips turn you off! They're like carrots, only tastier :)  The original recipe called for turnips, but I just couldn't add one more oddity to my meal.  Instead, I added good old standbys:  Yukon Gold potatoes (a definite must add) and celery.

    Hope you enjoy St. Patrick's Day. What are your plans? Green beer and Guinness Stew, I hope! :) 

    Guinness Beef Stew
    Adapted from Cooking Light March '10

    Canola oil
    1 tablespoon butter
    1/4 cup all purpose flour
    salt & pepper for seasoning beef
    2 pounds boneless chuck roast, cut into cubes (don't use lean stew meat as it will get tough with the slow cooking)
    1 teaspoon Kosher salt
    5 cups chopped onion (about 3)
    1 tablespoon tomato paste
    4 cups beef broth
    1 (11.2 oz) bottle Guinness Draught
    1 tablespoon raisins
    1 teaspoon caraway seeds
    1/2 teaspoon black pepper
    1 bay leaf
    2 celery stalks, chopped
    2 medium-large Yukon Gold potatoes, chopped into chunks
    1 1/2 cups diagonally sliced carrots (peeled)
    1 1/2 cups diagonally sliced parsnips (peeled)
    2 tablespoons finely chopped flat leaf parsley

    1. Heat several rounds of oil in a large stock pot or Dutch oven over medium high heat. Add 1 1/2 teaspoons butter to pan.

    2. Place flour in a shallow dish. Sprinkle beef with salt and pepper; dredge beef in flour. Add half of beef to pan and cook 5 minutes, until browned but not cooked through. Remove beef and repeat procedure with remaining beef.

    3. Add onion to pan and cook about 5 minutes or until tender. Stir in tomato paste and cook 1 minute. Stir in broth, beer, scraping bottom of pan to loosen brown bits. Return meat to pot; stir in 1 teaspoon salt, raisins, caraway seeds, pepper and bay leaf. Bring to a boil. Cover, reduce heat and simmer for 1 hour, stirring occasionally.

    4. Uncover and bring back to a slow boil. Cook uncovered for 50 minutes, stirring occasionally. Add carrot, parsnip, celery and potatoes. Cover, reduce heat to low, and simmer 30 minutes, stirring occasionally.

    5. Uncover and bring back to boil, cook 10 minutes or until veggies are cooked and tender. Remove bay leaf & sprinkle with parsley.

    Wednesday, March 10, 2010

    Mini Lemon Poppy Seed Muffins with Lemon Glaze

    While the rest of the country seems to be enjoying a nice thaw, the weather in SoCal has been quite tempestuous at best. Persistent rain showers on the weekends turns in to sunny, but extremely windy days with uber chilly nights. I suppose I can't complain since I never had to trudge through freezing temps or shovel my car out of the snow this winter, but a girl can still wish for the warm weather to come back! When all else (and mother nature) fails, I bake something citrusy to remind me of sunny days and springtime!

    Mini Lemon Poppy Seed Muffins While I was baking these miniature, bite sized delights, I couldn't but help wonder who first thought that lemon and poppy seeds would make a stellar combination. Poppy seeds are so strange, yet so delicious, adding a nice crunch to an otherwise light muffin. A sweet lemony glaze sends these muffins over the top, and makes them so pretty, don't you think?

    Mini Lemon Poppy Seed Muffins
    Being a lover of all things lemon, I didn't mind that I used quite a lot of lemon in this recipe.  Fresh lemon juice and zest add a nice zing to the batter, while fat free lemon yogurt keeps these moist and tender.  If you're crazy and would like to tame down your zing level, feel free to substitute vanilla or plain yogurt for the lemon. 

    Ok, before I start babbling....back to Lost!  I can't even believe I'm multitasking during my favorite TV show!  Is there rehab for habitual multitaskers?!

    Mini Lemon Poppy Seed Muffins with Lemony Glaze
    Adapted from Bon Appéti, May '09

    1 1/2 cup all purpose flour
    1/2 cup whole wheat pastry flour
    1 teaspoon baking powder
    1/2 teaspoon coarse kosher salt
    1/4 teaspoon baking soda
    1 cup (8 oz container) lemon yogurt
    2 tablespoons fresh lemon juice
    1 cup sugar
    1/2 cup (1 stick) unsalted butter, room temperature
    1 tablespoon (packed) finely grated lemon peel
    2 large eggs
    1/8 cup poppy seeds

    lemon icing
    2 tablespoons fresh lemon juice
    1/2 cup sifted powdered sugar

    Preheat oven to 350°
    1. Butter and flour three mini muffin pans or line with paper liners. Whisk flour, baking powder, 1/2 teaspoon coarse salt, and baking soda in medium bowl. Whisk yogurt and lemon juice in small bowl to blend.

    2. Using electric mixer, beat sugar, butter, and lemon peel in large bowl to blend. Add eggs 1 at a time, beating well after each addition until mixture is light and fluffy, occasionally scraping down sides of bowl. Beat in dry ingredients in 3 additions alternately with yogurt mixture in 2 additions. Mix just until blended. Mix in poppy seeds. Spoon batter into prepared muffin cups by generous tablespoonfuls.

    3. Bake muffins until tester inserted into center comes out clean, 18 to 20 minutes. Cool in pans 5 minutes. Remove muffins from pans and cool on rack.

    4. Once completely cooled, mix 2 tablespoons of fresh lemon juice with powdered sugar. Continue adding powdered sugar until desired consistency is reached (about 1/2 cup)

    Monday, March 1, 2010

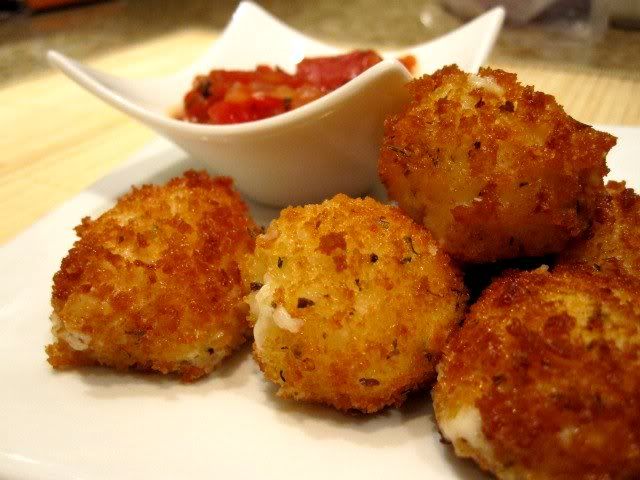
    Fried Mozzarella Bites with Homemade Tomato Sauce

    ooey gooey deliciousness. I toyed with titling this post those very three words, but thought that just might be weird. But, now that you're here and reading, I'll just go ahead and tell you there is nothing better than any foods that can be described as ooey gooey deliciousness! With a crisp shell and a gooey, melted cheese center, each of these mozzarella bites tasted a little bit like {fried} heaven dunked in tasty, amazing sauce.

    Mozzarella Balls

    I'd like to say these are perfect party foods, but the bites are best eaten straight from the fryer. I'm not sure how elegant of a party you typically host, but nothing about deep frying inside of your house is at all sophisticated in my opinion. First off, the smell lingers in your house for days, and then there's me, the ever put-together chef, freaking out about dropping things in hot oil and periodically yelping like a scared baby.

    Fried Mozzarella Bites

    So, yes. I'm advising you to make these and enjoy them all on your own. The minor heartburn afterwards? SO definitely worth it!

    PS. I must thank my mother for giving me this most dreaded Christmas gift, the infamous Fry Daddy. While I looked at it with glee, I knew it would only spell diet disaster. Yes, you can fry anything, especially in our house! After devouring bite after yummy mozzarella bite, hubby decided to use the extra breading and fry a steak. Gross!! Ok...I lie. It was pretty good.

    Fried Mozzarella Bites with Homemade Tomato Sauce
    slightly adapted from Pink Bites 

    1 8 oz container of mozzarella balls (I used the ciliegine, "cherry" sized mozzarella balls)
    2 large eggs
    1/4 cup of milk
    1 cup of plain flour
    2 cups of panko
    1 tablespoon of dried oregano
    1/2 teaspoon garlic salt
    salt and pepper
    canola oil for frying
     (you'll end up with a lot of excess flour, breading, etc.  Halve the breading if you prefer, but having the excess makes dunking easier! Or, you can double the amount of cheese)

    1.  Drain the cheese and dry on paper towels. Prepare your breading station by having 3 bowls ready. Put flour in one, season with salt and pepper to taste. Mix the eggs with the milk and pour into the second bowl. Add the breadcrumbs with the dried oregano and garlic salt to the last bowl and mix well.

    2. Dip each piece of cheese in the flour, then in the egg mixture and lastly in the breadcrumbs, shaking off excess after each step. Repeat the breading process again and place cheese balls on a flat plate.

    3.  Heat about oil up to minimum line in Fry Daddy or in a medium sauce pan to 350 degrees. Carefully lower cheese balls, a few of a time and cook until they are golden, about a minute or so. Remove and drain in paper towels. Repeat with the remaining cheese making sure oil comes up to temperature before adding more cheese.

    Tomato Sauce:
    1 tablespoon of olive oil
    1/2 onion, chopped
    2 garlic cloves, chopped
    1 14.5 oz can of fire roasted diced tomatoes (try Muir Glen)
    1 teaspoon dried basil
    1 teaspoon dried oregano
    1/8 teaspoon red pepper flakes
    salt and pepper

    1. Heat the oil over medium-heat and add the onions. cook until translucent, about 6 minutes. Add the garlic, cook for a minute more and add the diced tomatoes.

    2. Fill half of the tomato can with water and add to the pot. Add spices and bring to a boil. Reduce heat, cover and simmer for about 20 minutes, until sauce is thickened (this process took awhile for me.  I let simmer until very thick b/c I like thick sauce). Season with salt and pepper to taste.

    Wednesday, February 24, 2010

    (Healthy!) Sour Cream Coffee Cake

    Something about the words "healthy" and "coffee cake" together just seems wrong. But folks, I kid you not, this cake is actually pretty healthy. With a mix of whole wheat pastry flour, ground oats, a modest 1/4 cup of brown sugar, low fat sour cream and an amount of butter that would horrify butter queen Paula Deen, there's not much to fear here. Though not as decadent as some coffee cakes I've made in the past, this guy certainly fulfilled my primal need for sweets and made the house smell like a dream (or a cake batter Yankee Candle, take your pick). 

    Healthy Sour Cream Coffee Cake
    The streusel topping's full of rolled oats, brown sugar, glazed walnuts and just a tad of butter, so I was pleasantly surprised at how satisfying it was sans all the butter.  Instead of an overly sugary topping, the mix added a lightly sweet and crunchy taste to the cake.  Though I was a huge fan of this recipe adapted from Cooking Light, I found that the cake tasted best on the day I baked it.  Afterward, a 20 second nuke in the microwave brought it back to life! 


    Brown Sugar Oat Sour Cream Coffee Cake

    Healthy Sour Cream Coffee Cake
    Adapted from Cooking Light March '10

    3/4 cup old fashioned rolled oats, divided (not quick oats)
    Cooking spray
    1 cup all-purpose flour
    1/4 cup whole-wheat pastry flour
    1 teaspoon baking powder
    1/2 teaspoon baking soda
    1/2 teaspoon ground cinnamon
    1/4 teaspoon salt
    1/2 cup granulated sugar
    1/4 cup packed brown sugar (though I'd like to keep this healthy, I'd bump this up next time - maybe double!)
    1/3 cup butter, softened
    2 large eggs
    1 teaspoon vanilla extract
    1 (8-ounce) carton light sour cream
    topping:
    1/4 cup brown sugar
    2.5 tablespoons finely chopped glazed or candied walnuts
    1/2 teaspoon ground cinnamon,
    1 tablespoon chilled butter, cut into small pieces

    1. Preheat oven to 350°.

    2. Spread oats in a single layer on a baking sheet. Bake at 350° for 6 minutes or until oats are barely fragrant and light brown.

    3. Coat a 9-inch springform pan with cooking spray; set aside. (I don't have a springform so I used a 9 inch pie pan and lined the bottom with parchment paper and sprayed with cooking spray)

    4. Reserve 1/4 cup oats; set aside. Place remaining oats in a food processor; process 4 seconds or until finely ground. Weigh or lightly spoon flours into dry measuring cups; level with a knife. Combine processed oats, flours, baking powder, baking soda, 1/2 tsp cinnamon and salt; stir with a whisk.

    5. Place granulated sugar, 1/4 cup brown sugar, and 1/3 cup butter in a large bowl. Beat with a mixer at medium speed for 3 minutes or until light and fluffy. Add eggs, 1 at a time, beating well after each addition. Beat in vanilla. Add flour mixture to sugar mixture alternately with sour cream, beginning and ending with flour mixture. (Batter will be slightly lumpy because of oats.) Spoon batter into prepared pan; spread evenly.

    6. Combine remaining 1/4 cup oats, remaining 1/4 cup brown sugar, nuts, and cinnamon in a bowl. Cut in 1 tablespoon butter with a pastry blender or 2 knives until well blended. Sprinkle top of batter evenly with nut mixture. Bake at 350° for 38 minutes or until a wooden pick inserted in center comes out clean, top is golden, and cake begins to pull away from sides of pan. Cool cake in pan for 10 minutes; remove from pan.