Showing posts with label fish. Show all posts

Wednesday, October 7, 2009

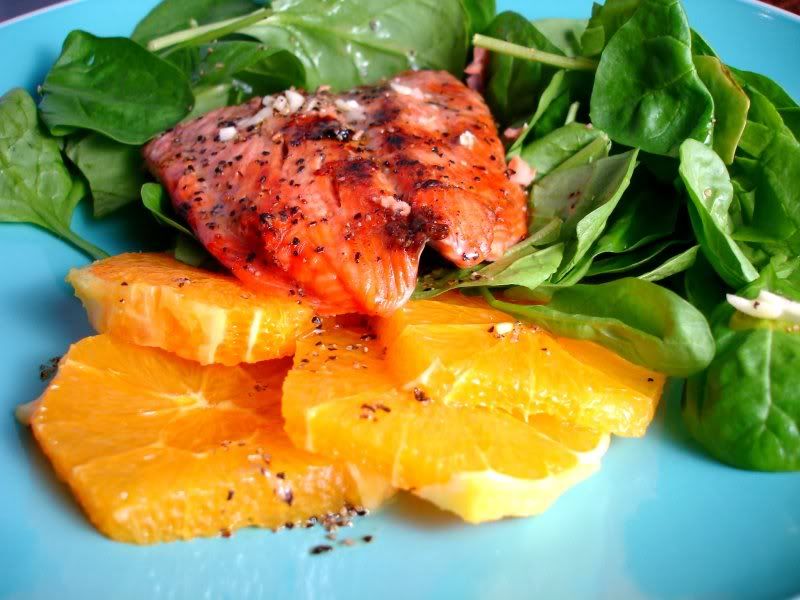
Grilled Salmon Salad with Sweet Citrus Vinaigrette

Back in grade school, I won the perfect attendance award not one but two grades in a row. As a child I was blessed with a strong immune system and really never, ever got sick....except for the one time I faked it to skip school. Luckily I've stayed pretty healthy into adulthood and have never gotten the flu despite being too much of a wuss to willingly subject myself to a flu shot.

Salmon Spinach SaladThis year, fueled by the flu media frenzy, I lined up with the masses and sat down for my first ever flu shot. Good news: it didn't hurt. Bad news: I'm sick now. boo.

I don't blame the shot - I know its a killed virus vaccine but I can't help but wonder at the bad coincidence. Ho Hum.

What does this have to do with a salad you might ask? Well, I admit not much though I did search for a recipe containing oranges to get my ever important Vitamin C dosage for the day. Wives tale or not I still overdose on Vitamin C when not feeling up to my grade school glory days of health.

Citrus Salmon Spinach SaladBeyond the Vitamin C, this salad is heart friendly and chock full of other goodies: omega-3 fatty acids & Vitamin D from salmon, beta carotene & Vitamin A from spinach, and heart healthy olive oil. The flavors came together quite nicely and after a meal like this, I hope my immune system will get a kick in the right direction!

Grilled Salmon and Spinach Salad with Sweet Citrus Vinaigrette
Cooking Light

Sweet Citrus Vinaigrette:
1/4 cup fresh orange juice
2 tablespoons olive oil
2 tablespoons rice vinegar
1/2 teaspoon honey mustard
1/2 teaspoon black pepper
1 garlic clove, minced

Salad:
2 tablespoons fresh lemon juice
4 (6-ounce) salmon fillets
2 teaspoons black pepper
Cooking spray
1 package fresh spinach
4 oranges, each peeled and cut into 6 slices

1. Preheat the grill to medium-high heat.

2. To prepare vinaigrette, combine first vinaigrette ingredients in a large bowl and stir well with a whisk.

3. Drizzle lemon juice over salmon fillets; sprinkle with black pepper. Place fillets, skin sides up, on a grill rack coated with cooking spray; grill 5 minutes on each side or until fish flakes easily when tested with a fork or until desired degree of doneness. Remove skin from fillets; discard.

4. Toss spinach with vinaigrette to taste. Add spinach and oranges and serve immediately.

Tuesday, April 21, 2009

Good Ol' Tuna Noodle Casserole

I'm very fortunate to have ended up quite the adventurous eater. As a child, I would pick and chose foods with ardent fury that I simply would and would not eat. Would you believe I never ate beans until college? ...told my friends' parents that I was allergic to milk because I hated the taste? ...refused to eat any sandwich that had been contaminated with pickle juice?

Well, luckily for us all I have turned out to be quite a charming and not-so-picky adult. :)

Tuna Noodle Casserole The worst offender on my "do not eat" list was hands down - canned tuna. I simply couldn't sit next to a friend or classmate who had a tuna sandwich. In college, my study buddy brought a snack pack of tuna and crackers and I swiftly put an end to our study dates.

I don't recall the first time I got over the canned tuna hurdle, but I can now safely say that tuna noodle casserole is one of my favorite comfort foods. While it certainly doesn't bring back any nostalgia of childhood, family dinners or momma's cooking, it does remind me of the early days of my relationship with hubby.

Tuna Noodle Casserole
Back when we were dating, I enjoyed cooking but had a very small kitchen and limited supplies (think a mish-mosh of pots and pans from college, the majority of which were hand-me-downs from my mother's kitchen or garage sale purchases). Since I was very much a budding cook, I stuck to lots of recipes using "convenience foods" like condensed soup or pre-packaged stir fry mixes. My recipe repertoire had its limitations, but I always had a few standbys that I knew would impress. Cooking for a new boyfriend required me to be calm, cool and collected in the kitchen (none of which I am today!) Tuna noodle casserole was my favorite dish to throw together so we could spend more time being googly-eyed and all that stuff that new couples enjoy.

Today, I like to think that I have gotten much better in the kitchen, but we still enjoy good ol' tuna noodle casserole more often than not. It's simple, delicious, and easy. To my old study buddy - I apologize. I'd be happy to have you and your tuna cracker snack pack over any day.

Good Ol' Tuna Noodle Casserole
1 tablespoon butter
3/4 cup diced onion
1 cup milk
1 (10.5 ounce) can condensed reduced-fat cream of mushroom soup
1 1/4 cups frozen green peas
1 tablespoon lemon juice
1/4 teaspoon salt
1/4 teaspoon pepper
1/4 teaspoon garlic salt
2 cans tuna, drained and flaked
3/4 box of rotini cooked according to package directions
1/3 cup Italian breadcrumbs
2 tablespoons grated Parmesan cheese

Preheat oven to 450° and spray a 2qt casserole dish lightly with cooking spray.

Melt butter in a saucepan over medium-high heat. Add onion; sauté 3-4 minutes. Add milk and soup. Cook 3 minutes; stir constantly with a whisk.
Add peas, lemon juice, salt, pepper, garlic salt and tuna. mix well. Add drained noodles and toss to coat noodles with sauce. Pour into casserole dish.

Combine breadcrumbs and cheese; sprinkle on top and spray breadcrumb topping with nonstick cooking spray. Bake at 450° 15 minutes or until bubbly.

Sunday, April 12, 2009

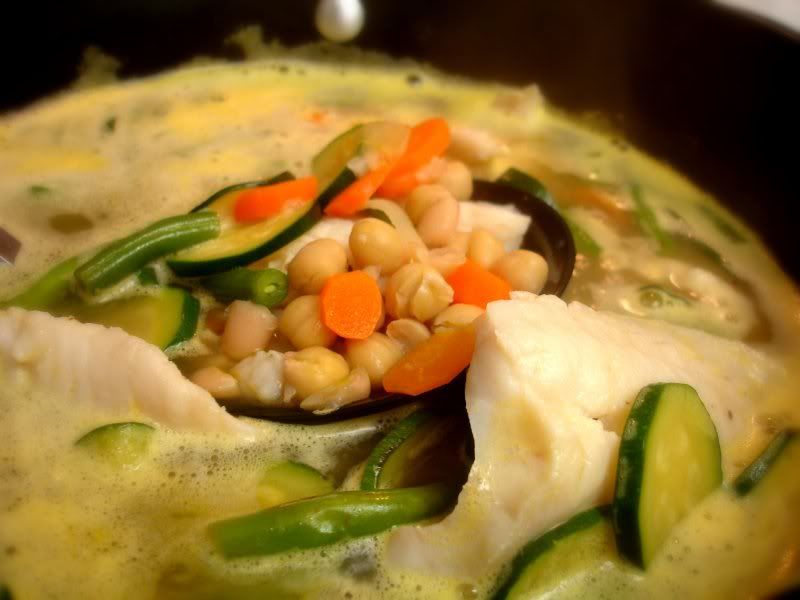
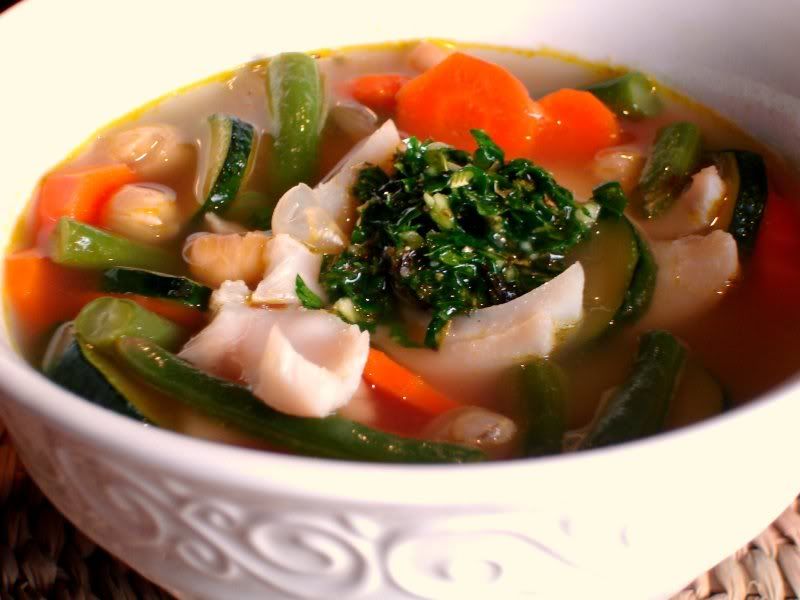
Fish Minestrone topped with Parsley Herb Pesto

I hope everyone had a wonderful Easter! We don't have any family in town, so we tried to enjoy the day by taking advantage of the beautiful sunshine and plan on having a nice dinner at home. Lately, I have been cooking quite a bit from my favorite big headed beauty's new cookbook, Giada's Kitchen.

Giada's Kitchen
I love her new collection that focuses on fresh ingredients and a bit of a California spin on recipes like this Fish Minestrone Soup. Aside from the great food, the cookbook also seems to offer uh, a little bit of candy for the eyes. Giada's stylist has an uncanny knack for picking out tops that accentuate her big...smile. I mean, is this cookbook G-rated? The Giada montages are something else!

Well, if anything, Giada's latest seems to have gotten hubby more interested in picking out dishes for dinner so I suppose that's a plus.

I had a few initial doubts about this soup as the actual broth isn't seasoned with anything more than salt and pepper. The mixologist in me felt inclined to run to the spice rack, but I resisted and just followed the recipe for once.

The fish seasons the broth nicely and a mixture of oregano, fresh Italian parsley and olive oil tops the soup and really kicks up the flavor. Giada calls it an herb sauce, but as you can see from the photos it's a little bit more of a pesto consistency so I've taken the liberty to rename.


Contrary to my assumption, the minestrone was full of flavor and quite hearty. Zucchini, carrots, onions, garbanzo beans and cannelini beans round out the soup nicely and are certainly a nice change from the typical Italian tomato based minestrone.

I highly recommend checking out Giada's Kitchen (for both the recipes and your husband's entertainment) and plan on making the Grilled Shrimp with Tomato Artichoke Broth tonight!

Fish Minestrone with Herb Pesto
adapted from Giada's Kitchen

2 tablespoons olive oil
1/2 cup sweet onion, diced
2 carrots, peeled and thinly sliced
2 zucchini, trimmed and thinly sliced
1 1/2 cup fresh green beans, cut into bite size pieces
1 can garbanzo beans, drained and rinsed
1 can cannellini beans, drained and rinsed
6 cups low sodium chicken broth
1 lb red snapper filets
1 teaspoon kosher salt
1/2 teaspoon fresh ground pepper

Herb Pesto Topping
2 cups fresh flat leaf parsley leaves
1/4 cup fresh oregano leaves
1 garlic clove
1 tablespoon white wine vinegar
1/2 cup extra virgin olive oil
1/2 teaspoon salt
1/4 teaspoon black pepper

Heat the olive oil in a large pot over medium heat. Add the onions, carrots, zucchini and green beans. Stir to combine and cook until tender, about 10 minutes. Add the beans and the broth. Cook until the broth simmers, about 5 minutes.

Season both sides of the fish fillets with kosher salt and pepper and add them to the soup. Simmer until the fish is cooked through. Season the broth with salt & pepper.

For the herb topping:
While the fish cooks, combine the parsley, oregano, garlic & white wine vinegar in the food processor. Pulse the machine until it forms a paste. Add olive oil in a steady stream while the food processor runs. Add salt and pepper.

Ladle soup into bowls and top with the herb pesto as desired.

Thursday, March 19, 2009

Heart Shaped Salmon & Shrimp Maki

As a child I had a true affinity for eating things shaped liked other things. Dino Nuggets? check. Peeps? check. Star shaped fish sticks? check.

I must confess that my affinity hasn't gone away, but luckily for all of us I've progressed to less processed, more tasty foods shaped like other things. My latest attempt? Heart Shaped Maki, of course.

Heart Shaped MakiOk, ok. So they may look like the hearts you drew in grade school when you couldn't quite get the shape right. ...but, they're still cute don't you think?

These rolls are filled with a combo of sauteed shrimp & salmon and topped with a dollop of sweet chili sauce. Some households may fly through bottles of condiments such as ketchup or mustard, but in our house we consume sweet chili sauce for sustenance. Mae Ploy is our personal fav.

Heart Shaped Sushi with Salmon & ShrimpBack to the heart shaped sushi. My Mom (uh, and me) are kitchen gadget freaks. I mean, the Magic Bullet is still one of my favorite kitchen toys. In any case, she sent me a Sushi Maker she recently saw a demo of. Consisting of a series of plastic molds and guides, the sushi maker allows you to make the traditional round maki, square shaped maki, and the lovely heart maki you must be oohing and ahhing over.

Heart Shaped Sushi
I think we still need some practice to get the rice / filling amounts right in the molds, but this is an addicting new hobby. Rolling sushi with a mat isn't difficult, but stuffing molds is oh so much fun!

Though we've used different sushi rice recipes in the past, I tried out Pioneer Woman's and was quite happy with it. I did end up with way more sushi rice seasoning (su) than I needed, so use it judiciously and don't saturate your rice.

See this previous post for filling & rice cooking ideas!

Thursday, March 12, 2009

Halibut with Coconut Red Curry & Garlic Lacinato Kale

There's a little game we I play in our house and it goes a little something like this:
ME: Honey?! Did you eat any of these cookies/biscotti/Wheat Thins/dessert?
HUBBY: Uh, no.
ME: But, uh. they're almost all gone! Surely I didn't eat these ALL by myself. You had to have had at least one, right? I mean, really. I couldn't have finished a whole batch....
HUBBY: Well,ok. Maybe I had one. Oh, uh...I mean two?
Me: (silence) {...look of horror takes over my face}.
HUBBY: Wait, maybe I had more than that. Don't you worry, babe. I ate a lot. (little white lie told by my spouse to prevent annoying "Am i getting fat?" questions).

Coconut Red Curry Halibut
It's wonderful having someone around to tell itsy-bitsy-little white lies just to make you feel better about your crazy appetite. It's really wonderful, actually, until I had to change my outfit before work because the pants I had put on were a little too tight. Not so wonderful.


Curry Halibut with KaleOn to happier things, this tasty dish isn't exactly low fat, but it tastes light and is quite healthy nonetheless. Flaky & mild halibut works well with a flavorful red curry coconut sauce. I paired the halibut with sweet brown rice, a thick & sticky version of the brown rice you're probably used to. Being so thick, the rice may have overpowered the sauce a little bit and next time I'd try this with Jasmine rice and add a little somethin' somethin' to the sauce to give it a kick.


Curry Halibut
Lastly, I cooked Garlic Lacinato Kale as our side. I cannot begin to tell you how much we love this veggie. Unlike curly kale, Lacinato kale has flat broad leaves and looks a little bit like something a Triceratops would eat. It's huge. We called it dinosaur food the first time we bought it and later found out that it's also sometimes called Dino Kale. Gosh, we're observant.

Coconut Red Curry Halibut
adapted from Cooking Light

canola oil
4 (6-ounce) halibut fillets
salt & fresh ground pepper
1 cup chopped onion
1/2 cup chopped green onions
1 tablespoon grated peeled fresh ginger
1 cup light coconut milk
1 tablespoon sugar
1 tablespoon fish sauce
2 teaspoons red curry paste
1/2 teaspoon ground coriander
1 tablespoon chopped fresh basil
2 teaspoons fresh lime juice

1. Heat 1 teaspoon oil in a large nonstick skillet over medium-high heat. Season halibut with salt & fresh ground pepper. Add fish to pan; cook 5 minutes on each side or until fish flakes easily when tested with a fork or until desired degree of doneness. Remove fish from pan; cover with foil to keep warm.

2. Add additional oil to pan. Add onion. Sauté 2 minutes. Add green onions, and ginger; sauté 2 additional minutes. Stir in coconut milk, sugar, fish sauce, red curry paste & coriander. Bring to a boil; cook 1 minute. Add salt & pepper to taste. Remove from heat. Stir in basil and juice.

Garlic Lacinato Kale

bunch of Lacinato Kale
1 large garlic clove
Kosher salt
olive oil

Rinse kale thoroughly. Strip leaves from the middle stem. Tear into smaller pieces.

Heat olive oil in a large saucepan over medium heat. Add kale and sprinkle with Kosher salt. Stir a few times, and allow to cook down slightly. Add garlic cloves and stir until garlic is fragrant. Add a teaspoon of water to the pan. Cover and reduce heat to low. Allow to simmer for about 2 minutes.

Monday, March 2, 2009

Cornmeal Crusted Mango Salmon

After a combined 18 hours of travel, we've managed to sit in 6 planes, bum around the airport for 8 hours, sit in 1 "Chili's Too" and have miraculously returned from West Palm Beach in one piece. I must say that I did pass out last night at 8pm, and didn't wake up this morning until well after my alarm went off, but it was definitely worth it. A best friend of mine just got married at an absolutely fabulous place, The Sundy House. If you're looking to get married in Florida, this is the place! We were surrounded by palm trees, cute fish ponds and a very romantic, tropical setting.

Cornmeal Crusted Mango SalmonUnlike many wedding receptions, the food was absolutely wonderful. I chose the light Florida grouper entree which was served with.....coconut sweet mashed potatoes! I must try to make this soon.

Though I live in sunny San Diego, Florida just seems more tropical to me. Perhaps it's the balmy temperatures or the ritzy beachside mansions. Or all the Floridians who look a little like this...

George Costanza's parent
In any case, all this tropicalness reminded me of a mango salmon dish I made awhile back. It's a perfect summery dish that can be served in the doldrums of winter to remind you of sunshine and vacation.
Cornmeal Crusted Mango SalmonCheck out Meeta's Monthly Mingle - Caribbean Cooking - for more tropical delights!

Cornmeal Crusted Mango Salmon
courtesy of Sunny Anderson

1 cup mango nectar
1 large mango, diced
1/2 cup all-purpose flour
1/2 cup cornmeal
2 teaspoons sugar
1 teaspoon salt
4 (6-ounce) center-cut salmon fillets with skin
Freshly ground black pepper
1 tablespoon extra-virgin olive oil
1 tablespoon butter

1. In a small saucepan over high heat, bring mango nectar and mango to a boil. As mango begins to break down, press down on it with a fork or potato masher, to mash it. Continue cooking until mango cooks down to form a chunky puree, about 15 minutes. Remove half to serve as a sauce. Set the other half aside for dredging.

2. On a large plate, mix together flour, cornmeal, sugar and salt.

3. Preheat a large skillet. Season salmon with salt and freshly ground black pepper (and a touch of cayenne if you're feeling crazy). Brush glaze over top of salmon, then dredge in cornmeal mixture. I covered the sides of the salmon with the cornmeal mix. Add oil and butter to skillet. Over high heat, sear salmon cornmeal mixture face down until golden, about 6 to 8 minutes for medium rare, flipping halfway through to crisp skin. If you cover all sides with the breading, lightly sear each side until the coating is crisp.

4. Drizzle mango sauce on salmon and serve immediately.

Thursday, November 6, 2008

Baked Costa Rican Style Tilapia with Tropical Pineapple Rice

What to do now?

After a greuling year of campaigns, political controversy and economic despair our country is left with hope and the promise of a new day. We've lived and breathed this monumental, historic race and now new & old political junkies everywhere are left with a politics hangover. For months, I have replaced my usual web browsing with an ardent obsession with political blogs.

Where I once read perezhilton.com with my morning cup of coffee, I found myself typing poltico.com into my browser first thing each morning. I sat glued to CNN, waiting and watching to see what would happen next. The long, hard fight is not over for President-Elect Barack Obama but now that the election is over, what do I do?

Cook and bake! Now that I can pull myself away from CNN, I'll be spending more time in the kitchen. For those still glued to see what unfolds next for our new President, here's a quick and easy meal to throw together. Keep me up to date. I need a break. Here's some photos pre-oven:

I first saw this recipe for Baked Costa Rican Style Tilapia with Pineapple Black Bean Rice on Simply Delicioso, Ingrid Hoffman's cooking show. It was the first episode of hers that I'd ever seen, but I instantly knew I needed to make this tropical fish. As the name spells out, tilapia is baked with a delightfully sweet and spicy rice accented by pineapples, salsa and black beans. Pop it all in the oven and you're left with a sophisticated, yet delicious and healthy meal.

I loved the rice so much that I'd definitely consider making rice this way again to serve with other meals though next time, I'd drain some of the excess liquid from the rice, pineapple and salsa mixture before baking. If you decide to cook this, I'd make sure to chop up the pineapple very finely and use a tasty salsa with a lot of spice! I was lucky to have a jar of homemade salsa on hand thanks to a lovely gift so the salsa added a lot of good flavor.

Baked Costa Rican Style Tilapia with Tropical Rice
Adapted from
Ingrid Hoffman
1 cup short grain brown rice
2 cups low-sodium chicken broth
1/4 cup freshly squeezed orange juice (I used orange pineapple mango juice)
1 lime, juiced
2 tablespoons olive oil
1/4 cup finely chopped fresh cilantro, plus more for garnish
2 garlic cloves, minced
1 teaspoon sugar
Kosher salt and freshly ground black pepper
4 tilapia fillets, rinsed and patted dry
2 cups homemade salsa
1 (15-ounce) can black beans, drained and rinsed
2 cups diced fresh pineapple
2 limes, thinly sliced

Directions

Combine the rice, chicken broth and a dash of salt in a pot over medium heat and bring to a boil. Reduce the heat to low, cover, and simmer for about 50 minutes. Remove from heat and keep covered for 10 minutes. Fluff with a fork. If using white rice, follow package directions.

Preheat the oven to 400 degrees F.

In a mixing bowl, whisk together the orange juice, lime juice, oil, 2 tablespoons of cilantro, the garlic, and sugar; season with salt and pepper. Add the tilapia fillets to the marinade, turning to coat. Marinate in the refrigerator for 20 minutes, turning occasionally.

Stir together the cooked rice, salsa, beans, pineapple, and remaining 2 tablespoons of the cilantro in a 2 or 3-quart baking dish. If there is a lot of liquid, drain some since you'll be adding the marinade. Remove the tilapia from the marinade, reserve the marinade, and lay the fish fillets over the rice mixture, overlapping if necessary. Pour the reserved marinade over the fish. Shingle the lime slices over the fish. Bake until the fish flakes easily, is opaque, and cooked through, 25 to 30 minutes. Garnish with chopped cilantro before serving.

Tuesday, October 21, 2008

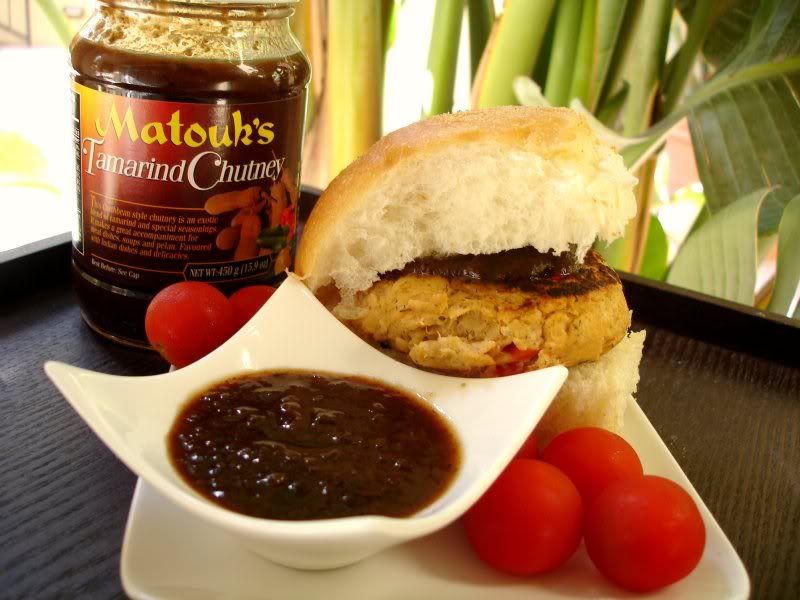
Hawaiian Salmon Sliders with Bren's Tamarind Chutney

I won't go so far as to call myself a loser, but to be honest, it's not often that I'm a winner in games of chance. Take for example, a girls outing in Vegas several months ago. About 17 of my girlfriends and I embarked on a much needed girls' weekend in our nation's Sin City. Somehow, each and every one of these 17 gals seemed to have the magic touch at the casinos. And by magic touch, I mean that they managed to win anything from $5-$5,000. Me? Well, not so much. I even went so far as to park myself next to one of these lucky ladies and mimic their every move/bet/wager to no avail.

Thankfully, my luck in the blogging world is a vast improvement on luck in the "real" world. Bren from Bren's Flanboyant Eats is a food & travel writer extraordinaire. She's so talented that she often gets whisked away to exotic places like Trinidad & Tobago just to eat, travel & enjoy herself. She's also so generous that she holds giveaways so average folks like myself can have a taste of the tropics. I was a lucky recipient of Matouk's tamarind chutney straight from the islands. Thanks, Bren!

I wasn't quite sure what I'd make with this chutney, but one day I was inspired to make salmon sliders when I was hungry and all I could find was some canned salmon in the pantry. Speaking of hungry, hubby has decided to call the oh-so-scary moments when my blood sugar drops and I get cranky, my HANGRY episodes (hungry-angry). Do any of you ever get HANGRY?


Bren, thanks for making me feel like a winner! The chutney was absolutely fabulous with these sliders.

Salmon Sliders
made by me in a fit of hunger
2 cans salmon, drained
1 teaspoon dried dill
2/3 cup panko breadcrumbs
1/2 c low fat mayo
1 egg & 1 egg white, beaten
1/2 teaspoon garlic salt
1 1/2 teaspoons Old Bay Seasoning
1/8 cup Heinz Chili Sauce
handful of chopped cilantro
1/4 cup chopped roasted red pepper

olive oil
Mini Hawaiian Rolls
cucumber slices

In a medium sized bowl, combine all ingredients and mix well. With wet hands, roll salmon mixture into small balls large enough to fit on the mini rolls. If mixture is too wet, add more panko crumbs to give the patties structure. Flatten slightly with the palm of your hand.

Heat olive oil in a nonstick skillet over medium high heat. Pan fry salmon sliders until cooked through, about 4-5 minutes on each side. Serve on Hawaiian rolls and top with cucumbers and chutney of your choice.

Tuesday, October 14, 2008

Jamie Oliver's Tuna Meatballs

Why would I remember anything I could look up?
- Albert Einstein

It's quite often that my friends and I decide to "geek it up" and challenge each other to trivia like "name that state's capital" or "name a college's mascot" or even "name that celebrity's spouse."

...doesn't sound thrilling, I know. However, we somehow manage to argue, debate, and make bets on some of the most mundane of life's facts. Without fail, we nearly always need to settle at least one dispute via Blackberry internet or Google. Ahh, our reliance on technology....

Remember the days when you actually knew your friends' and family's phone numbers by heart? I even used to recall birthdays (all on my own!), and often my dear ones' addresses in the event I needed to send them a card or (gasp) a handwritten letter!

Microsoft Outlook products do all that remembering and organization for me now.

Similarly, I've come to rely on the internet for 98% of my recipes. Don't get me wrong, I have a whole bookshelf of cookbooks, but I somehow always revert to all of your delicious blogs, food websites like Cooking Light and bulletin boards for our next meal ideas.

Realizing I should probably utilize some of my (many) cookbooks, I chose this recipe from Jamie Oliver's cookbook, Jamie's Italy: Le Migliori polpette di tonno or the best tuna meatballs.

As opposed to your typical mom 'n pop veal, beef or lamb meatballs, Jamie's meatballs are a tasty mixture of tuna, pine nuts, Sicilian spices and breadcrumbs. Initially, we weren't sure what to think of this recipe, but being a lover of both tuna and cinnamon, I couldn't pass this up. You heard me right, tuna and cinnamon. Sounds strange, but any combination of my two favorite things in this world couldn't possibly be wrong. And Jamie's accent is just so cute. He couldn't be wrong either. I digress.


Though my tuna meatballs aren't quite as pretty as Jamie's, they're absolutely delicious and amazingly fragrant. I had a little bit of an issue with having the meatballs stick while I was rolling them, so I added a touch of olive oil to the mixture. Other than that, this is a fairly simple, yet delicious meal you all should enjoy! Serve with spaghetti, some toasty bread & a nice bottle of white wine, and enjoy the evening.

Le Migliori Polpette di Tonno, Jamie's best tuna meatballs
adapted from Jamie's Italy

for the tomato sauce
olive oil
1 small sweet onion, chopped
4 cloves of garlic, chopped
1 teaspoon dried oregano
1 28 oz can of plum tomatoes (I found these at Trader Joe's)
Kosher salt and freshly ground pepper
about 1 teaspoon of honey
small bunch of freshly chopped flat leaf parsley


for the meatballs
14 oz. fresh tuna (not canned)
olive oil
1/4 cup pinenuts
1 teaspoon ground cinnamon
Kosher salt and freshly ground pepper
1 teaspoon dried oregano
handful of freshly chopped flat leaf parsley
1 3/4 cup Italian breadcrumbs
1/4 cup freshly grated Parmesan cheese
2 large eggs
1/2 teaspoon fresh lemon zest and juice from 1/2 lemon.

1/2 box of spaghetti, cooked according to package directions

1. Chop tuna into about a 1 inch dice. Heat a large skillet over medium heat and pour a few rounds of olive oil. Add tuna, pinenuts and cinnamon. Season lightly with salt & pepper to taste. Saute until tuna is browned on all sides, but not cooked all the way through to prevent overcooking. Remove from heat and place into large mixing bowl. Allow to cool for about 5 minutes.

2. Add oregano, parsley, breadcrumbs, Parm, eggs, lemon zest and juice to the bowl. Use your hands and scrunch the mixture together. If the mixture doesn't stick add a few teaspoons of olive oil. Combine well. Roll the mixture into golf-sized balls and place onto an oiled cookie sheet. Allow to sit for one hour.

3. While meatballs are resting, heat olive oil in a large pan over medium heat.
Add onion and garlic and heat slowly until soft, about 8 minutes. Add oregano, tomatoes, salt & pepper and bring to a boil. Add honey and reduce heat to a simmer for 15 minutes. Pour sauce into a blender (or use an immersion blender). Blend/Puree until smooth. Take a taste and add more salt or seasoning if needed.

4. Using the pan you fried the tuna on, add a little more olive oil and place back onto the heat. Add meatballs to the pan and allow to brown on all sides. If the pan isn't big enough, saute in two batches. Add to the sauce when done and sprinkle with parsley. Serve with spaghetti.

Wednesday, August 6, 2008

Beat the Heat and the Deadline with Tuscan Fagioli con Tonno

Tuscana Tuna Bean Salad
Though I may be experiencing a sick case of writer's block, I love Grace's A Southern Grace so much that when she announced her roundup, I knew that even without much to say, I had to be there (or be square). Sorry, couldn't help it. I'm no longer nine years old, but I still find myself saying things like that all the time.

For much of the country, August rolls around and it's hot, sticky, sweaty, gross, and humid. You can obviously tell what I think of this month that's not quite summer, but not quite fall according to the clothing stores who begin selling sweaters in 90 degree heat. Well, to cheer up all of us cranky melting folk, Grace's Beat the Heat roundup calls for recipes that do not require any heat during the cooking process. I can't wait to see the roundup, and for those of you not in the know, you only have 2 more days to get yours in!
Though a never ending stream of no-heat recipes reside in my little imagination, time has gotten the best of me. When I've actually been cooking (not to be confused with cooking in my mind), I have repeatedly turned on the stove, oven and any other hot appliance I can find & cursed myself. I never learn.

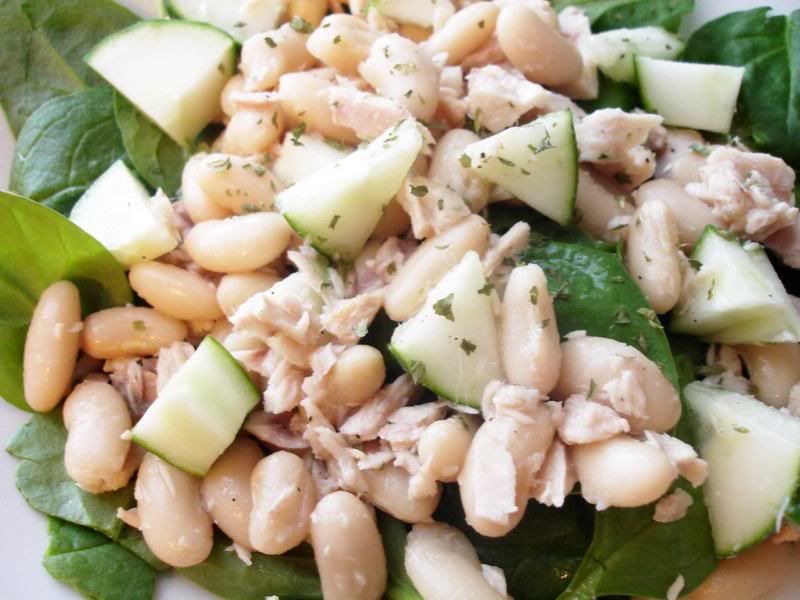
Our time in DC is coming to a close, and with that I've been trying to clear the pantry and refrigerator. Browsing around for possible ingredients, I made this quick and tasty lunch combining cannellini beans and tuna for what I'm hereby naming Tuscan Fagioli con Tonno. I apologize if you're Italian and I've somehow butchered your language. I just thought it sounded cool :) It comes together quickly and easily and spares you from turning on those dreaded appliances. Best of all, its another protein packed dish. Testament to my absentmindedness of late, I diced up a Roma tomato from the Farmer's Market to throw in, but forgot it. It's good with or without so you can decide!


Tuscan Fagioli con Tonno (Tuscan Beans with Tuna)
1 can Cannellini Beans, drained and rinsed
1 can Albacore tuna, drained and flaked
1/4 cup diced cucumber
1/4 cup diced tomato
1 tbsp red wine vinegar
2 tsp olive oil (use good quality)
juice from half of a lemon
Kosher salt & fresh ground pepper
parsley (optional)
1/2 cup of baby spinach leaves
  1. In a medium sized bowl, combine beans, tuna, cucumber and tomato.
  2. In a separate small bowl, whisk together red wine vinegar, olive oil, and lemon juice.
  3. Drizzle dressing over bean mixture and toss gently. Season with Kosher salt and pepper to taste. Sprinkle with parsley if desired.
  4. Serve salad over bed of baby spinach leaves

Wednesday, July 2, 2008

It's a Sushi Party!

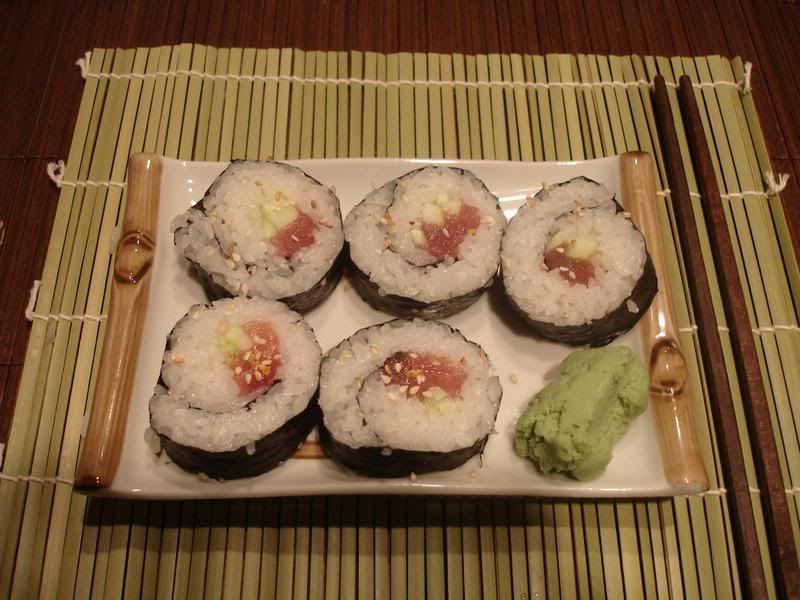
Tekka Maki with CucumberI'm always a little bit confused by those who claim they don't like a certain food because "they never grew up eating it." Well, I'm proof positive that you can break through these barriers! My parents would rather starve than dine on succulent raw fish, so they are obviously major haters of sushi. My mom also orders steak at a five star restaurant well done so I suppose her need for cooked fish is no surprise.

Tekka Maki:
Tuna Cucumber Roll

On the flip side, hubby and I harbor a tad bit of an addiction to sushi of all kinds. Whether it's served in a hole in the wall restaurant or a "traditional" Japanese joint, we welcome it all. Strangely enough, we've never made it ourselves.

After having a bit too many tastings of wine, I purchased a sushi mat at Robert Sinskey Vineyards in Napa Valley. I suppose that after shelling out our life savings on wine bottles, it was a welcome sight to see something cost less than $5 & the bargain shopper in me couldn't resist. Oh, and isn't drunk shopping the best kind? :) In any case, the sushi mat has been sitting in my cupboard for months until hubby and I finally decided to take the plunge & have ourselves a little sushi party.

Rolling the sushi was much easier than I expected though I still have plenty of room for improvement. Follow one of the many tutorials online and you'll be a pro in no time! Be sure not to overstuff and you'll be fine. Finding the right balance between fish, veggies & rice was the biggest challenge for me. Some rolls, like the first picture had too much rice while others didn't have enough. For those in the area, El Pescador is an excellent source for yummy fish.

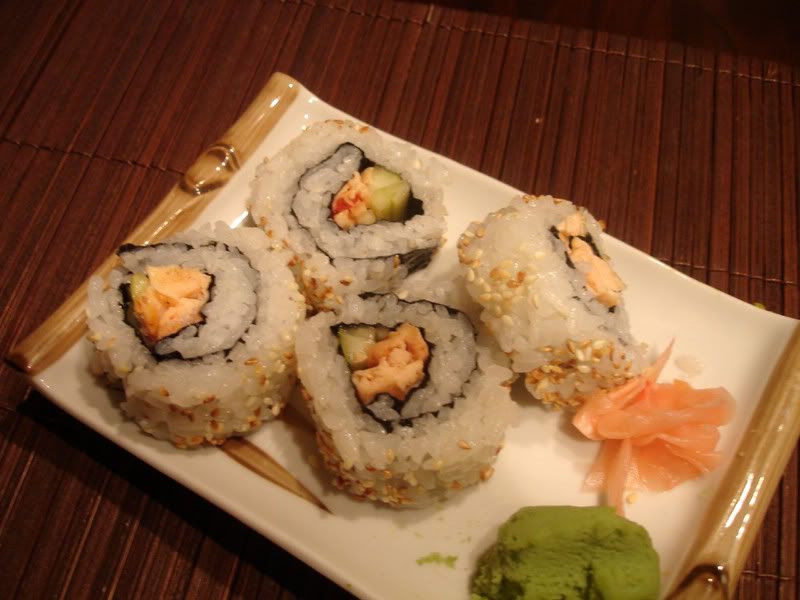
Sake (Salmon) Sweet Chili Maki:
Sweet Chili Salmon MakiHere's the sushi rice recipe we followed, based on the 4-5 websites and cookbooks I had open at the same time. Feel free to scale down the recipe; the ratio of rice to water is about 1 1/4 cups of water to 1 cup of rice.

Sushi Rice
2 cups sushi rice
2 1/4 cups water, plus extra for rinsing
2 tablespoons rice vinegar
2 tablespoons sugar
1 tsp salt
electric fan

Place the rice in a fine sieve and rinse with cool water. Continue to rinse and toss rice until water runs clear.

Place the 2 cups of rice into a medium sized saucepan and cover with 2 1/4 cups of water. Bring the water to a boil. Once the water is boiling, reduce the heat and cover. Cook for 15 minutes and then remove the rice from the heat, covered for 10 minutes.

In a small saucepan, combine the rice vinegar, sugar and salt. Heat until the sugar dissolves.

Once the rice has set, pour into a shallow bowl. It's important to cool the rice down quickly so either have someone else help you to fan the rice or bring over an electric fan. With fan blowing on rice, mix in the rice vinegar mixture and use cutting strokes to mix in the seasoning. Take care to cover all of the rice with the seasoning.

Cover with a damp kitchen towel & allow rice to come to room temperature before using.

Sushi Rolling tutorial

Sweet Chili Salmon Maki

Sprinkle salmon with salt and pepper. Heat olive oil in a skillet and sauté salmon for about 2-3 minutes on each side. Allow to cool and gently flake salmon. When rolling sushi, line salmon down the rice and pour sweet chili sauce alongside. Include cucumbers or avocado if desired & follow sushi rolling technique above.


Happy 4th of July!!

Wednesday, May 14, 2008

Tourist Fun and some (Healthy) Breaded Fish Tacos

With hubby's busy grad school schedule, we certainly don't get to clown around on the weekends as much as we used to. Our usual weekend itinerary goes a little like this... hubby's locked away in the office, head in the books...I, on the other hand spend my Saturdays out in the sun by the pool. Poor guy.

Well, last weekend we were lucky to have a sunny day to spend some time together doing fun touristy things around "America's Finest City" (San Diego, for those of you wondering). We spent the early afternoon enjoying margaaritas from the ocean view deck of the Hotel Del Coronado, soaking up the sunshine...and walking around the beautiful Coronado Island beaches.

During a nice, long stroll we proceeded to find the house of our dreams on the beach. Now, I just need to win the lottery. If you own this house, please call me. I'd be happy to be your maid.

After a rough afternoon of drinks and walks along the beach, we headed to the Gaslamp district to sip even more margaritas and grab a late lunch on an outdoor patio basking in the sun. We happened upon a somewhat cheesy Mexican joint, though it fit the bill since we were both in the mood for tacos.

By default, I always order fish tacos. I'm on a little bit of a San Diego area-wide fish taco taste test quest. You see, they're somewhat of a staple here. While Chicago has its Italian Beef and deep dish pizza, San Diego has amazing fish tacos.

While the fish tacos were tasty and satiated my craving, I thought back on my days in the Midwest where I'd cook fish tacos all the time. They didn't appear on many menus, and if they did, it was usually at a bar - not really the freshest source of fish in my opinion. It became my signature dish, seeing as they were a rare commodity. Once we moved to San Diego, we've had so much fun on our fish taco taste testing that my beloved taco recipe has fallen to the wayside.

So, today I bring you Part 2 of my Limes series: (Healthy) breaded fish tacos. I put healthy in parentheses because though these are not deep fried, its still hard to imagine anything breaded as healthy.

This is a dish I've been making for many years now, way before I realized fish tacos were somewhat trendy. (Gosh, I'm such a culinary pioneer.) Since I've been making these for years, documenting the exact recipe is a little tricky though I think this comes close. Traditionally, San Diego fish tacos are served on a charred corn tortilla with crispy fish draped in a smooth mayo-based sauce. To lighten things up, I substitute the mayo sauce with fresh pico de gallo, corn kernels and a few spinach leaves to add a smidgen more vitamins.

The fish are coated in a cornmeal breading and lightly pan fried with nothing but nonstick cooking spray. For the breading, I would highly suggest Andy's fish breading. It may not be available in all areas, but its by far the best I've tried. It lends a crispy coating without deep frying, and is seasoned to perfection. If you can't find it (look around the seafood counter), I suppose that another cornmeal-based breading would work.

Andy's Crusted Fish Tacos
Juice of one lime
1 pound of tilapia (or mahi mahi), cut into 1/4 inch chunks
dash of salt and pepper
1/2 teaspoon of garlic powder
2 egg whites
1 tbsp milk
1/2 cup of Andy's Fish Breading
4-6 flour or corn tortillas, warm
1 tablespoon cilantro, roughly chopped
1/2 cup of chopped spinach or cabbage
Assorted veggies (i.e. corn kernels, avocado slices)

Pico de Gallo
Courtesy of Rachael Ray
1 large tomato, cored, seeded, and coarsely chopped
1 white onion, coarsely chopped
2 limes, juiced
1/4 cup chopped cilantro
Salt and freshly ground black pepper

For pico de gallo, mix ingredients together and season, to taste, with salt and pepper.

Fish Tacos:
1. Sprinkle fish with lime juice, salt and pepper to taste.
2. Setup breading station:
-In a medium bowl, whisk together garlic powder, egg white and milk. Place fish pieces into egg mixture.
-On a flat, shallow dish, sprinkle a thin layer of fish breading. Pour additional breading as needed.
3. Dredge fish chunks into cornmeal breading, several pieces at a time making sure that the fish are not covered in excess egg. Set the prepared fish aside.
4. Heat a nonstick skillet over medium heat. Spray liberally with nonstick spray. Pan fry fish one layer at a time.
5. Serve tacos with lime wedges, pico de gallo, cilantro and spinach or cabbage.

Enjoy with a tasty margarita!