Monday, March 31, 2008

Baked Oatmeal for a Lazy Weekend Breakfast

Baked Oatmeal
Although its Monday, and 'being lazy' is like a distant & fond memory, I thought I'd share a recipe for baked oatmeal that hubby and I have been enjoying. During our vacation, I developed a slight obsession with oatmeal and ordered it in nearly every little breakfast cafe we found. This recipe is wonderful and smells like 'Christmas in a bowl.' I used to save that term for chai tea (Christmas in a cup), but baked oatmeal's aroma is nearly as dreamy. Cinnamon, brown sugar, and a tad bit of butter combine to make a hearty and comforting meal. I mixed the wet ingredients and dry ingredients separately the night before so that when I woke, I just had a little mixing & baking to do. I've read that you can freeze and reheat the oatmeal as well though of course, we had few leftovers! :)

Baked Oatmeal
Adapted from Cooking Light

2 cups rolled or old fashioned oats
1/2 cup packed light brown sugar
1/3 cup raisins (can also use cranberries, blueberries)
1/4 cup chopped, peeled apple
1 teaspoon baking powder
1 teaspoon cinnamon
1/8 teaspoon ground cloves
1/8 teaspoon salt
1 1/2 cups nonfat milk
1/2 cup applesauce
1 teaspoon pure vanilla extract
1 1/2 tablespoon melted butter
2 egg whites -- beaten well
Fresh, sliced strawberries (optional)

Preheat oven to 375.

1. Combine dry ingredients (first 8) in a medium bowl. Combine the milk, applesauce, butter, and egg whites in a separate bowl and beat well. Add wet ingredients to dry and combine until just moist.

2. Pour mixture into an 8 inch square baking dish coated with cooking spray. Bake at 375 for 20-25 minutes, depending upon the consistency you prefer. I like thick oatmeal, so I bake for 25 minutes.

3. Serve hot with a dash of milk poured over it. Serve with fresh, sliced fruit such as strawberries.

Yield: 5 to 6 servings

Friday, March 28, 2008

Napa Valley Delights for Everyone

Our vacation was amazing, though doing nothing but drinking and eating for several days in a row puts a damper on any sort of half marathon training. Well, we indulged anyway and enjoyed every minute of it.

With so many wineries lining the Sonoma and Napa Valley areas, I was intrigued by how successfully the wineries could compete and differentiate themselves. After visiting just a few, I quickly realized that nearly every winery had a distinct character and intrigue. We visited many wineries, but here are a few of my favorites, picked for their personality. I'll follow up with restaurant favorites in an upcoming post.

Foodie
If you're a foodie, then Robert Sinskey Vineyards is for you. Located in the Stags Leap district of Napa, Robert Sinskey has a clear passion for food and wine. With an on site kitchen in the tasting room, the 'Gluttonous Flight' offers a tasting of 5 limited production wines, each coupled with a tasty food bite fresh from the kitchen. Peruse the area, and you'll find a cute shop sprinkled with recipes such as the Tofu and Bok Choy dumplings that I'm planning to pair with the 2006 Abraxas bottle. I also bought my first sushi mat here, so if you're inclined to buy kitchen trinkets, this winery could be dangerous after a few glases of wine.


Posh Socialite

If you are lucky enough to tote along a designated driver, visit the newly opened Del Dotto Estate Winery and Caves in St. Helena. You won't be disappointed, and you won't come out sober :) The Winery is opulent with perfectly manicured lawns, Italian marble and mosaics to please your eyes. Oh, and the wine is delicious as well. On the tour, our humorous and entertaining guide, Steve, led us to the Italian brick lined caves and provided us 'side by side' barrel tastings to demonstrate the amazing effect the Oak used in the aging barrels has on the taste. Apparently, I prefer Missouri Oak while hubby preferred the French Oak. He's always more sophisticated than me. After what felt like the 20th pour of wine, I couldn't tell the difference anymore. The tour fee is a little steep here ($50) but is well worth it, and you'll certainly get your money's worth in wine.


Family Man

Baldacci Family Vineyards is a quaint, family winery with excellent wine. We probably wouldn't have stumbled upon this winery if it weren't for a recommendation. Each of the vineyard's bottles is made and named with a family member in mind, and we loved the Four Sons Cabernet. Because we visited in the off-season, we were lucky to have the grounds to ourselves and enjoyed a tour of what our guide called a "working cave" minus the bells & whistles of Del Dotto. The tour was equally educational and we enjoyed sipping our wine on the patio.

The Artisan

A life of art galleries and sparkling wine....sounds good to me. A visit to Mumm Napa is a special treat as you can sample some very tasty sparkling wine then tour the grounds filled with artwork and a permanent Ansel Adams exhibit. Mumm offers complimentary guided tours, though we opted to stroll on our own. This was also the last winery we visited, so we might have been a little tired at that point! Courtesy of Mumm, here's a recipe that I am quite intrigued by:

Black Velvet, courtesy of Mumm Napa
1 part stout beer, slightly chilled
1 part Brut

Black Velvet is smashing when layered. Pour the stout into a half-pint glass or flute. Carefully add the sparkling wine on top. When you sip, the heavier stout will slip under the wine, so you’ll enjoy a taste of both. Experiment with dry Irish stout and brut, or a sweet Imperial stout and a less dry sparkling wine.

History: The death of Prince Albert, beloved consort of Britain’s Queen Victoria, inspired this cocktail in 1861. It’s widely attributed to a bartender at Brook’s Club in London, who thought Champagne too festive for such a somber occasion. By blending Champagne with stout, he created a cocktail cloaked in funereal black.

Thursday, March 27, 2008

Back in Action!

I just returned for a much needed and fabulous vacation with hubby in San Francisco, Napa and Sonoma. More on the vacation soon. After a long, but beautiful drive home along the coast of California, I came home to find:

1. All of my flowers died. I'm not sure how I thought they would survive my absence in bone-dry San Diego, but now I get to buy new ones! They've been growing in the garden for over a year, and the flowers were starting to look a little weathered.

2. I have 232 emails in my work inbox and 657 blog updates on igoogle. I need a vacation from my vacation.

3. I was alerted by dear reader, Cassie, that my blog has been down for the week! So very sorry (and thanks again, Cassie). I tried to make some last minute layout changes right before heading out the door, and apparently never checked to make sure the changes went through properly. Rookie move, I apologize. I'll be back with some fabulous recipes very soon!

Thursday, March 20, 2008

Girl Scout Samoa Brownies!

I was very much hit by the inspiration bug yesterday. I've come up with a recipe that combines two of my favorite things in this world: chocolate and Girl Scout Cookies. To start, I absolutely cannot say 'no' to the cute girl scouts camped out in front of local grocery stores, so I have amassed quite the collection of samoas, thin mints and do-si-dos. Though my Google research resulted in a few good recipes using the cookies as ingredients, I was surprised not to find more.
Since I was also the lucky recipient of TCHO chocolate from Blake Makes, I felt compelled to make something delicious with the smooth, dark chocolate in my pantry. Why not make Samoa brownies??

The Samoa brownies have a base oatmeal layer that is briefly baked and then topped with dark chocolate brownie batter, topped with an oatmeal - Samoa cookie topping. Divine! I could eat this entire pan in one sitting. The Samoas add a nice crunch to an otherwise very smooth brownie. I originally made only half the amount of oatmeal base & topping in the recipe & I regretted it. Next time, I will definitely make all of the oatmeal topping. You may have more than you need, but more is better than not enough!

Samoa Brownies
Base and topping:
2 1/2 cups old-fashioned rolled oats
3/4 cup all-purpose flour
3/4 cup packed brown sugar
1/2 teaspoon baking soda
3/4 cup butter or margarine, melted
3 Samoa Cookies, coarsely chopped

Brownie Layer:
1 stick (1/2 cup) unsalted butter
8 oz fine-quality dark chocolate, chopped
3/4 cup packed light brown sugar
1 teaspoon pure vanilla extract
2 large eggs
3/4 cup all-purpose flour
1 tablespoon unsweetened cocoa powder
1/2 teaspoon salt1/4 teaspoon baking powder

Heat oven to 350 degrees. Spray an 8x8 inch baking pan with cooking spray.
In a large bowl, mix oats, 3/4 cup flour, the brown sugar and baking soda. Stir in melted 3/4 cup butter. Reserve 1/3 of the oat mixture for topping. Press remaining oat mixture in pan. Bake 10 minutes. Cool 5 minutes. Add Samoa cookies to remaining topping mixture.

Melt butter and half of chocolate in a 1 1/2-quart heavy saucepan over low heat, stirring, until smooth. Remove from heat and cool to lukewarm. Stir in brown sugar and vanilla. Add eggs 1 at a time, beating well after each addition, until mixture is glossy and smooth. Whisk together remaining ingredients, then stir into chocolate mixture. Stir in remaining chocolate.

Spread batter over baked base. Sprinkle with reserved oat mixture for the topping. (You may have leftover oat toppings, but use enough for your personal preference). Bake about 25 - 28 minutes or until center is set and oat mixture has turned golden brown. (Do not over bake.) Cool completely, before cutting (if you can wait).

TCHO Chocolate and a Good Recipe to Follow!

TCHO is a new kind of chocolate company: a chocolate startup run by a former space shuttle technologist, Timothy Childs, and Wired magazine co-founder Louis Rossetto. Quite a duo if you ask me, and they are serious about their dark chocolate. They've gone for a minimalist design of brown paper, stamped label, and no pretentious percentage amounts of cocoa included. Their testers are everyday people like you and I and their chocolate is developed in beta versions.

Well, I was lucky enough to be a recipient of a beta bar from Blake Makes, a wonderful blog that provides giveaways (in addition to excellent recipes I must add) in exchange for a little blog 
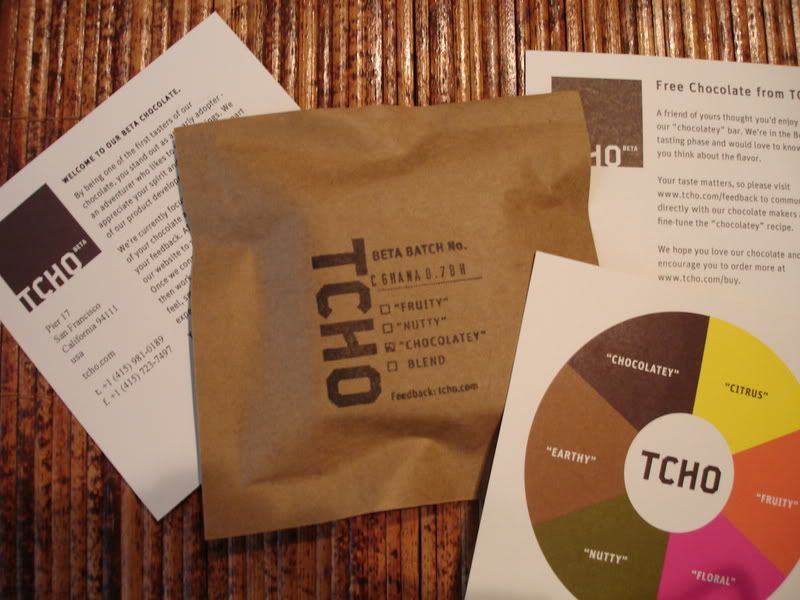
feedback. Free Chocolate! It must be my birthday. I eagerly awaited the arrival and though I attempted a little restraint, I took a nice bite as soon as I could open up the package.

The chocolate was surprisingly aromatic and smooth. It was delicious, heaven in a little bar. And to be honest, I don't usually prefer plain, dark chocolate. I like it in something like a brownie or a cookie. I ended up using the chocolate in an excellent recipe that I will post later today, but I could have eaten this bar all by itself. Thanks, TCHO and Blake Makes!

Wednesday, March 19, 2008

Feed Your Belly Virtually

If you've never been, visit Tastespotting and watch yourself get hungry instantly. The site has amazingly tempting and beautiful pictures. Click on the picture and you'll be rewarded with a recipe and a new blog to explore. ...and yay! I saw one of my own pictures today posted online. Check out Post 10884!

Spiced Shrimp with Black Bean, Corn Salsa and a side of Cilantro Coconut Rice


Last night's dinner reminded hubby and me of vacation. We're not sure if it was the coconut rice that added a tropical flair, the spiced shrimp reminding us of summers, or if we're just very stressed. It's certainly been a long week for us with him attempting to overcome a deathly flu during finals, and long & tiring work hours for me. Yesterday wasn't any better, but luckily this dish came together so quickly that even a stressed out me could put it together. If only I had made a pina colada to go along...

The shrimp is nicely spiced with chili powder, garlic and cumin before being sauteed with corn, black bean, salsa, and lime. I was a little weary of the amount of chili powder used since I'm a weakling with spicy foods, but rest assured that if you use a milder salsa, it tempers the kick and I didn't notice any spice at all. The cilantro coconut rice was a perfect accompaniment - lightly flavored and sticky - just how we like our rice! Sorry for the lack of rice photos, but we gobbled this up too quickly. There's no time for photos with hungry, stressed out folk. :)

Spiced Shrimp with Black Bean, Corn Salsa
(adapted from Cooking Light)

1 tablespoon chili powder
1/2 teaspoon garlic salt
1/2 teaspoon ground cumin
1 1/2 pounds uncooked medium shrimp, peeled and deveined
2 tablespoons fresh lime juice, divided
1 1/2 cups frozen whole-kernel corn, thawed or fresh corn, when in season
3/4 cup bottled salsa
1/4 cup chopped fresh cilantro
1 (15-ounce) can black beans, rinsed and drained
Olive oil cooking spray

Preparation
  1. Heat a large nonstick skillet over medium-high heat and spray lightly with olive oil cooking spray. Combine first 3 ingredients in a large bowl. Add shrimp; toss to coat.
  2. Add shrimp; sauté 3 minutes - 5 minutes, or until shrimp is opaque. Do not overcook. Add 1 tablespoon lime juice. Remove shrimp from pan. Add corn to pan; sauté 1 minute. Stir in salsa, cilantro, and beans; cook 1 minute or until thoroughly heated. Stir in 1 tablespoon lime juice and add shrimp back to pan. Toss shrimp with bean and corn.
Cilantro Coconut Rice
Courtesy of Rebecca from CLBB

1 tsp olive oil
1 clove garlic, minced
3/4 cup rice
1/2 cup light coconut milk
1 1/4 cup water
1 tsp kosher salt
juice of half a lime
1/4 cup chopped cilantro

  1. Heat oil in saucepan over medium heat. Add garlic, saute for 30 seconds. Add rice, and stir to coat, saute for 1 minute or so. Add coconut milk, water, and salt. Bring to a boil. Reduce heat, cover, and simmer for 20 minutes or until liquid is mostly absorbed. If rice does not appear fully cooked and water has evaporated, add a tablespoon or two of additional water. Once cooked, remove from heat, and remove cover, add lime juice and cilantro, stir and cover. Let stand for 5 minutes or so.

Tuesday, March 18, 2008

New to Cooking? How To Boil Water

I won't insult your intelligence, as I assume even the most novice of you cooks have once placed a pot on the stove...well, I hope. Come to think of it, I did have a roommate in college who didn't know how to boil water...

In any case, many gals on the STLWed board have mentioned they'd like to get more involved in cooking. How To Boil Water: Life Beyond Takeout from the Food Network Kitchens serves as an excellent starter cookbook to get you in gear. The book begins with the fundamentals and provides clear yet entertaining background information about kitchen equipment, ingredients, and cooking methods such as chopping and veggie preparation. I usually skip this section of cookbooks, because it's typically boring and written in a language that insinuates you're not intelligent if you didn't already know that celery stalks should be peeled. How To Boil Water takes nothing for granted and provides guidance on how to adapt a recipe to "make it your own" by adding or substituting alternative ingredients and interesting side notes and tips about each recipe. For example, for novice improvisers the book suggests frying up a small patty of meatloaf to ensure the spices are right. Brilliant! Did you know that there's fundamentally no difference between brown & white eggs (beyond the chicken who laid it)? I didn't. Best of all, this cookbook is equipped with beautiful and colorful photos throughout to get you inspired (and give you a clue what your food should look like :)

So, for those of you out there that are kitchen shy, consider this book as a starter and let me know about your recipe successes! Here's one that we enjoy:

Buffalo Chicken Sub Sandwiches
Courtesy of How To Boil Water: Life Beyond Takeout

3 boneless, skin-on chicken breast halves, about 1 1/2 pounds (I usually just stick with skinless, though its not as crispy this way)
2 teaspoons chili powder
Kosher salt and freshly ground black pepper
6 tablespoons unsalted butter (you can get away with using less)
1 to 2 ribs celery
1/2 bunch watercress
1 baguette (aka French bread, 15 to 18 inches long)
4 tablespoons hot sauce
2 ounces creamy blue cheese
1/4 cup mayo or sour cream (I use light)
  1. Preheat oven to 350 degrees. Pat chicken dry with paper towels and season with chili powder & salt and pepper. Heat a large skillet over medium-high heat; add 2 tbsp of butter. Lay the chicken skin side down and cook without moving until the skin is golden and crispy, about 4 minutes. Turn and cook until the chicken is opaque, about 4 additional minutes. Reserve the skillet. Put the chicken in a baking dish or roasting pan and bake until firm to the touch, about 10 minutes. Set chicken aside to rest for 5 minutes before slicing.
  2. While the chicken bakes, thinly slice the celery. Trim and discard the tough stems from the watercress. Rinse, dry and set aside the leaves.
  3. Cut the bread crosswise into 4 equal pieces; cut each piece in half for sub style sandwiches. Add 2 tbsp butter to the reserved skillet. Once butter stops foaming, toast half the bread, cut side down, pressing and moving to soak up butter, about 2 minutes. Transfer to a platter and brush with half the hot sauce. Repeat with remaining butter, bread and hot sauce.
  4. Spread cheese evenly on the bottoms of the bread. Layer the celery over the cheese. Thinly slice the chicken and place on the celery. Top with watercress and finish by smearing the top pieces with mayo. Press the tops on the sandwiches and serve immediately or wrap and serve within 2 hours.

Monday, March 17, 2008

Chicken Greek a Tikka Salad Wraps with Parsley Feta Pesto

Chicken Greek a Tikka Salad with Parsley Feta Pesto
Whew...what a name! I saw these on Rachael Ray's show and was instantly intrigued and sold on her fusion between Greek & Indian food. The chicken is marinated in a yogurt and coriander spice marinade and then grilled, while the accompanying salad contains many of the typical Greek salad goodies - feta cheese, kalamata olives (though I omit these because of personal preference) and a light vinaigrette. This has become one of our all-time favorite meals. While Rachael serves this as a salad with pitas on the side, we prefer to spread the thick parsley feta pesto on Mediterranean flat bread, and make wraps. Either way, this is an absolutely fresh and delicious dish! If you're not in the mood for making the pesto, this would be equally as delicious with some hummus or tzatzki sauce.
Since hubby is finally getting over his flu and regaining his appetite, I've been cooking up a storm. More to come!

Chicken Greek-a-Tikka Salad with Parsley-Feta Pesto
Adapted from Rachael Ray

4 flat breads or pitas (I prefer Trader Joe's Mediterranean flat bread)
1 cup plain yogurt
1 teaspoon ground coriander
1 teaspoon ground cumin
1 teaspoon dried oregano
2 teaspoon Old Bay seasoning (Rachael uses grill seasoning, but I only have Old Bay)
2 tsp minced garlic
2 to 2 1/2 pounds white meat chicken, cubed into bite size pieces
1 heart romaine lettuce, chopped
2 vine ripe tomatoes, chopped
1/2 seedless cucumber, chopped
1/2 red onion, chopped
3 ribs celery, chopped
1/4 cup red pepper, chopped
1/2 cup pitted kalamata olives
1 lemon, juiced
Extra-virgin olive oil, for drizzling
Salt and pepper

Parsley Feta Pesto:
1 cup flat-leaf parsley leaves
3/4 cup feta crumbles, divided
1 clove garlic
1 teaspoon coarse black pepper
3 tablespoons chopped walnuts
1/4 cup extra-virgin olive oil
Metal skewers or bamboo skewers soaked in water

Preheat a grill pan to high heat. Heat a toaster oven or oven to 250 degrees F.
Wrap breads in foil and place in oven to warm.

Combine yogurt and next 5 ingredients (coriander to garlic). Coat chicken in mixture then thread meat onto skewers. Brush grill pan with oil and grill meat 5 to 6 minutes on each side or until cooked through and browned.

Combine chopped lettuce, chopped veggies, olives and hot peppers on a large platter or in a serving bowl. Dress the salad very lightly in lemon juice and extra-virgin olive oil and salt and pepper. Top with 1/4 cup feta cheese crumbles.

Place all ingredients, including the remaining 1/2 cup of feta for pesto in the food processor except extra-virgin olive oil. Turn processor on and stream in extra-virgin olive oil. If your food processor does not have this option, pulse in 1 tbsp of olive oil at a time.

Remove bread from oven and spread with the pesto. Place grilled meat on salad platter and serve, allowing guests to make their own wraps.

Friday, March 14, 2008

Newlywed Cooking at its Best: Small Batch Baking

mini batch brownies
Baking has always been one of my passions. When hubby and I were dating, I'd joyfully bring him and his roommates cakes, cookies, and their favorite- rice crispy treats, and they'd instantly be gobbled up. It also won me brownie points (OK, sorry for that cheesiness). If the guys weren't around, I'd at least have my own roommates and coworkers to share my culinary creations with. Now that we no longer have two sets of roommates, and I don't work in a large office anymore, its up to hubby and I to devour the majority of my baking treats. I can't say we really mind this challenge at times, but our health probably does! Beyond that, having to bake for two limits how often I'm able to experiment with new recipes.

Small Batch Baking recently came to the rescue with decadent desserts that serve two to four Small Batch Baking Cookbookpeople. Even better, the amount of ingredients used is so small that even a fancy dessert such as Petite Pear Tarte Tatin does not seem as daunting. If the recipe fails, at least I only wasted 4 tablespoons of flour!

I feverishly flipped through the book the first night it arrived, overwhelmed at which recipe to make first. In the mood for a muffin? Well, perfect - there's a recipe that makes just two jumbo morning glory muffins. Too lazy to make an apple crumble pie? Don't be, you only have to use one apple! Over the past couple days, I've managed to make almost 5 recipes. Some were divine, others were near kitchen disasters (pecan snowball cookies). The Moist Fudgy Brownies were top-notch if you enjoy gooey brownies with crisp edges. I also enjoyed the rum cakes, hubby felt otherwise ("they taste like egg cake..." OK!) . All in all, this cookbook is great for couples or those looking for some portion control. I will admit I did feel bad when hubby came out for a study break and asked for another brownie. I suppose it's probably for the best. More Small Batch recipes and reviews to come.

Moist & Fudgy Brownies
adapted from Small Batch Baking
Makes 2-3 brownies

1 1/2 tablespoons unsalted butter
2 1/2 tablespoons semisweet chocolate chips
1/4 cup plus 2 tablespoons sugar
1 tablespoon plus 2 1/4 teaspoons egg substitute or beaten egg
1/2 teaspoon pure vanilla extract
3 tablespoons plus 2 teaspoons all-purpose flour
1/8 teaspoon salt

Pan Required:
1 petite loaf pan (2 cup capacity, about 5x3 inches) My mini loaf pan is smaller(about 3/4 cup capacity), so I divided the batter between two mini pans.
  1. Preheat the oven to 350 degrees. Line the pan with aluminum foil. Very Lightly grease the foil.
  2. Place the butter and the chocolate chips in a medium sized microwaveable bowl and microwave on medium power until the chocolate is soft and the butter is melted, about 45 seconds. Stir until the chocolate is smooth and completely melted. Add sugar and stir until incorporated. Then add the beaten egg and vanilla, and stir. Finally, add the flour & salt. Spread the batter evenly in the prepared loaf pan(s).
  3. Bake for 28 to 30 minutes (about 24 minutes if using a smaller pan), or until a toothpick inserted comes out with moist crumbs; the top will appear dry and the brownie will start to shrink from the sides of the pan. Do not overcook.
  4. Remove the loaf pan from the oven, place on wire rack and let the brownies cool completely in the pan. Use the edges of the foil to lift brownies out of the pan. Remove foil and cut brownies.

Thursday, March 13, 2008

Kitchen Goodies Wish List

These products belong in my kitchen:

File under - "why didn't I think of that?"
The crusty edge pieces of brownies are my absolute favorite...and most likely yours too. Too bad there's usually only four. Alas, this labyrinth shaped Brownie Edge Pan , ensures that each brownie piece has the perfect ratio of crust to gooey center that we all love. No more fighting for the corner pieces!

For the indecisive, the S-XL Cake Pan "produces 15 different cake servings to choose from. Half-portions for dieters, oversized portions for insatiables, and the rest for the undecided. Some would see this as the ultimate control, others as the most luxurious of options embedded in delight." ...hmm, I'd still probably choose the jumbo sized piece meant for the stout, fat man below. Lastly, I can never keep my measuring spoons in one place. I don't keep them connected to avoid having to wash the whole set because one spoon is dirty... especially the often neglected 1/8 teaspoon. These measuring spoons stay together by magnets, so you don't need to worry about separating them for the dishwasher. If you'll be using them frequently, think about sticking them on the refrigerator or a metal backsplash. Easy access, easy cleaning...what more could you want? Progressive Measuring Spoons

Wednesday, March 12, 2008

Back to the Basics....Chicken Noodle Soup

When making soup, I typically stick to thick, hearty stews or chili, but poor hubby has been quite sick the past few days. Though we have a ton of fancy leftovers (anyone want crab cakes or Mongolian beef with sticky rice?), he doesn't have much of an appetite so I thought some good 'ol chicken soup would be perfect. To be honest, chicken noodle soup has always brought back memories of the Campbell's version with the scary chicken chunks so I've never been a huge fan. I thought I should give this American favorite-food-for-the-sick a second shot. Everything homemade is better, right?

Many of the recipes I found used a lot of spices or were too complex for what we're looking for. This recipe (courtesy of my neighbor who has to hear hubby cough all day) is simple, but delicious. Sauteed sweet onions, garlic, carrots and celery are accompanied by poached chicken to make a flavorful broth. I used leftover Asian noodles from the e-fu recipe in a previous post, but you can use regular dried egg noodles found in the supermarket.
For any of you out there that are feeling under the weather, this one's for you!

Homemade Chicken Noodle Soup
1 cup egg noodles, cooked per package directions and drained
1 tablespoon olive oil
2 cloves garlic, minced
1/2 cup chopped sweet onion
1/2 cup chopped carrots
1/2 cup chopped celery
4 (14.5 ounce) cans low sodium chicken broth (or use homemade broth)
1 can 98% fat free cream of mushroom soup
1 pound chicken breasts or tenders
1/2 teaspoon dried basil
1/4 teaspoon red pepper flakes
1/2 teaspoon dried oregano
2 bay leaves
salt and pepper to taste

In a large stockpot over medium high heat, saute the onions and garlic in the olive oil until onions are translucent, about 4-5 minutes. Add carrots and celery and continue to saute until vegetables are crisp tender, about 4 additional minutes. Add the broth, cream of mushroom soup, chicken, bay leaves and spices. Mix well and bring soup to a boil. Once boiling, reduce heat and simmer for 15 minutes.
Remove chicken from soup with a slotted spoon or tongs. Place on a plate and shred with a fork and a knife. Stir chicken and egg noodles into soup. Simmer an additional 5 minutes, or until noodles are heated through. Remove bay leaves, season with salt and pepper to taste & enjoy!

Monday, March 10, 2008

Braised E-Fu Noodles with Mushrooms

Braised E Fu NoodlesI've been honored to help Pat Tanumihardja of Asian Grandmother's Cookbook with her latest project. Pat has signed on to author a new cookbook that will be published by Sasquatch books in the spring of 2009. Her cookbook will be a "compilation of family and homecooking recipes from across the Asian smorgasbord, the idea being that grandmothers are the closest link we have to our cultures and traditions."I love the idea! As a recipe tester, I followed her recipe for Braised E-Fu Mee (noodles) as closely as possible and squelched my usual desire to make substitutions or modifications.

I was pleased with this challenge, specifically because it forced me to seek out and use ingredients totally foreign to me. Before heading out to Ranch 99, a huge local Asian grocery store, I should have done some prior research. I naively thought I could head to the noodle aisle and find "E-Fu" noodles, a Chinese egg based noodle. Unfortunately, the noodle aisle at Ranch 99 is larger than most grocery stores' cereal aisle, and is chalked full of any and every type of noodle one could imagine - white, egg, curly, fresh, Vietnamese, Filipino, Cantonese. I tried to solicit the help of two sweet looking employees, but both shied away when I showed them the noodles I was looking for on my printed recipe. Alas, I finally found fresh, flat noodles which Pat described in her recipe as made from eggs and wheat flour, typically called e-fu, or "yi meen" in Cantonese. It didn't help that nearly all of the noodle packages were in Chinese; anything written in English was esoteric --- "Chinese Noodle." Love it.enoki mushrooms


I next headed to the produce & mushroom sections to look for dried shiitake mushrooms and enoki mushrooms. I never would have guessed what enoki mushrooms look like! For those not as adventurous, the enoki mushrooms are very mild in taste and cook down so that you barely notice them. To use them, just cut off the bottom stalk of the mushroom where the cluster of stalks are connected. According to Pat, these can also be eaten raw.


The dried shiitake mushrooms were soaked in a cup of water for about 20-30 minutes to soften them up. The resulting broth was later used for cooking & added a wonderful flavor to the dish. Lastly, I used cremini mushrooms which are my personal favorite and what I had on hand.

Here's the complete cast of characters including: shiitake, cremini, and enoki mushrooms, garlic, shallots and green onions. If you notice how poorly the shallots are chopped, my eyes were watering so much I thought I might cut a finger off!


The garlic, shallots, onions, mushrooms (& chicken, for me) were sauteed and then braised in the mushroom broth. The noodles were added & stir-fried, making for an easy dish to prepare.

Verdict: This recipe is a keeper. The dish is so unlike any stir-fry I would normally prepare, but both hubby and I were pleasantly surprised. The mushrooms added a mild and earthy, woodsy taste that was subtle but very delicious. My stir fry dishes are usually heavy on garlic and soy sauce, so this was much more mild (in a good way). However, I wouldn't recommend this dish if you are not a mushroom lover. Though the original recipe did not call for any meat, we added chicken and wouldn't have liked it as much without some protein in there. I look forward to the release of this great cookbook. Thanks, Pat!


Braised E-Fu Noodles with Mushrooms, courtesy of Pat from Asian Grandmother's Cookbook

8 medium shiitake mushrooms, reconstituted and sliced into 1/4-inch slices (about 3/4 cup; soak mushrooms for approximately 20-30 minutes. Reserve the water used to soak the mushrooms)
2 (9oz) packets fresh or dried e-fu noodles (I used a 16 oz package of the fresh noodles)
3 tablespoons vegetable oil, divided
1 tablespoon soy sauce
Pinch salt
3 cloves garlic, minced (about 1 tablespoon)
1 medium shallot, chopped (about 1/4 cup)
4 oz button mushrooms, trimmed and sliced (about 1 cup)
2 oz enoki mushrooms, trimmed and separated (1 cup)
1 cup Chinese chives or skinny green onions cut into 2-inch lengths (about 4 to 5 stalks)
3 tablespoons oyster sauce
Salt and pepper to taste


Prepare noodles according to package instructions. Drain and rinse with cold water in a colander. Place drained noodles in a medium bowl and sprinkle 1 tablespoon oil, pinch salt and soy sauce. Mix well and set aside.


Preheat a 14-inch wok or 12-inch skillet. Swirl in 2 tablespoons oil and heat over medium heat until hot. Sauté garlic and onions until fragrant, about 30 to 45 seconds. Add shiitake and button mushrooms and stir about 2 minutes, until mushrooms almost cooked. Add enoki mushrooms followed by reserved mushroom water.


Sprinkle oyster sauce and 1 teaspoon salt. Throw in chives followed by noodles and toss to mix well. Season with salt and pepper to taste and toss with a couple more flourishes.

Saturday, March 8, 2008

Gladiator Power Bars

Homemade Protein BarIn honor of the triumphant return of American Gladiators to our TV screens, I've made some homemade energy/power/protein bars. As a child, I was fixated by this bizarre icon of early 90s television. Come to think of it, I'm not sure why my parents allowed these weekly viewings. There's nothing inherently wrong with the show, though it just seems to be an odd choice for a child's TV repertoire. In any case, I digress.

I work out fairly often and enjoy energy bars as a quick snack or energy boost. As we all know, this habit can get expensive as an average bar costs about $1.50. On top of that, read the label of your favorite energy bar and you may see ingredients such as high fructose corn syrup, fractionated palm kernel oil, and sugar alcohols (think digestive problems). Yuck.

These bars are based upon Alton Brown's Protein Bar recipe. You can interchange the fruits, and if you're in the mood for an indulgent bar, add mini chocolate chips. Because I didn't want to get stuck with a bag of wheat germ or oat bran, I visited my local Whole Foods and purchased all thedried fruits dry goods in bulk. Total cost: $2.20 (the 1/4 cup of wheat germ cost $.08!) Beat that Luna Bar! I added some spices (cinnamon & pumpkin pie spice) to rev up the taste, used crunchy peanut butter for half the amount called for, and experimented with adding peanut butter chips & chocolate chips I had on hand. The latter is optional, of course. Don't want to bring your health down! :)

Verdict: The bars are certainly hearty and the peanut butter has a predominant taste. Nothing can beat my Luna Bars which in my mind, are a like a candy bar with vitamins, but obviously some things are too good to be true. These homemade power bars are made from wholesome ingredients and are low cost to make. I'll be freezing some to add into my rotation though I can't call them a replacement quite yet.
Update: I finished off my batch of fresh bars, and moved onto the frozen ones. I actually prefer these to the fresh! Leave them out for just a few minutes to soften and they're ready to eat.

Gladiator Power Bars
(adapted from Alton Brown's Protein Bars)

1 cup vanilla soy protein powder
1/2 cup oat bran
1/2 cup whole wheat pastry flour
1/4 cup wheat germ
1/2 teaspoon kosher salt
1 teaspoon ground cinnamon
1/2 teaspoon pumpkin pie spice
1/2 cup raisins
1 cup dried blueberries
1/2 cup chopped dried apricots
1 (12.3-ounce) package silken tofu
1/2 cup apple juice
1/2 cup dark brown sugar
1/2 cup granulated Splenda for baking
2 large whole eggs, beaten
1/3 cup creamy peanut butter
1/3 cup crunchy peanut butter (optional, use all creamy pb if you prefer)
1/2 teaspoon vanilla extract
1/4 cup mini chocolate chips (optional, but delicious)
Cooking Spray

Line the bottom of a 13 by 9-inch glass baking dish with parchment paper and lightly coat with cooking spray. Set aside. Preheat the oven to 350 degrees F.

Coarsely chop the raisins, blueberries and apricots and set aside.

In a large mixing bowl, combine the protein powder, oat bran, wheat flour, wheat germ, salt, cinnamon and pumpkin pie spice. Set aside.

In a separate medium sized bowl, whisk the tofu until smooth. Add the apple juice, brown sugar, Splenda, eggs, peanut butters and vanilla, 1 at a time, and whisk to combine after each addition. Add this to the protein powder mixture and stir well to combine. Fold in the dried fruit (and chocolate chips, if using). Spread evenly in the prepared baking dish and bake in the oven for 35 minutes. Remove from the oven and cool completely before cutting into squares. Cut into squares and store in an airtight container for up to a week.

Thursday, March 6, 2008

Fast Food Shrimp Craze - Shrimp Burgers!

I have always been a little Forrest Gump in my ways - I love shrimp. I make shrimp as often as most families probably make chicken. I have a whole book dedicated to recipes like Shrimp Jambalaya, Shrimp with Saffron Rice (posted on this blog), Shrimp with Linguine...but I finally was looking for something different. Who knew this inspiration would come in the form of Asian Fast Food?! McDonalds Shrimp Ad

I came across a post on Serious Eats about crazy Asian pizza crusts, many of which involved copious amounts of shrimp. My personal favorite was Pizza Hut's Whole Shrimp Cheese Bite, "a ring of shrimp with tails dangling in the air and heads swaddled in tubes of cheese-stuffed dough." Yikes. Well, after looking into the Asian Shrimp fast food obsession, I also found that McDonald's carries Shrimp Burgers in Japan. A little strange in concept, but definitely more palatable than a ring of shrimp doused in pizza cheese.

I scoured the net and cookbooks for a suitable recipe and ended up combining a few. The recipe below is based on Emeril's Marcelle Shrimp Burger recipe. When preparing, note that the shrimp mixture will be a little wet. You can prevent it from being too wet by adequately draining and patting the shrimp dry before adding it to the rest of ingredients. If it still looks too wet, add a few dashes of flour or cornstarch to thicken. Lastly, when forming the patties, use gentle hands as it will still be much more "loose" than a normal meat burger patty would. A little veggie oil rubbed on the hands helps as well. Don't worry, the patties will stay formed during the cooking process! These were extremely tasty and hit the spot. Now, I just need to try out that Mc Donald's version....

Shrimp Burgers
Ingredients
1 1/2 pounds shrimp, peeled and deveined
2 teaspoons Creole or Old Bay seasoning, divided
1/4 teaspoon salt
1/4 teaspoon cayenne
1 clove garlic, peeled and crushed
1/2 cup finely chopped yellow onions
1/4 cup finely chopped red bell peppers
1/2 cup finely chopped celery
1 large egg, beaten
1/4 cup finely chopped green onions
1/4 cup finely chopped parsley
1 teaspoon baking powder
1/4 cup all purpose flour

Place half of the shrimp with 1 tsp of the Creole/Old Bay seasoning, salt, cayenne, and garlic in a food processor. Process for approximately 1 minute to combine. Transfer the mixture to a bowl. Chop the remaining shrimp and fold into the ground shrimp along with with the chopped onions, red pepper, celery, egg, green onions, parsley and baking powder. Mix well. Cover and refrigerate for an hour to allow the mixture to chill and firm up.
Remove the mixture from the refrigerator and form into 6 patties.

In a shallow bowl, combine the flour with the remaining teaspoon of Creole or Old Bay. One at a time, dredge the patties on both sides to lightly coat with flour.

In a large, heavy skillet, heat the oil over medium-high heat. Add the shrimp patties in batches and cook on both sides until golden brown, about 8 minutes. Drain on paper towels.

To serve, spread the toasted bun with mayo if using and dress with lettuce and tomatoes. Enjoy!

Wednesday, March 5, 2008

Blog Tag Spreading Like a Virus

I've noticed an outbreak of blog tag lately and figured since I've been tagged by both Brigid and Aimee, I should get moving before I run out of people to tag (I think this may already have happened!). I previously only posted 5 items, but thought of 2 more. See below for the fabulous #6 & #7.

Here's the rules: Link to the person who tagged you. Post the rules on your blog. Share seven random and/or weird facts about yourself on your blog. Tag seven random people at the end of your post, and include links to their blogs. Leave a comment on their blogs so that they know they have been tagged!

  1. I have won 2 deparmental awards from work - the "One more Drink" award and "Sweetest Tooth" award. I swear I live a healthy life though y'all might think otherwise now. It is true, though- I like to have a good time, and especially enjoy any and all desserts!
  2. My husband & I grew up 10 minutes away from each other, went to college in the same state, then both moved to Chicago after college where we lived about a block apart until we finally met in 2004! It took quite a few years, but we finally found each other.
  3. I can stand a lot of things, but I absolutely cannot stand to be cold. I get irritable & don't leave the house. Poster child for seasonal depression. Well, it's taken me 28 years to figure this out, but I have finally moved somewhere warm. Previously: St Louis, South Bend, Chicago (capital of all things cold and snowy).
  4. I have saved almost every issue of Cooking Light since I started subscribing in 2002. I am not OCD, but I do love my Cooking Lights!
  5. Talents I do not possess: whistling, skiing, swimming in butterfly stroke. Maybe I should rethink my New Year's resolution.
  6. I visit the grocery store on average 5 out of 7 days. I really love to cook, but have not yet mastered the art of planning ahead. There is always one more ingredient that I need which in turn ends up in a purchase of about 5 or more items. Thankfully, there is an abundance of grocery stores near me.
  7. A friend and I once flew to Tempe, AZ just because a Cereality had opened there. For those not in the know, Cereality is a "cereal bar & cafe" where you can mix & match cereals and toppings. After flying there, we trudged through 100 degree heat to arrive at the location on the ASU campus, only to find it...closed. School wasn't in session! DOH! Poor trip planning. :) We emailed our sob story to the contact us address on the website and they were so nice to send us a huge box of goodies. We heart Cereality!

I'm tagging Heather, Mary (who may have been tagged 5 times now), Ellen. Hmm, everyone seems to have been tagged already. Anyone want to play? :) Sorry to be a tag slacker.

Monday, March 3, 2008

Chicken with Mushroom Marsala Sauce and Roasted Broccoli

When trying to think of Monday night's meal, it dawned on me that for every main dish that piqued my interest, I tried to think of a corresponding carb-centric side dish to serve. Rice, pasta & bread are our main staples and its very seldom we don't get our carb fix for the day. In an attempt to branch out, I roasted broccoli in garlic and olive oil. I had never roasted broccoli before, but I must say this will now be my go-to way of cooking broccoli. Unlike steamed broccoli, which often cools after sitting out, the roasted broccoli stayed warm and was infused with flavor.

As for the main dish, the Chicken Marsala is my attempt to recreate a delicious dish we had at a local Italian restaurant. Because the recipe makes an ample amount of sauce as you can see in the photo, I would consider serving this dish over spaghetti or fettuccine in the future to soak up some of that good stuff!

Chicken with Mushroom Marsala Sauce
(adapted from Emeril Lagasse)
1/2 cup all-purpose flour
1 tablespoon creole seasoning
8 chicken breast tenders or 2 boneless, skinless chicken breasts, cut in halves and pounded thin
1 tablespoon olive oil
3 tablespoons butter, divided
12 ounce package of cremini mushrooms
3/4 cup Marsala Wine
3/4 cup chicken stock
Salt and freshly ground black pepper


DIRECTIONS
In a shallow plate, combine the flour and creole seasoning and stir to combine thoroughly. Quickly dredge the chicken in the seasoned flour mixture, shaking to remove any excess flour.

Heat olive oil in a large skillet over medium-high heat until hot. Add 1 tablespoon of the butter and cook the chicken breasts until golden brown on both sides, about 3 minutes per side.
Transfer to a plate and keep warm.

Add an additional tablespoon of butter to the pan and sauté the mushrooms. Cook, stirring frequently, until mushrooms are golden brown around the edges and have given off their liquid. Add the Marsala wine and bring to a boil, scraping to remove any browned bits from the bottom of the pan. When the wine has reduced by half, add the chicken stock and cook for 3 minutes, or until the sauce has thickened slightly. Stir in a tablespoon of butter. Lower the heat to medium and return the chicken breasts to the pan and continue to cook until they are cooked through and the sauce has thickened, about 5 to 6 minutes. Season with salt and pepper, to taste.

Garlic Roasted Broccoli
12 oz. bag of precut broccoli spears
2 tablespoons extra-virgin olive oil
2 large garlic cloves, peeled and crushed
1/2 teaspoon kosher salt
1/2 teaspoon crushed red pepper
1/4 teaspoon garlic salt
dash of pepper
Lemon wedges, for serving
1/4 cup grated parmesan cheese
cooking spray

DIRECTIONS
Preheat the oven to 450° and lightly spray a baking sheet with cooking spray. In a large bowl, toss the broccoli with the olive oil, garlic, salt, crushed red pepper, and garlic. Spread the broccoli on a baking sheet and roast in the upper third of the oven for about 20 minutes, stirring occasionally, until crisp-tender and browned in spots. Sprinkle with parmesan cheese & serve with lemon wedges.