Saturday, May 31, 2008

Strawberry Lemon German Pancake

One of my favorite childhood memories is the day my Father tried to make breakfast for the family. We had a very traditional household; Mom ruled the kitchen and Dad usually only entered to help clean dishes. I'm not even sure if he could tell you the difference between a spatula and a whisk. If you can only imagine, the outcome was a disaster. One pancake batch was burnt, the other underdone. My brother and I had many a laugh watching our Dad bumble around and delivering the flattest, ugliest pancakes you've ever seen to the breakfast table.

Though I'd consider myself fairly skilled in the kitchen, I've never been able to master fluffy perfectly uniform pancakes like these beauties from Recipe Girl. The talent has somehow eluded me, though perhaps it could be genetic? I've been tempted on more than one occasion and infomercial to buy the Perfect Pancake Maker, though my kitchen really can't handle one more kitchen gadget .

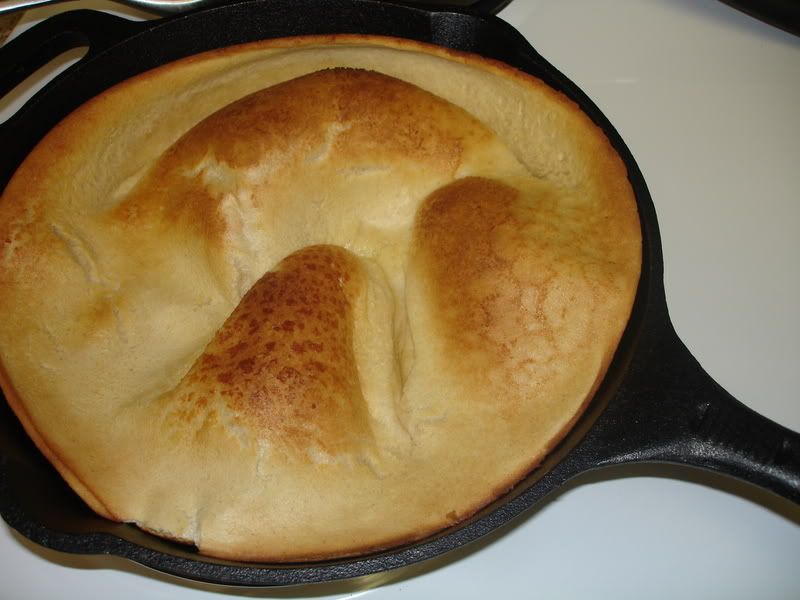
This morning, I had an "a-ha" moment and decided to make a German Pancake, a one "pot" wonder, that's sometimes also referred to as a Dutch Baby Pancake. No guesswork or constant pancake flipping needed here! The texture is a little different than a 'normal' pancake, as the German guy is a little more part crepe, part pancake. Having had these decadent babies in pancake houses, I was surprised at the ingredient list and the simplicity of the recipe. I found some tips on the Seattle News Food & Wine website and from there combined several recipes to create this delicious breakfast.

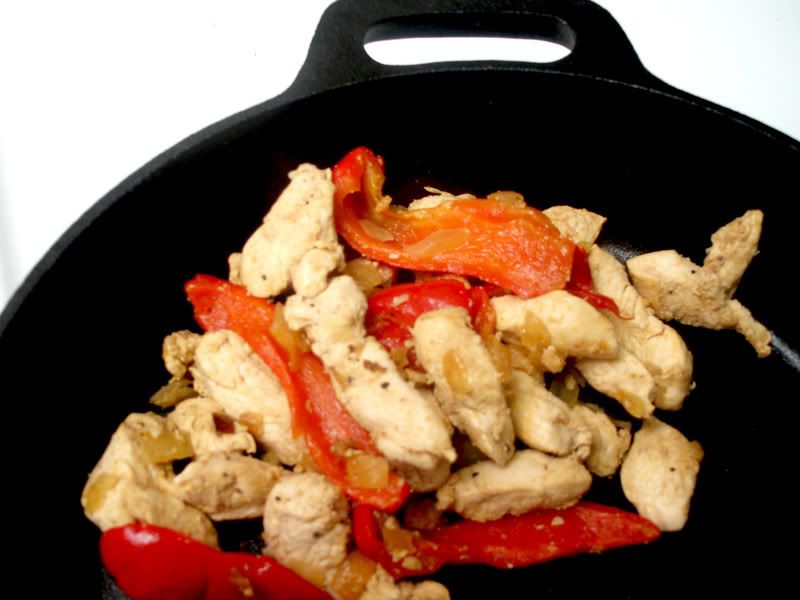
After the batter is combined in a blender, its placed in a hot cast iron skillet coated with melted butter.

The pancake is immediately placed back into the oven and allowed to baked until golden and puffs up quite beautifully:


After its pulled out of the oven, the pancake deflates a little and is ready for the topping of your choice. Since strawberries are in season here, I sprinkled ours with strawberries and some extra blackberries we had in the house. Feel free to substitute sauteed cinnamon apples, chocolate chips or raspberries. The pancake is slightly sweet and spiced with cinnamon and cardamom. Depending on how sweet you like yours, warm maple syrup drizzled atop the slices is absolutely divine.

Strawberry Lemon German Pancake
Adapted from King Arthur Flour recipes
2 tablespoons butter
1/2 cup all purpose flour
1/4 teaspoon salt
1/2 teaspoon ground cinnamon
1/8 teaspoon cardamom
1 tablespoon granulated sugar
1/2 cup milk
1 teaspoon vanilla extract
1/2 teaspoon lemon zest (optional)
2 large eggs
juice of half a lemon
2 tablespoons (1/2 ounce) confectioners’ sugar
maple syrup, optional

Quart of strawberries
1 teaspoon of sugar
spritz of lemon juice
Makes 4 servings for 4 normal people or 2 servings for ravenous couples (us)

Preheat the oven to 425°F.
Melt the butter in an 11-12" cast iron skillet. If you don't have a cast iron skillet, substitute an oven proof skillet. Place a pat of butter onto the skillet and place into the preheated oven.
In a blender, quickly combine the eggs until golden and frothy. Remove the blender cap and stream in milk, followed by the flour, salt, cinnamon, cardamom, sugar, milk, vanilla, and lemon zest until mixture is smooth.
Once butter is sizzling,remove from oven and with a potholder, swirl the butter around the pan to make sure its coated. Pour the batter into the pan and return to oven immediately. Bake the pancake for 18 to 20 minutes, or until it’s very puffy and golden.

While the pancake is baking, hull and slice strawberries into a bowl. Sprinkle strawberries with lemon juice and a teaspoon of sugar. Toss to combine.

Remove it from the oven, and sprinkle with the lemon juice, then the powdered sugar. Cut in squares, and serve immediately, garnished with the strawberries, or the topping of your choice. Drizzle with maple syrup.

Check out Nutriferia for a Berrylicious roundup.

Nutriferia badge

Wednesday, May 28, 2008

Labor of Love: Pulled Pork BBQ Sammies & Chicken Pasta Salad

Pulled Pork Sammie

I was a little bit of a precocious child. I'd find something and when I decided to like it, I LOVED it and took it upon myself to become an expert. One year, my obsession became dolphins - bottlenose, spotted, spinner- it didn't matter, I loved them all. I put my little heart into scouring through encyclopedias, books about dolphins, reading and learning just about everything my developing brain could soak in.

Hey, I even went through a dolphin fashion phase where I would wear dolphin earrings to match my dolphin t-shirt and socks (somehow I made it through these years with friends). Well at some point during my research, I read that dolphins were unfortunately being caught in nets by tuna fisherman. From that day forward, I swore I would never eat tuna. And I didn't...until I was in my 20s and decided I LOVED eating tuna, not studying them. Thankfully, I believe fishing practices have also improved.

I similarly decided as a child that I would not drink milk at the tender age of 3. Later in my childhood, I simply would not and could not eat a pig. That day, at the age of 8, I swore off pork. The tuna and the milk were not such a huge deal in my family. However, swearing off meat in a carnivorous family does not go over well. For many years, my Mom (being the saint she is) would have to make me my own "special" dish while the rest of the family dined on beef and pork. We'd go out for Pizza Hut and while the rest of the family shared a Meat Lovers pie, I'd have to get my own cheese pizza. Faces would sour when they saw my barren pizza; my parents would often wonder where I came from!

Fast forward to many years later: I'm no longer a picky eater in the least bit. I'll try anything once though the last time I said this I ended up eating chicken feet and feeling a tad bit ill.

As you'll notice, most of my posts and cooking concentrates on desserts (for obvious reasons), chicken/poultry and seafood. Even though I am no longer picky, old habits die hard and I have never been much of a meat eater. I had my very first bites of steak when I met my husband.

Hubby should probably hang out with my family more often since he's also quite a carnivore. He has been more than patient, altering his diet to accommodate mine so that we can share dishes at restaurants and I don't need to cook him anything "special" that I wouldn't enjoy myself. Though I will say that I'm less than skilled at cooking pork or beef, I've made a conscious effort to try it out from time to time to be fair to his tastes. While the rest of the world is moving towards a vegetarian diet, I'm bucking the trend. I'm a quasi-wannabe vegetarian trying to eat more meat!

Pulled pork is one of my favorite 'compromises' and this recipe is beyond easy. I usually save it for nights I know that I'll be working late or unable to make a fancy dinner. Lean pork tenderloin goes into the slow cooker with a magic tenderizing ingredient...Root Beer! The first time I used this recipe, I was a little skeptical, but it has tasted great every time. After several hours of slow roasting, add your favorite bbq sauce (Sweet Baby Rays is best in my opinion) and allow to cook on low for another hour. Voila, you have wonderful slow roasted pulled pork! If you have more time, consider serving these with cole slaw on the top. It's also delicious on the mini Hawaiian rolls you can purchase at most groceries.

This may be my shortest & easiest (& tastiest) recipe to date. (check out those superlatives!) J

Pulled Pork BBQ Sammies
2 pounds pork tenderloin, trimmed
salt & pepper
1(12 oz) can of root beer
sweet onion, cut into 5 rings ½” wide (reserve remainder of onion for other use)
1 bottle Sweet Baby Ray's BBQ Sauce (or your favorite)
toasted kaiser buns, makes about 6-8 sandwiches depending on bun size

1. Rub salt and pepper into pork tenderloin, to taste.
2. Cover the bottom of the slow cooker with sliced onion rings, about 4-6. Place pork tenderloin on top of onions in slow cooker. Pour root beer over the pork, cover and cook on low until tender, about 5-6 hours.
3. Remove pork from the slow cooker and shred with a fork and knife. Drain half of the juice from the slow cooker and save onions in the juice.
4. Add pork back to slow cooker and pour bbq sauce over pork. Eyeball the amount to use based on how saucy you would like your pulled pork. Combine well and cook on low for an additional hour. Serve on toasted kaiser buns.

Chicken & Pasta Salad
adapted from Cooking Light
1 1/2 cups chopped red,yellow and orange bell pepper
1/2 cup frozen green peas, thawed
3/4 cup plain fat-free yogurt
1/3 cup chopped onion
1/4 cup light mayonnaise
2 teaspoons prepared mustard
1/2 teaspoon celery seeds
1/4 teaspoon salt
1/4 teaspoon pepper
2 cups chopped cooked chicken breast (about 1 pound)
1 cup cooked tri color rotini pasta
1/2 cup shredded cheddar cheese

1. Combine the first 9 ingredients in a medium bowl. Add the chopped cooked chicken, cooked pasta,and cheese and toss mixture well. Cover salad and chill 1 hour.


Print out the recipe here:

Slow Cooker BBQ Pulled Pork

An easy and tasty way to make pulled pork. Perfect ...

See Slow Cooker BBQ Pulled Pork on Key Ingredient.

Monday, May 26, 2008

Peanut Butter Chocolate Chip Biscotti

Though I would have preferred to spend my weekend toasting in the sun, it seems that the weather never cooperates when needed. I'm sure the sunshine will make a triumphant return when I return to work in a windowless office. Figures. Well, welcome back to all that were away. I hope your journey into catching up on Google Reader posts has been as fun & entertaining as mine. Y'all were cooking away while I was gone!

After spending a rather chilly weekend in Scottsdale, we returned home to some similar cloudy, temperate weather. Isn't the saying, "If life hands you lemons, make lemonade?" Well, since the house is still rather cool & I'm no longer terrified of making biscotti, I decided that if I couldn't frolic in the sun, I'd spend some time baking a relatively healthy yet sinful treat for an after dinner treat.

Unlike other biscotti recipes I have made, this one uses reduced fat peanut butter as the main source of fat - no butter here. Similar to the others, a dry dough is rolled into a log and twice baked to result in a crunchy cookie wonderful with a cup of coffee or tea.

Biscotti Log after first bake:

After a cut & second bake, the biscotti are ready to eat!
Peanut Butter Chocolate Chip Biscotti
Adapted from One Smart Cookie
Yield: about 16 biscotti, depending on desired thickness

2 cups all purpose flour (can substitute 1 cup all purpose, 1 cup whole wheat)
1 teaspoon baking powder
1 /2 teaspoon baking soda
1/4 teaspoon salt
1/2 cup reduced fat peanut butter
1/2 cup sugar
1/2 cup packed golden brown sugar
1 large egg
2 large egg whites
2 teaspoon vanilla
1/4 - 1/2 cup of mini chocolate chips

1. Preheat oven to 350 degrees

2. In a medium bowl, combine flour, baking powder, baking soda and salt.

3. In a large mixing bowl, beat peanut butter, sugar, brown sugar, egg & egg whites, and vanilla until well combined and smooth. Add flour mixture and mini chips. Stir by hand until just combined. The dough will seem very dry and it'll work best to use your hands to combine.

4. Turn the dough out onto a lightly floured surface, divide in half. Shape each into an 8" log. Place the logs 2-3" apart on a cookie sheet that has been sprayed with nonstick spray. Flatten each log into a rectangle about 3" wide.

5. Bake for 25-30 minutes, until firm and cracking on top. Place on a wire rack to cool for 15 minutes. Meanwhile, reduce oven temperature to 275.

6. Place logs on cutting board, and cut each diagonally into 1/2 - 3/4 inch thick slices, using a serrated knife. Place biscotti cut side down onto the cookie sheet and return to oven for 20 minutes. Flip biscotti over and bake for an additional 20 minutes. Transfer to a wire rack to cool.

Wednesday, May 21, 2008

Brown Sugar Banana Apple Monkey Bars

Whew. That's a mouthful of a name!

Brown Sugar Banana Apple Monkey BarsBecause our house has recently reached heatstroke inducing levels, I've shied away from the oven for the past week or so. Cooking has also been a chore. Last night, it got so hot in the kitchen I had to shower after making dinner. I don't know how chefs do it. What if I were a TV chef and after every take they had to towel me off? I'm sure I'd be canceled in no time. The last thing anyone needs to see is a sweaty chef.

Monkey BarsThankfully, its finally cooled off a bit, so in a fit of baking withdrawal I instantly consulted my ever burgeoning recipe collection to find something that didn't require a lot of baking time. Monkey bars? What are those? Good question. It seems that monkey bars are a cross between a banana cake and a banana bar. Not as fluffy as a cake, but not as dense as a typical bar. They're also part dessert, part snack, maybe even part breakfast. Are the monkeys suffering from an identity crisis?
Monkey Bars
I combined a few recipes to result in a light cake-type treat that is full on brown sugar sweetness accented by cinnamon, caramelized apples, rum soaked raisins and ripe bananas. Applesauce and yogurt provide moisture to lower the amount of fat used. Finally, a dusting of powdered sugar provides the final touch. These were delicious and very light. So light, that it's hard to eat just one!

Since I technically used 3 fruits here (bananas, apples, raisins) I'm submitting this recipe to Cate from Sweetnicks ARF/ 5-a-day Tuesday roundup.

Brown Sugar Banana Apple Monkey Bars
Adapted from Cooking Light

Ingredients
1/2 cup raisins
1 1/2 tablespoons banana rum (can substitute with dark rum or apple juice)
1/2 large apple, cut into 1/2 inch pieces
1 tablespoon brown sugar
pat of butter

batter recipe:
1 cup all-purpose flour
1/2 teaspoon baking powder
1/2 teaspoon baking soda
1/4 teaspoon salt
1/4 teaspoon ground cinnamon
3/4 cup packed light brown sugar
3 tablespoons butter, softened
2 medium bananas, mashed ripe
3 tablespoons plain yogurt
1 teaspoon vanilla extract
2 large egg whites
1 tablespoon unsweetened applesauce

Cooking spray
1 tablespoon powdered sugar

Preheat oven to 350°.
Combine the raisins and rum in a microwave-safe bowl. Microwave at high for 1 minute, and set aside to cool.

In a small nonstick saucepan, melt a pat of butter over medium heat. Add brown sugar and allow to heat for 2 minutes or until bubbling. Add apples and saute until golden brown and tender, about 4 minutes. Add apples to raisins and allow to cool.

Combine flour and the next 4 ingredients (flour through cinnamon) in a medium bowl, stirring well with a whisk. Set aside.

Combine 3/4 cup brown sugar and 3 tablespoons butter in a large bowl, and beat with a mixer at medium speed until well blended. Add banana, yogurt, vanilla, egg whites and applesauce, beating well. Add the flour mixture, beating just until combined. Stir in raisin apple mixture.

Spread the batter into an 8-inch square baking pan coated with cooking spray. Bake at 350° for 30 minutes or until golden. Cool the bars completely on a wire rack. Sprinkle with powdered sugar once cool.

Monday, May 19, 2008

Last of the Limes: Chicken Fajita Marinade

Courtesy of LibraryMan from FlickrAnd Then There Were None! (always one of my favorite Agatha Christie books...) After going on a lime blitz, I nearly reached the end of my lime stockpile and successfully made Cilantro Lime Hummus, Coconut Cilantro Rice, and Fish Tacos.With some leftover tortillas from the fish tacos and just one lime left I decided to make one of my favorite Mexican dishes: Chicken Fajitas.

It's Monday, so I'm at a loss for words, but I can tell you these were so good. So yummy in fact that we ate so much we polished off all the tortillas so I can only show you the picture of the chicken/veggie combo. I'd imagine if you'd like to make this vegetarian, you could omit the meat. Similarly, shrimp or beef would work well.

Ok, off to go let my brain rest. Too much fun in one weekend. I promise I'll have more interesting anecdotes later in the week!

Chicken FajitasChicken Fajita Marinade
2 tablespoons lime juice
2 tablespoons chicken broth
1 tablespoon olive oil
2 cloves garlic, crushed
1 teaspoon soy sauce
1/2 teaspoon salt
1/4 cup balsamic vinegar
1/8 teaspoon cayenne pepper (add more depending on heat level desired)
1/4 teaspoon ground black pepper
1 lb boneless, skinless chicken breasts, cut into strips
1/2 large red bell pepper, seeded and cut into long strips
1/2 onion, chopped

2 tsp olive oil for sauteing

1. In a large Ziploc bag, mix together all ingredients (from lime juice to chicken).
2. Place chicken in the marinade, and refrigerate at least 2 hours, or overnight.
3. Heat oil in a large nonstick skillet over high heat. Add red peppers and onions. Saute for approximately 3 minutes or until vegetables start to become tender (I cooked the onions for longer to create a caramelized effect). Add chicken strips and saute until browned, approximately 5 minutes.
4. Remove from heat and serve with desired accompaniments (i.e. cilantro, salsa, avocado, lettuce, sour cream, etc.)

Wednesday, May 14, 2008

Tourist Fun and some (Healthy) Breaded Fish Tacos

With hubby's busy grad school schedule, we certainly don't get to clown around on the weekends as much as we used to. Our usual weekend itinerary goes a little like this... hubby's locked away in the office, head in the books...I, on the other hand spend my Saturdays out in the sun by the pool. Poor guy.

Well, last weekend we were lucky to have a sunny day to spend some time together doing fun touristy things around "America's Finest City" (San Diego, for those of you wondering). We spent the early afternoon enjoying margaaritas from the ocean view deck of the Hotel Del Coronado, soaking up the sunshine...and walking around the beautiful Coronado Island beaches.

During a nice, long stroll we proceeded to find the house of our dreams on the beach. Now, I just need to win the lottery. If you own this house, please call me. I'd be happy to be your maid.

After a rough afternoon of drinks and walks along the beach, we headed to the Gaslamp district to sip even more margaritas and grab a late lunch on an outdoor patio basking in the sun. We happened upon a somewhat cheesy Mexican joint, though it fit the bill since we were both in the mood for tacos.

By default, I always order fish tacos. I'm on a little bit of a San Diego area-wide fish taco taste test quest. You see, they're somewhat of a staple here. While Chicago has its Italian Beef and deep dish pizza, San Diego has amazing fish tacos.

While the fish tacos were tasty and satiated my craving, I thought back on my days in the Midwest where I'd cook fish tacos all the time. They didn't appear on many menus, and if they did, it was usually at a bar - not really the freshest source of fish in my opinion. It became my signature dish, seeing as they were a rare commodity. Once we moved to San Diego, we've had so much fun on our fish taco taste testing that my beloved taco recipe has fallen to the wayside.

So, today I bring you Part 2 of my Limes series: (Healthy) breaded fish tacos. I put healthy in parentheses because though these are not deep fried, its still hard to imagine anything breaded as healthy.

This is a dish I've been making for many years now, way before I realized fish tacos were somewhat trendy. (Gosh, I'm such a culinary pioneer.) Since I've been making these for years, documenting the exact recipe is a little tricky though I think this comes close. Traditionally, San Diego fish tacos are served on a charred corn tortilla with crispy fish draped in a smooth mayo-based sauce. To lighten things up, I substitute the mayo sauce with fresh pico de gallo, corn kernels and a few spinach leaves to add a smidgen more vitamins.

The fish are coated in a cornmeal breading and lightly pan fried with nothing but nonstick cooking spray. For the breading, I would highly suggest Andy's fish breading. It may not be available in all areas, but its by far the best I've tried. It lends a crispy coating without deep frying, and is seasoned to perfection. If you can't find it (look around the seafood counter), I suppose that another cornmeal-based breading would work.

Andy's Crusted Fish Tacos
Juice of one lime
1 pound of tilapia (or mahi mahi), cut into 1/4 inch chunks
dash of salt and pepper
1/2 teaspoon of garlic powder
2 egg whites
1 tbsp milk
1/2 cup of Andy's Fish Breading
4-6 flour or corn tortillas, warm
1 tablespoon cilantro, roughly chopped
1/2 cup of chopped spinach or cabbage
Assorted veggies (i.e. corn kernels, avocado slices)

Pico de Gallo
Courtesy of Rachael Ray
1 large tomato, cored, seeded, and coarsely chopped
1 white onion, coarsely chopped
2 limes, juiced
1/4 cup chopped cilantro
Salt and freshly ground black pepper

For pico de gallo, mix ingredients together and season, to taste, with salt and pepper.

Fish Tacos:
1. Sprinkle fish with lime juice, salt and pepper to taste.
2. Setup breading station:
-In a medium bowl, whisk together garlic powder, egg white and milk. Place fish pieces into egg mixture.
-On a flat, shallow dish, sprinkle a thin layer of fish breading. Pour additional breading as needed.
3. Dredge fish chunks into cornmeal breading, several pieces at a time making sure that the fish are not covered in excess egg. Set the prepared fish aside.
4. Heat a nonstick skillet over medium heat. Spray liberally with nonstick spray. Pan fry fish one layer at a time.
5. Serve tacos with lime wedges, pico de gallo, cilantro and spinach or cabbage.

Enjoy with a tasty margarita!

Tuesday, May 13, 2008

Aww, shucks! Thanks!

Thanks to Bridgett over at La Bella Cook for giving me the "I Love You This Much" Blog Award, which I must say, is one of the cutest I've seen. Doesn't it make you smile?

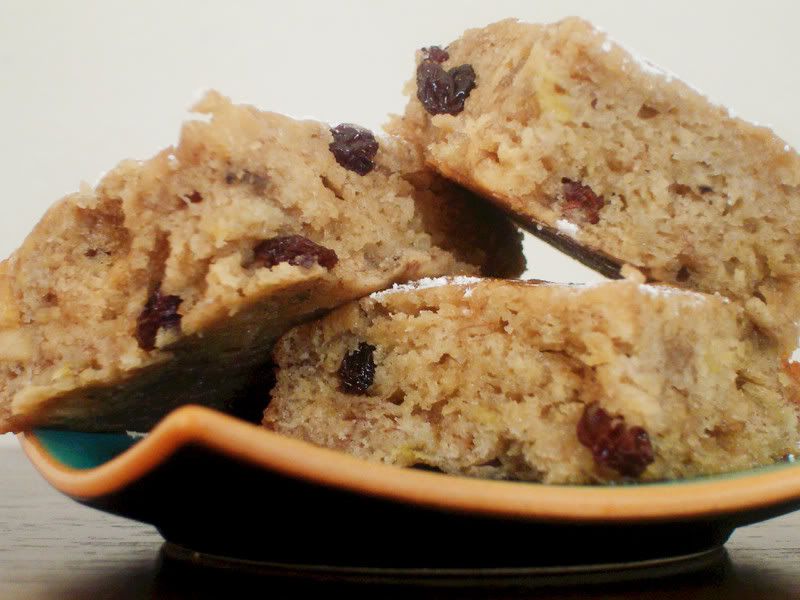
Bridgett has a fabulous blog with beautiful pictures that make me want to pack my bags and head on over to Italy for a month. Since that's sadly not feasible right now, I may just show up at her doorstep and have her bake me the delicious red velvet cake she posted. Go visit her & you won't be disappointed!

Like many others, I started this blog as a little project, mainly to help me keep track of my culinary experiments and serve as a virtual cookbook. I'm a little forgetful at times so what could be more helpful than posting my dishes on the web for the whole world to see? I wasn't sure who would read my blog, but I thank all my readers and visitors for coming by and offering comments. It really does make my day!

Though I'd really like to send this award along to all the blogs listed on my link list, I suppose that'd take awhile. I'm sharing this award with three blogs that I've been following for awhile and greatly enjoy:
  • Paws and Pours combines a little of all the good things in life: food, wine, dogs. I don't have a dog right now (though desparately want one), so reading about Chase is a nice way to live vicariously.
  • Adventures of an Amateur Foodie, based in San Diego, tempts me with not only yummy recipes but local restaurant reviews that remind me I need to branch out and go try something new!

Both of these blogs provide a wide variety of delicious recipes that I'm constantly bookmarking. My to-try list is way too long... Lastly,

  • My Life in Transition, while not a food blog, is full of fun, laughter and life. Julia's uber-creativity inspires me to one day be creative. I just haven't gotten there yet. Seriously, this woman is amazing and cracks me up with every post.

Thanks again, Bridgett! :)

Monday, May 12, 2008

Gooey Delights - Cinnamon Rolls with Cream Cheese Glaze

I'm interrupting my previously scheduled "recipes with lime" series to tempt you (and myself) out of any previously scheduled diets. Yikes, I'm a nasty one.

In honor of my wonderful Mother who absolutely loves cinnamon rolls, I made these gooey & tasty treats for hubby and me on Mother's Day. Since my Mom couldn't actually fly out to join our glutton fest, I called her to wish her a Happy Mother's Day, and also tell her about my creation - I wasn't sure if she appreciated that or was just jealous. Sorry, Mom. I promise I'll make you some soon.

Though I'm not yeast phobic, baking with yeast is always a little bit of a gamble. My last kitchen disaster happened when I tried to make last minute dinner rolls and ran out of flour midway through the process. I still got a rise out of my rolls, but they were odd-tasting to say the least. Luckily, this attempt was much more successful.

Planning ahead this go around, I prepared the dough the night before and used the correct amount of flour. Genius, huh? After using my trusty Kitchen-Aid stand mixer to do the brunt of the work, I allowed the dough to rise (crossing my fingers the entire time) and then proceeded to roll out the dough, fill and cut like a madwoman who needed cinnamon rolls to survive.

Because I like things to be decadent if I'm going to splurge, I increased the amount of brown sugar in the cinnamon filling mixture to 1 cup. When sprinkling on the dough, it seems like an awful lot, but trust me, it's delicious and worth it. Plus, a little bit tends to fall out during the assembly process, and I want all the gooey goodness I can get. If you're so inclined, you could also add raisins or nuts to the filling and thus incorporate some vitamins into an otherwise non-nutritious meal. After rolling (be sure to make it tight!) and cutting the rolls, I covered the beauties with plastic wrap and let them sit in the fridge overnight.

Fast forward to Sunday morning, I woke up when the sunlight peeked through our blinds and and pulled the buns out. I promptly went back to sleep to give those guys a chance to rise again. Though they only need about 45 minutes for the final rise, mine had a chance to rise for 2 hours thanks to my sleepiness.

Into the oven they went:

...we were almost immediately rewarded with wafting scents of cinnamon. Luckily, we only had to wait about 16 more minutes to dive in. Yum!
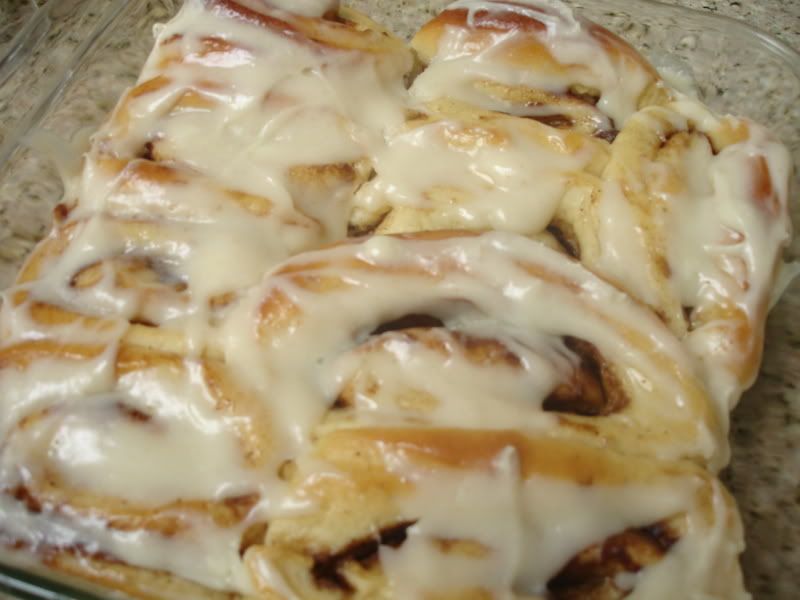

**If you're visiting via Google Reader, please click on the original post to see my site makeover. Thanks to Julie from LeeLou Blogs who was a great help!!

Cinnamon Rolls with Cream Cheese Glaze
Courtesy of Molly Wizenberg on Epicurious

Dough:
1 cup whole milk (I used skim milk)
3 tablespoons unsalted butter
3 1/2 cups (or more) unbleached all purpose flour, divided
1/2 cup sugar
1 large egg
2 1/4 teaspoons rapid-rise yeast
1 teaspoon salt
Nonstick vegetable oil spray
Filling:
3/4 cup (packed) golden brown sugar (I used 1 cup)
2 tablespoons ground cinnamon
1/4 cup (1/2 stick) unsalted butter, room temperature
(add in raisins or nuts, if you choose)
Glaze:
4 ounces cream cheese, room temperature
1 cup powdered sugar
1/4 cup (1/2 stick) unsalted butter, room temperature
1/2 teaspoon vanilla extract

Preparation
For dough:
Combine milk and butter in glass measuring cup. Microwave on high until butter melts and mixture is just warmed to 120°F to 130°F, 30 to 45 seconds. Pour into bowl of stand mixer fitted with paddle attachment. Add 1 cup flour, sugar, egg, yeast, and salt. Beat on low speed 3 minutes, stopping occasionally to scrape down sides of bowl. Add 21/2 cups flour. Beat on low until flour is absorbed and dough is sticky, scraping down sides of bowl. If dough is very sticky, add more flour by tablespoonfuls until dough begins to form ball and pulls away from sides of bowl. Turn dough out onto lightly floured work surface. Knead until smooth and elastic, adding more flour if sticky, about 8 minutes. Form into ball.

Lightly oil large bowl with nonstick spray. Transfer dough to bowl, turning to coat. Cover bowl with plastic wrap, then kitchen towel. Let dough rise in warm draft-free area until doubled in volume, about 2 hours.

For filling:
Mix brown sugar and cinnamon in medium bowl.
Punch down dough. Transfer to floured work surface. Roll out to 15x11-inch rectangle. Spread butter over dough, leaving 1/2-inch border. Sprinkle cinnamon sugar evenly over butter. Starting at 1 long side, roll dough into log, pinching gently to keep it rolled up. With seam side down, cut dough crosswise with thin sharp knife into 18 equal slices (each about 1/2 to 3/4 inch wide).

Spray two 9-inch square glass baking dishes with nonstick spray. Divide rolls between baking dishes, arranging cut side up (there will be almost no space between rolls). Cover baking dishes with plastic wrap, then kitchen towel. If making ahead, refrigerate dough overnight. Let dough rise in warm draft-free area until almost doubled in volume, 40 to 45 minutes.

Position rack in center of oven and preheat to 375°F. Bake rolls until tops are golden, about 16 -20 minutes. Remove from oven and invert immediately onto rack. Cool 10 minutes. Turn rolls right side up.

For glaze:
Combine cream cheese, powdered sugar, butter, and vanilla in medium bowl. Using electric mixer, beat until smooth. Spread glaze on rolls. Serve warm or at room temperature.

Kitchen Notes:
  • Use high quality cinnamon...you won't regret it. Penzeys Spices has some good ones to choose from.
  • Be sure to roll the dough very tightly to keep the rolls uniform and to prevent precious filling from falling out
  • If you're not the type to wake up at 6am to have these rolls ready by brunch, prepare the dough overnight. After assembling, cover the pans with saran wrap and store in the refrigerator. Remove in the morning and allow to rise for 45 minutes - 1 hour before baking
  • Not sure what to do with two batches of cinnamon rolls? Besides making some new friends at the office, freeze an already baked batch and save for a future treat. When ready to enjoy, microwave or bake in the toaster oven.
  • If you're really feeling indulgent or you love icing, double the icing recipe!

Thursday, May 8, 2008

Here's the Hummus. Lime Series Part 1

Reading Cathy's "No Excuses" post this morning reminded me that I've been on a diet, starting tomorrow, for quite some time now (PS check out her pictures, they're fabulous). While training for the half marathon, I was ravenous at all hours of the day as I was burning so many calories and loving every moment. It was like high school all over again - the glory days of eating with immunity. Seriously, I used to eat an ice cream sundae for lunch.

Well, after the race, my appetite has remained that of a teenage boy, though unfortunately I'm not running anymore, taking a much needed break from strenuous exercise to give my knees a vacation. So at this point, I'm pretty much on an anti-diet: carb loading for the race that isn't to come. Yikes! So, in honor of my diet starting tomorrow, I'm bringing you a healthy, wholesome treat.

Today's recipe is courtesy of a truly humorous food blog, Urban Drivel. The hummus is lower in fat, but loaded with the 'good fats' & it uses my favorite ingredient of the moment: limes. I've become obsessed of late with using limes in my cooking. I realize limes are not an earth shattering ingredient and cooks everywhere have been enjoying their zesty taste for quite some time now. I"m not sure why they haven't joined my repertoire sooner, but because I'm a little OCD, I'm on a lime kick & the next couple of recipes will all use my star ingredient.

This Cilantro Lime Hummus is amazing. I pretty much stuck to the original recipe, though taking a cue from my friends at CLBB, I used the chickpea juice instead of water and also used a tad more garlic. Check out the original recipe here.
Low Fat Cilantro Lime Hummus
Adapted from Urban Drivel
1 (15 oz) can chickpeas drained and rinsed. Reserve juice.
juice of one lime
zest of one lime
1/2 bunch cilantro, chopped
2 Tablespoons tahini paste
2 teaspoons extra virgin olive oil
3/4 tsp salt
1 small garlic clove, minced

1. Process the garlic in the food processor until chopped. Add chickpeas, lime juice, lime zest, cilantro, tahini, 2 tsp of the oil, salt and garlic together in the food processor. Pulse 2-3 times. Add reserved juice from chickpeas until hummus reaches desired consistency (about 6 tablespoons). Process until very smooth, stopping to scrape down the sides of the bowl with a rubber spatula as needed.

2. Transfer the hummus to a serving bowl; cover with plastic wrap and refrigerate until the flavors meld, about 30 minutes. (The hummus covered can be refrigerated for up to 2 days. Bring to room temperature and season with additional lemon juice, salt, and cayenne as needed before serving).

Tuesday, May 6, 2008

You Want What for Dinner?!

...spaghetti & meatballs of course.

You see, I have a bad habit of pestering hubby about helping me come up with dinner ideas. I say 'pester' because with as much time as I spend perusing cooking blogs and participating on boards, I really shouldn't need too much of hubby's input for dinner ideas. Though it is nice from time to time, the poor man couldn't pick out leeks and rhubarb from shallots in a lineup.

So, after a particularly stressful day and an inability to think straight, I forced hubby to come up with our Sunday dinner and of all things, he chose homemade spaghetti and meatballs. Though this would probably be the last thing I order in an Italian restaurant, I couldn't scoff at the idea and come off as the crazy wife who requests opinions but doesn't like any of them. Well, actually I suppose this happens all the time, but who's keeping track?

Spaghetti & MeatballsFor hubby, spaghetti & meatballs reek of nostalgia - family dinners and quality homemade food with fresh ingredients. For me, I think of $5.99 all-you-can-eat church spaghetti dinners. Growing up in an Asian household, I get nostalgic over things like nasi goreng, lemper ayam, and kue lapis. Dishes like spaghetti & meatballs usually came from Mr. Chef Boyardee, a sauce packet or the local Pasta House. Nonetheless, I forged on and began my search for a true, hearty & homemade recipe.

I wasn't quite sure where to start but as usual, a simple Google search resulted in a bevy of delectable recipes from fellow food bloggers. After reading through a few, I chose Chelley's spaghetti sauce from Sugar and Spice since I had over-zealously plucked my basil plant and needed to use dried basil. Then, knowing how much hubby likes Italian sausage, I found Elise's meatball recipe from Simply Recipes that uses both ground beef and Italian pork sausage. Plain breadcrumbs are used in the original recipe, but I tried Italian style breadcrumbs to give the meatballs an extra flavor kick.

Like many wonderful things in life, good things come to those who wait. Though we live in an instant gratification society, this homemade sauce is best when simmered all day, or at the very least a few hours. You'll be rewarded with tempting aromas wafting through your house and a sauce that is so much better than any kind you could buy in the store. Since I was at first skeptical, but certainly won over by this recipe, I'm submitting it to this week's Presto Pasta night.

While not the most sophisticated of dishes, homemade spaghetti & meatballs is ultimate comfort food. Sorry, Chef Boyardee.

Homemade Spaghetti Sauce
adapted from Sugar & Spice

2 Tablespoons olive oil
1 large sweet onion, chopped
4 cloves garlic, chopped
1 28-oz. can tomato puree
1 28-oz. can tomato sauce
2 ½ teaspoons dried parsley
1/2 teaspoon dried basil
Water from rinsing extra sauce and puree from inside of cans
2 teaspoons salt
2 Tablespoons sugar
1/2 teaspoon ground black pepper
1 bay leaf

1. Saute onion and garlic in olive oil over medium-low heat until onion is tender.
2. Add tomato sauce, tomato puree, parsley, basil, water, salt, sugar, pepper and bay leaf.
3. Stir and lower heat to a slow simmer. The sauce is best when simmered for at least 2 hours. Remove bay leaf before serving

Italian Meatballs
(adapted from Simply Recipes)

1 lb ground beef
½ lb fresh sweet(mild)Italian pork sausage, casings removed
2 Tablespoons finely chopped basil (I used 2 tsp dried basil)
2 Tablespoons finely chopped fresh Italian parsley
½ cup finely chopped crimini brown mushrooms
2 eggs, lightly beaten
¾ cup Italian style bread crumbs
¼ cup grated Parmesan cheese
1 ½ teaspoons Kosher salt
2 teaspoons fresh ground black pepper
1 Tbsp olive oil

1. Prepare the meatballs. Mix by hand in a large bowl beef, Italian sausage, basil, parsley, mushrooms, eggs, breadcrumbs, Parmesan cheese, salt, and pepper until well mixed. Use small melon baller, or teaspoons to form 1-inch round meat balls. Roll and compress into tight balls. (We made ours a little larger).

2. Heat frying pan over high heat and add olive oil. Sear and brown meat balls on all sides, about 2-5 minutes depending on size of meatballs. You may need to brown two batches of the meatballs. Do not crowd the pan by stacking the meatballs. Cook in a single layer and do not over-cook as these will simmer with the sauce.

3. Add meatballs to spaghetti sauce, and gently stir. Simmer sauce and meatballs for 30-45 minutes, stirring occasionally.

Monday, May 5, 2008

Bored, much?

I spent the weekend in Kansas City to celebrate my older brother's birthday. Though he and his friends are anywhere from 3.5 - 7 years older than me, they seriously know how to PARTY. After several days of drinking and eating to excess, I'm absolutely pooped today and struggle to keep one eye open. I do have some fun recipes and stories to share - especially one of trying to cook a birthday dessert in a bachelor's apartment. Available ingredients: think old spaghetti sauce, stale chips and moldy cheese....sounds like a bachelor cliche, but I have photographic evidence.

In the meantime, I've seen a couple of these Flickr searches and was inspired by Sweets By Sarah's post. This saves me from trying to write in complete sentences as well. Enjoy!

The rules are simple:
1. Go to http://www.flickr.com/.
2. Type your answer to each question in the “search” box.
3. Using only the first page, pick an image.
4. Copy and paste the picture into your blog.


  1. What is your first name?


  2. What is your favorite food?

    Particularly appropriate since it's 'fake' sushi made from rice krispy treats. Rice krispy treats & sushi are my favorite foods

  3. What high school did you go to?


  4. What is your favorite color?


  5. Who is your celebrity crush?


  6. What is your favorite drink?


  7. What is your dream vacation?


  8. What is your favorite dessert?


  9. What do you want to be when your grow up?


  10. What do you love most in life?


  11. What is one word to describe you?