Showing posts with label baking. Show all posts

Monday, February 7, 2011

You Heard Me, It's a Belgian Chocolate Giveaway!

Though I haven't actually filled it out myself, the creepy snoop in me loves perusing through the "info" section of people's Facebook profiles.  The other day, I came across a friend who I hadn't spoken to in probably 20 years.  If you haven't spoken to someone in that long, are they still considered a friend?  In any case, she listed a "things I love" section which really made me smile and wonder what I'd put on my own list.

...white wine in the summer, hot chocolate in the winter...wagging doggie tails and running to the dog park...laughing until my stomach hurts...girls weekends and slow weekends with hubby.  giggling babies... ice cream and cake.  Cake and chocolate. ...Chocolate.
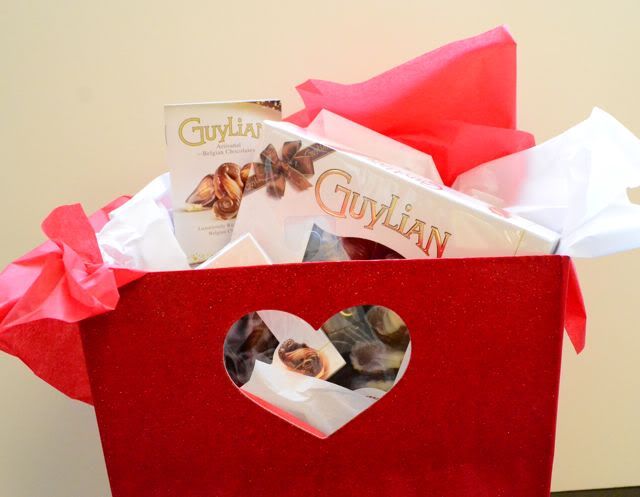

Guylian Chocolates
My very unscientific hypothesis states that a majority of you ladies and gentlemen may put chocolate right up there on your list as well.  And if chocolate makes you happy, it's chocolate that I'll give you! Details on the Guylian Belgian Chocolates giveaway at the end of this post.

Meanwhile, I have a great non-chocolate dessert recipe to share.  I'm aiming for sugar overload here, folks.
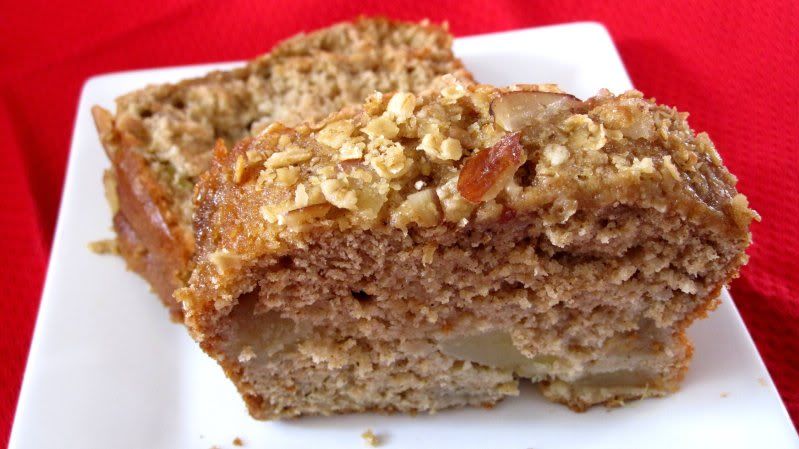
Apple Pie Bread
Confession time: I have never made any type of fruit pie...not cherry pie, not apple pie, not even the God of all pies: key lime pie.   Something about making homemade pie crust and pastries just thoroughly intimidates me.  Add it to the cooking bucket list, I suppose.  Well, if you're like me and love apple pie but are also dreadfully lazy, this quick bread recipe just might fit the bill.  It's filled with the good things in life - cinnamon, gooey apples and a nice nutty crunch without all the hassle.  If you have a great apple pie recipe that is delicious and not too time consuming to make, please send my way!


Apple Pie Bread
3 cups flour
1/2 teaspoon salt
1 teaspoon baking soda
1/2 teaspoon baking powder
1/2 teaspoon ground cinnamon
2 teaspoons apple pie spice
4 eggs, beaten
1 21 oz can apple pie filling
1 cup apple sauce
3/4 cup packed brown sugar (divided)
2/3 cup canola oil
1/2 cup sliced almonds

Preheat oven to 350 degrees.  Grease and flour two loaf pans.

1. In a large bowl combine flour, salt, baking soda, baking powder, cinnamon and apple pie spice.  In a separate bowl, combine eggs, apple pie filling, apple sauce, 1/2 c. brown sugar and canola oil.  Add egg mixture slowly to eggs, stirring until just combined.

2. Divide batter evenly among pans.  Top each loaf with remaining brown sugar and almonds.

3.  Bake for 55 minutes or until a toothpick inserted in the center comes out clean.  Cool in pans on a wire rack.

-------------------------------------------------------------------------------------------------------------

And now on to the good stuff.  The fine folks at Guylian Chocolates have graciously offered to send one of my awesome readers a Valentine's gift basket of chocolates. They sent me some chocolates to sample, and I must tell you that this stuff is divine.  Just think about this...chocolate seashells with milk, dark and white Belgian Chocolate filled with rich, decadent creamy chocolate praline truffle. um,YEA. Seriously.  If you don't have a Valentine's day gift yet, here's your chance.  Or...if you're selfish like me, you can just keep the chocolates to yourself :)
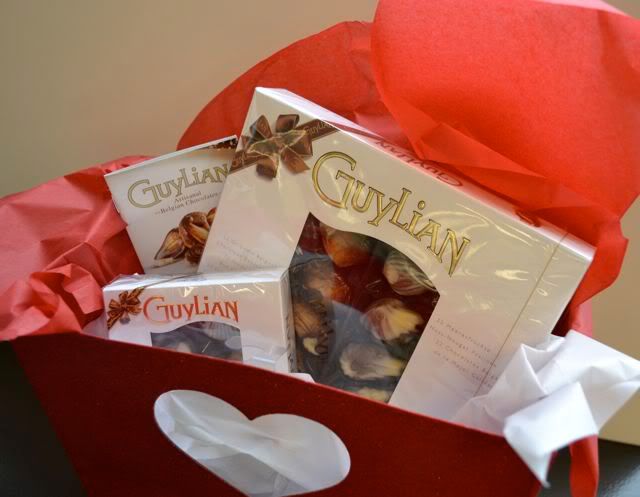
Guylian Chocolates

Giveaway: Guylian Belgian Chocolates!

Starts today and ends Friday, February 11 at midnight (EST). Winner will be chosen at random through random.org

To enter into the giveaway:
Leave a comment letting me know what truly makes you happy or list your favorite chocolate dessert

Additional Entries can be earned by:
1. Tweeting about this post: Guylian Belgian Chocolate Giveaway http://bit.ly/gdVimS @newlywedcook Please RT!

2. Follow @newlywedcook on Twitter, then come back to this page and leave a separate comment telling me you did so. (if you already follow, let me know, that counts!)

3.  Share a link to this post via Facebook or email and leave a separate comment telling me you did so.

Wednesday, November 10, 2010

Cherry Pie Pecan Bars

I admit it. I cut coupons...AND I think its fun. Some habits die hard and while growing up my Mom and I would sit on the couch on Sundays and go through the ads and coupons. In my grade school days, I think finding a coupon acted as leverage and a perfect excuse to convince my mom that it was a good idea to buy the latest junk food or kid-geared snack. To this day, I must say I still enjoy this activity though I must also admit I probably only use 1- 2% of the coupons I so diligently cut out, save and file.  It's the effort that counts!

Cherry Pie Bars

Last Sunday I saw a recipe for Cherry Pie Pecan Bars in the coupons section. I am not a fan of cherry pie, and I don't like pecans but the recipe reminded me that Lucky Leaf had sent me a few samples of their pie fillings.  Since I don't make pies very often, this recipe seemed just about perfect.  Um, except for the stick or so of butter that I was missing!  I subbed apple butter for quite a bit of butter so I had no idea how these would turn out.

Maybe I just thought I didn't like cherry pie, because this dessert was one of my favorites in a long time. I can't say the apple butter substitution made these all that healthy, but just like my coupon cutting, it's the effort, right?

Cherry Pie Pecan Bars
Adapted from Lucky Leaf recipe

2 cups all purpose flour
2 cups uncooked quick cooking oats
1 1/2 cups granulated sugar
13 tablespoons butter
7 tablespoons apple butter
1/2 cup chopped pecans
1 tsp baking soda
1 21 oz can cherry pie filling
1 cup minature marshmallows

1.  Preheat oven to 350 degrees.  Combine all ingredients except pie filling and marshmallows in a large mixing bowl.  Beat at low speed, scraping bowl often until mixture resembles coarse crumbs.

2. Reserve 1 1/2 cups of the crumb mixture for the topping.  Press remaining mixture into ungreased 13x9 inch baking pan.  Bake for 12-15 minutes or until lightly browned.  Gently spoon pie filling over hot crust.  Sprinkle with marshmallows then sprinkle with remaining crumb mixture.

3. Continue baking for 25-30 minutes or until lightly browned.  Cool completely on a rack.

Thursday, April 29, 2010

Black and Tan Guinness Brownies

I have a Thursday confession for y'all. I just don't LOVE brownies. Now that's not to say I won't eat them. I just can't eat a lot of brownie, and perhaps it has to do with the fact that I sneeze profusely on each first bite of strong chocolate. Does that mean I'm allergic? Because if so, let's just pretend like nothing ever happened.

Black and Tan Guinness Brownies

Well, when I first saw this recipe, I couldn't help but feel intrigued. For starters, Guinness in dessert adds a whole new dimension of deliciousness.  To top it all off, this looks like a brownie on top of a blondie. Just like mini versions of food, there's just something cute about combining two desserts and making them sit on each other.  Why, you ask?  I don't know.  Just try it.

Black and Tan Guinness Brownies

The brownie-blondie combo worked well for me - so well, in fact that I dont think I sneezed even once while eating these. If you're a fan of the uber rich chocolately chocolate brownie, this may not be your favorite, but these tasted light enough that I could not just stop at one. Now, is that a good thing or a bad thing? :)  My brownies are a little on the gooey side, but that's how hubby likes them.  If you're more of a well-done brownie connoisseur some extra oven time might do you good.

Black and Tan Brownies
Tan brownies:
6 tablespoons butter,softened at room temp
1 1/2 cups packed brown sugar
2 large eggs
1 teaspoon vanilla extract
1 cup all-purpose flour
1 teaspoon baking powder
1/4 teaspoon salt
1/4 - 1/2 cup chopped pecans
1/4 teaspoon cinnamon
Cooking spray

Black brownies
3 ounces unsweetened chocolate, finely chopped
4 tablespoons butter
1 cup granulated sugar
2 large eggs
1 teaspoon vanilla extract
1 cup Guinness Stout
1 cup all purpose flour
1/4 teaspoon salt

1. Place one rack in lower third of oven; place another rack in center of oven. Preheat oven to 350°.

2. To prepare Tan Brownies, place 6 tablespoons butter and brown sugar in a medium bowl; beat with a mixer at medium speed until light and fluffy. Beat in 2 eggs and 1 teaspoon vanilla. Weigh or lightly spoon 4.5 ounces (about 1 cup) flour into a dry measuring cup; level with a knife. Combine flour, baking powder, cinnamon and 1/4 teaspoon salt, stirring well. Add flour mixture and pecans to sugar mixture, beating just until combined. Spoon into a 13 x 9–inch baking pan coated with cooking spray, spreading evenly with a knife or rubber spatula (mixture will be thick). Bake at 350° in lower third of oven for 15 minutes.

3. To prepare Black Brownies, melt chocolate and 4 tablespoons butter in a large microwave-safe bowl on HIGH for 1 minute or until melted, stirring after every 20 seconds until smooth. Add granulated sugar, stirring until well combined. Add 2 eggs, 1 teaspoon vanilla, and Guinness, stirring with a whisk until well combined. Weigh or lightly spoon 4.5 ounces (about 1 cup) flour into a dry measuring cup; level with a knife. Combine 4.5 ounces flour and 1/4 teaspoon salt, stirring well. Add flour mixture to chocolate mixture, stirring to combine. Pour mixture evenly over Tan Brownies.

4. Bake on the center rack at 350° for 25-30 minutes or until a wooden pick inserted into center comes out almost clean. Cool in pan on a wire rack; cut into squares.

Source: Cooking Light, March 2010

Friday, April 16, 2010

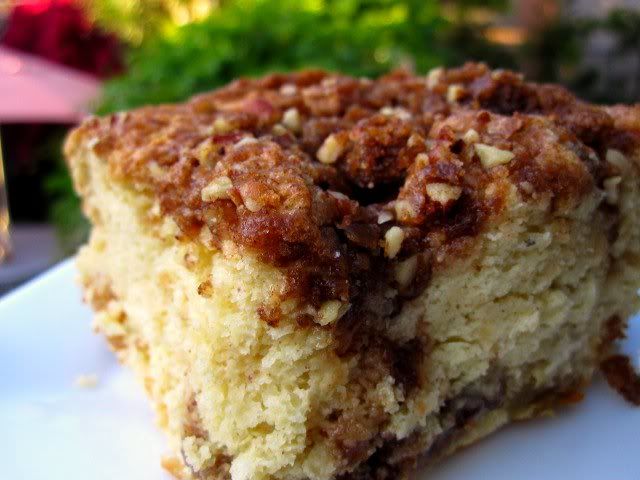
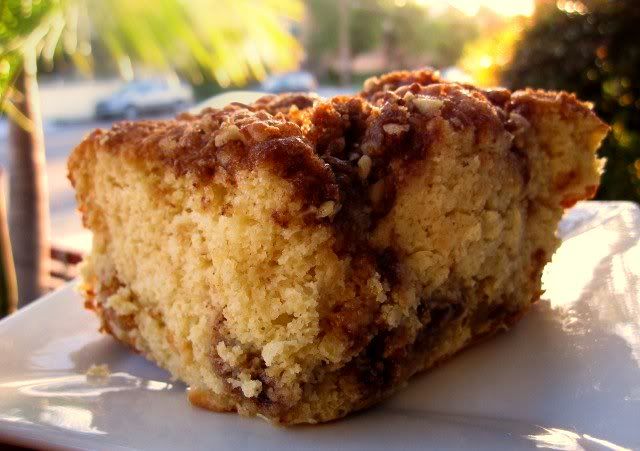
Brown Sugar Pecan Coffee Cake

The winner of the Wok Giveaway is lucky Linda from Silly Little Mischief! Congrats, and enjoy.  Let us know what you make!  Big thanks to everyone who entered.

Crumb Cake

Yesterday my dear, amazing brother left a comment on the blog after he got to be a lucky first hand witness to what's called "kitchen drama" in our house. Though I absolutely love cooking, I tend to get well, let's just a say...a bit cranky when things don't go perfectly in the kitchen. Last weekend, I tried to make one (ok maybe, two!) too many things at once, with too little time and of course, there were ingredients forgotten, things spilled and a few swear words here and there and everywhere. Luckily, brother and hubby watched the Masters while things (including me) imploded in the kitchen. I suppose my kitchen inelegance may be reason #1 that I could never be on Top Chef or any other live cooking show for that matter!

Sour Cream Coffee Cake

Hubby is quite used to this kitchen drama and to his credit, he patiently puts up with my it like a saint and gets rewarded with his very own cake! This sour cream based coffee cake is a much more decadent version than the healthy one I baked not too long ago. Though I'd like to say both versions were equally delicious, c'mon that'd be a lie and I'm no liar! Since we're all being honest, who doesn't agree that baked goods hit a new level with some good old fashioned butter and eggs?

Oh well. I did use fat free sour cream which hopefully cuts down the fat content just a bit. And there's less than 2 cups sugar total so we have that going for us as well, right?! Regardless, this is one of my new favorite recipes and a great treat to bring to a party. Its quite pretty with a brown sugar pecan topping and stays unbelievably moist.

Brown Sugar Pecan Coffee Cake
topping:
3/4 cup light brown sugar, packed
1 tablespoon all-purpose flour
1 teaspoon cinnamon
2 tablespoons cold unsalted butter, cut into pieces

In a medium bowl, combine the brown sugar, flour, and cinnamon. Add the butter and, using your fingertips, pinch the ingredients together into a sandy, crumbly mixture.

cake:
8 tablespoons (1 stick) unsalted butter, softened at room temperature
1 cup granulated sugar
3 eggs
2 cups sifted all-purpose flour
1 teaspoon baking soda
1 teaspoon baking powder
1/2 teaspoon cinnamon
1/4 teaspoon salt
1 cup sour cream
1/2 cup golden raisins
topping, recipe above
1/4 cup chopped pecans, pulsed in the food processor (you can up this if you're more of a pecan fan)

1. Preheat the oven to 350 degrees. Butter a 8 by 8-inch cake pan, line with parchment paper and butter the paper. In a mixer fitted with a paddle attachment, cream the butter until smooth. Slowly add the sugar and mix. Add the eggs and mix until light and fluffy.

2. Sift the flour, baking soda, baking powder, cinnamon and salt together. Working in batches, add flour mix to the butter/sugar mixture, alternating with dollops of sour cream. Stir in the raisins.

3. Pour the batter into the prepared pan. Sprinkle the topping mixture over the cake. Sprinkle pecans on top. Bake until risen and browned, about 45-50 minutes depending on your oven. Let cool 10 minutes in the pan. Serve in squares.

Adapted from Gale Gand

Wednesday, March 10, 2010

Mini Lemon Poppy Seed Muffins with Lemon Glaze

While the rest of the country seems to be enjoying a nice thaw, the weather in SoCal has been quite tempestuous at best. Persistent rain showers on the weekends turns in to sunny, but extremely windy days with uber chilly nights. I suppose I can't complain since I never had to trudge through freezing temps or shovel my car out of the snow this winter, but a girl can still wish for the warm weather to come back! When all else (and mother nature) fails, I bake something citrusy to remind me of sunny days and springtime!

Mini Lemon Poppy Seed Muffins While I was baking these miniature, bite sized delights, I couldn't but help wonder who first thought that lemon and poppy seeds would make a stellar combination. Poppy seeds are so strange, yet so delicious, adding a nice crunch to an otherwise light muffin. A sweet lemony glaze sends these muffins over the top, and makes them so pretty, don't you think?

Mini Lemon Poppy Seed Muffins
Being a lover of all things lemon, I didn't mind that I used quite a lot of lemon in this recipe.  Fresh lemon juice and zest add a nice zing to the batter, while fat free lemon yogurt keeps these moist and tender.  If you're crazy and would like to tame down your zing level, feel free to substitute vanilla or plain yogurt for the lemon. 

Ok, before I start babbling....back to Lost!  I can't even believe I'm multitasking during my favorite TV show!  Is there rehab for habitual multitaskers?!

Mini Lemon Poppy Seed Muffins with Lemony Glaze
Adapted from Bon Appéti, May '09

1 1/2 cup all purpose flour
1/2 cup whole wheat pastry flour
1 teaspoon baking powder
1/2 teaspoon coarse kosher salt
1/4 teaspoon baking soda
1 cup (8 oz container) lemon yogurt
2 tablespoons fresh lemon juice
1 cup sugar
1/2 cup (1 stick) unsalted butter, room temperature
1 tablespoon (packed) finely grated lemon peel
2 large eggs
1/8 cup poppy seeds

lemon icing
2 tablespoons fresh lemon juice
1/2 cup sifted powdered sugar

Preheat oven to 350°
1. Butter and flour three mini muffin pans or line with paper liners. Whisk flour, baking powder, 1/2 teaspoon coarse salt, and baking soda in medium bowl. Whisk yogurt and lemon juice in small bowl to blend.

2. Using electric mixer, beat sugar, butter, and lemon peel in large bowl to blend. Add eggs 1 at a time, beating well after each addition until mixture is light and fluffy, occasionally scraping down sides of bowl. Beat in dry ingredients in 3 additions alternately with yogurt mixture in 2 additions. Mix just until blended. Mix in poppy seeds. Spoon batter into prepared muffin cups by generous tablespoonfuls.

3. Bake muffins until tester inserted into center comes out clean, 18 to 20 minutes. Cool in pans 5 minutes. Remove muffins from pans and cool on rack.

4. Once completely cooled, mix 2 tablespoons of fresh lemon juice with powdered sugar. Continue adding powdered sugar until desired consistency is reached (about 1/2 cup)

Wednesday, February 24, 2010

(Healthy!) Sour Cream Coffee Cake

Something about the words "healthy" and "coffee cake" together just seems wrong. But folks, I kid you not, this cake is actually pretty healthy. With a mix of whole wheat pastry flour, ground oats, a modest 1/4 cup of brown sugar, low fat sour cream and an amount of butter that would horrify butter queen Paula Deen, there's not much to fear here. Though not as decadent as some coffee cakes I've made in the past, this guy certainly fulfilled my primal need for sweets and made the house smell like a dream (or a cake batter Yankee Candle, take your pick). 

Healthy Sour Cream Coffee Cake
The streusel topping's full of rolled oats, brown sugar, glazed walnuts and just a tad of butter, so I was pleasantly surprised at how satisfying it was sans all the butter.  Instead of an overly sugary topping, the mix added a lightly sweet and crunchy taste to the cake.  Though I was a huge fan of this recipe adapted from Cooking Light, I found that the cake tasted best on the day I baked it.  Afterward, a 20 second nuke in the microwave brought it back to life! 


Brown Sugar Oat Sour Cream Coffee Cake

Healthy Sour Cream Coffee Cake
Adapted from Cooking Light March '10

3/4 cup old fashioned rolled oats, divided (not quick oats)
Cooking spray
1 cup all-purpose flour
1/4 cup whole-wheat pastry flour
1 teaspoon baking powder
1/2 teaspoon baking soda
1/2 teaspoon ground cinnamon
1/4 teaspoon salt
1/2 cup granulated sugar
1/4 cup packed brown sugar (though I'd like to keep this healthy, I'd bump this up next time - maybe double!)
1/3 cup butter, softened
2 large eggs
1 teaspoon vanilla extract
1 (8-ounce) carton light sour cream
topping:
1/4 cup brown sugar
2.5 tablespoons finely chopped glazed or candied walnuts
1/2 teaspoon ground cinnamon,
1 tablespoon chilled butter, cut into small pieces

1. Preheat oven to 350°.

2. Spread oats in a single layer on a baking sheet. Bake at 350° for 6 minutes or until oats are barely fragrant and light brown.

3. Coat a 9-inch springform pan with cooking spray; set aside. (I don't have a springform so I used a 9 inch pie pan and lined the bottom with parchment paper and sprayed with cooking spray)

4. Reserve 1/4 cup oats; set aside. Place remaining oats in a food processor; process 4 seconds or until finely ground. Weigh or lightly spoon flours into dry measuring cups; level with a knife. Combine processed oats, flours, baking powder, baking soda, 1/2 tsp cinnamon and salt; stir with a whisk.

5. Place granulated sugar, 1/4 cup brown sugar, and 1/3 cup butter in a large bowl. Beat with a mixer at medium speed for 3 minutes or until light and fluffy. Add eggs, 1 at a time, beating well after each addition. Beat in vanilla. Add flour mixture to sugar mixture alternately with sour cream, beginning and ending with flour mixture. (Batter will be slightly lumpy because of oats.) Spoon batter into prepared pan; spread evenly.

6. Combine remaining 1/4 cup oats, remaining 1/4 cup brown sugar, nuts, and cinnamon in a bowl. Cut in 1 tablespoon butter with a pastry blender or 2 knives until well blended. Sprinkle top of batter evenly with nut mixture. Bake at 350° for 38 minutes or until a wooden pick inserted in center comes out clean, top is golden, and cake begins to pull away from sides of pan. Cool cake in pan for 10 minutes; remove from pan.

Wednesday, February 17, 2010

Sweet and Salty Candy Bar Brownies

I've been sensing a disturbing trend, and I'm not sure I like it! Maybe its just me, but seems these days, its pretty hip for women to claim "I never cook!" or refer to their pimped out kitchen tools as simply decoration. Being involved in the food community shields me from anti-cooking attitudes as I'm {virtually} surrounded by talented chefs and passionate foodies. However in 'real' life, I've found it hard to find many women who actually admit to loving the very fine art of making food, then stuffing your face full of said food.

Sweet and Salty Brownie

Alas, here I am: an island in a sea of non-cooks and dainty eaters. Prove me wrong, world! You too can cook...I promise :) In the meantime, here's some delicious sweet and salty brownies to help inspire you to get in the kitchen.

There are few things in life that I love more than the sweet and salty combo.  I mean, I'll even eat fries and dip them in soft serve ice cream.  Gross, ok.  But don't blast it until you try it...


Sweet and Salty Brownie


I first spotted the recipe for these decadent brownies on Cakespy's Serious Eats posting.  Using an already delicious brownie batter recipe as the base, add roasted peanuts, salty pretzels, caramel and in my case, chopped chocolate candy bars and you have yourself quite the amazing dessert.  Cakespy uses Ghirardelli caramel chocolate, but since I have just about every type of chocolate candy except this kind, I substituted some Belgian chocolate bars with a crispy cookie filling and a little bit of caramel.  Close enough, I say.


Sweet and Salty Brownies
Adapted from Cakespy and Betty Crocker's Cooky Book 

2 squares unsweetened chocolate (2 ounces)1/3 cup butter
1 cup sugar
2 eggs
3/4 cup flour
1/2 teaspoon baking powder
1/4 cup chopped roasted peanuts
3.5 ounce candy bar of your choice, coarsely chopped (try using Ghirardelli chocolate caramel bar, Twix, or Take 5)
20 pretzels, crushed into small pieces (i used a mortar & pestle)

1. Preheat oven to 350°F. Line an 8-inch square pan with parchment paper and spray lightly with cooking spray.
2. Whisk flour and baking powder in a small bowl
3. In a large saucepan, melt chocolate and butter over low heat until melted; stir frequently to avoid scorching.
4. Remove from heat and allow to cool slightly; beat in sugar and eggs.  Add in the flour and baking powder mixture, blending well.
5. Mix in the nuts and chocolate candy bar.  Add in the pretzel pieces last, mixing only until they are incorporated.
6. Spread the mixture into the pan. Bake for 30 to 35 minutes, or until top has a dull crust and a slight imprint remains when touched lightly. Cool slightly and cut into squares.

Tuesday, February 9, 2010

Granola Chocolate Chip Cookies

If you're anything like me, you're on a continual quest for "THE BEST" recipe for many of life's staples: mac 'n cheese, apple pie, and of course, chocolate chip cookies.  I've made many that I thought were the best, but somehow I still find myself questioning if I can tweak or find a better recipe.  Honestly, this drives hubby absolutely nuts since my scatter-brained brain often forgets these tweaks and the "best" is lost in history.

Granola Chocolate Chip Cookies

Though these cookies are different than your average chocolate chip cookie, I must say they're some of my favorites. After receiving a delicious box of the new granola from Special K, I set off on a quest to use the granola in a recipe other than my usual fruit and yogurt parfaits. I happened upon this Granola Chocolate Chip Cookie recipe at one of my favorite blogs, Baking Bites and could barely contain my excitement.  Granola? check.  Butter? check.  Chocolate? check.  I'm in.

Equally crisp yet chewy, the granola adds a nice crunch and a hint of saltiness that sends these cookies over the edge for me.  The granola I used wasn't too chunky, but if you have one full of clusters, try and chop up the pieces so that the cookies aren't overburdened by the granola.  Go forth and bake.  Just try not to eat the whole batch like me!

Recipe here @ Baking Bites. 
Granola Chocolate Chip Cookies
slightly adapted from Baking Bites
 1 1/3 cups all purpose flour
1/2 tsp baking soda
1/2 tsp salt
1/4 tsp cinnamon
1/2 cup butter, melted and cooled
1/3 cup sugar
1/2 cup brown sugar
1 large egg
1 tsp vanilla extract
1 cup granola, small pieces (I used Special K which is a honey/nut type of granola)
1/2 cup chocolate chips


1. Preheat oven to 350F. Line a baking sheet with parchment paper.

2. In a large bowl, whisk together flour, baking soda, salt, cinnamon and both sugars until well combined. In a small bowl, whisk together cooled butter (room temp), egg and vanilla extract. Pour into flour mixture and stir well to combine.

3. Stir in granola and chocolate chips until all are well-distributed in the dough.  The dough will be a little dry, but don't fret!  Roll dough into 1-inch round balls (this is most easily done by hand) and place on baking sheet. Press each gently to flatten.

4. Bake for 10-12 minutes, or until cookies just begin to take on a light golden brown color.
Cool completely on a wire rack before storing in an airtight container.


Wednesday, January 27, 2010

Blueberry Lemon Ricotta Muffins

Tales of a chronic multi-tasker: I kid you not. As I write this, I am simultaneously watching the utterly delightful movie Julie & Julia (uh, finally!), baking cookies (in the toaster oven - don't ask), and rubbing my dog's belly with my foot (spoiled brat). Lately I feel as if my life just keeps trucking along while my body just really, really wants to morph into a sedentary couch potato. Instead, I ran five miles this morning...while listening to my iPod, reading a magazine and watching the morning news. Blast. Try again.

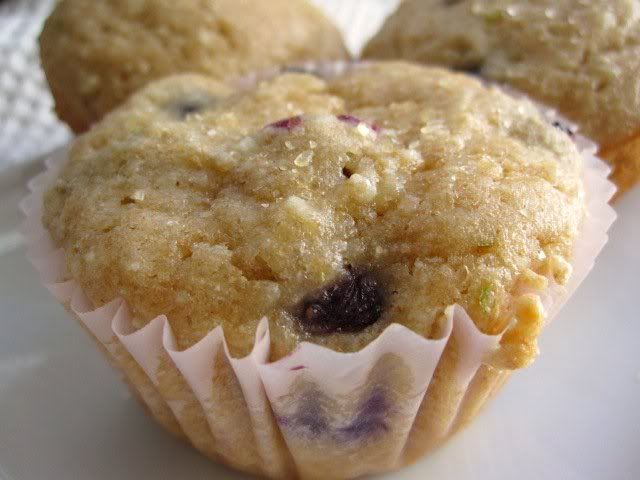
Well thankfully when life gets me down, I bake! After performing an end of the week inventory of the refrigerator, I found that I needed to play a little Iron Chef and figure out what to do with leftover ricotta cheese, blueberries, already zested lemons and celery. Even after channeling my inner Chef Morimoto, I couldn't think of a practical application for the celery, but I did create these lovely Blueberry Lemon Ricotta Muffins.

Combining a variety of internet sources, I came up with a recipe that used the lemon juice from my already-zested lemons and the zest of an un-juiced, but nearly-end-of-life-lime. While clearing the pantry, I randomly found exactly 1 cup left of whole wheat pastry flour and used this instead of 2 cups of all-purpose flour. And finally, I made cutie mini muffins from the scraps of batter left in the mixing bowl. Don't let a crumb of these go to waste!

Hopefully eating one of these will put a smile on your face. It worked for me! Off to go rescue those cookies then finally concentrate on the movie!

Blueberry Lemon Ricotta Muffins
Adapted from Baking with Dorie and Recipe Girl
1 cup whole wheat pastry flour
1 cup all-purpose flour
½ tsp baking powder
½ tsp baking soda
½ tsp salt
1 cup granulated sugar
½ stick (1/4 cup) butter, softened
½ cup unsweetened applesauce
zest from 1 lime (medium to large size)
1 cup ricotta cheese
1 large egg
1½ Tablespoons freshly squeezed lemon juice
½ tsp vanilla extract
1 heaping cup of fresh blueberries
coarse sugar for sprinkling

1. Preheat oven to 350°F. Line 12 cupcake tins with paper liners.

2. Whisk the flours, baking powder, baking soda and salt in a medium bowl.

3. Add sugar and zest to a large mixing bowl. Using a wooden spoon, rub zest with sugar until sugar is moist and fragrant.

4. Using an electric mixer, add butter to sugar and beat until creamy. Beat in applesauce, ricotta, then egg, lemon juice and vanilla extract. Add dry ingredients and stir just until blended. Carefully fold in blueberries.

5. Divide batter evenly among muffin cups. Sprinkle with coarse sugar.

6. Bake 18 to 20 minutes, or until a toothpick inserted in the center comes out clean

7. Place on wire rack to cool.

Wednesday, December 30, 2009

Childhood Throwback: Ranch Oyster Crackers

Certain foods just exude memories of childhood. Seems just like yesterday I was popping Bagel Bites in the toaster oven and picking off those creepy square pepperoni pieces one by one...Or, eating the cornbread coating of the corn dog, sans hot dog. Apparently I liked things 'just so' by a very young age!

Ranch Oyster Crackers

I distinctly remember one of the grade school homeroom mothers always made ranch oyster crackers. I'm not sure why or for what occasion, but all I know is that I ate them a lot and my mom surely didn't make them! The other day I got an intense craving for them and was pleased to find they weren't just a figment of my imagination. And, 20-some odd years later, they're just as tasty as I remember.

Try these zesty crackers in a bowl of chili. Its an utter delight.

Homeroom Ranch Oyster Crackers
1 1oz. package Ranch dressing mix
1/2 teaspoon dill
1/4 teaspoon garlic powder
1/4 teaspoon lemon pepper (optional)
1/4 cup canola oil
5 cups oyster crackers

Preheat oven to 250 degrees
1. In a large bowl, combine ranch, dill, garlic powder, lemon pepper and oil. Stir until well combined.
2. Add oyster crackers and toss gently until crackers are evenly covered with seasoning.
3. Spread crackers evenly on a cookie sheet and bake 15-20 minutes or until golden brown. Gently stir about half way through baking.

Tuesday, December 8, 2009

Chicken Pot Pie Turnovers

Let's be honest. What's better than chicken pot pie?

Chicken Pot Pie Turnover**Ahem, eating chicken pot pie out of your hands, of course!**

Maybe its just me but taking any culinary classic and modifying it for portability is culinary genius (think Mickey D's handheld apple pies!). And thanks to the Foodbuzz Tastemaker Program and the fine folks at Challenge Dairy butter, I had some delicious ingredients on hand to make a one of a kind, creative dish.

Though chicken pot pie is really nothing new or cutting edge, I thought I'd spice up the filling with grilled chicken seasoned with beau monde seasoning, a blend of celery, onion and salt, and smoked paprika for a little extra zing.


Chicken Pot Pie TurnoverI've seen pot pie topped with pastry pie dough, biscuits, and cornbread, so I thought I'd give puff pastry a try for a change. I ended up loving these turnovers for the crust to filling ratio. I've always been a fan of the crust top, but not bottom, so this is just perfect for me. Flaky goodness all around. Delicious. And portable. Yum.

Chicken Pot Pie Turnovers
1 package Pepperidge Farms frozen puff pastry (2 sheets), thawed on counter for 30-40 minutes
1 lb chicken tenders, cubed
2 tablespoons butter, divided
1 teaspoon beau monde seasoning
1/2 teaspoon smoked paprika
1/4 teaspoon salt
1/4 teaspoon pepper
2 carrots, peeled and diced
1/3 cup diced onion
1 cup frozen mixed vegetables
1/4 teaspoon garlic powder
1 can reduced fat cream of mushroom or celery soup
1/2 cup chicken broth
1 teaspoon corn starch

Preheat the oven to 400 degrees.

In a large skillet or saucepan, melt 1 tbsp butter over medium heat. Sprinkle beau monde seasoning, paprika, salt and pepper on to chicken. Saute chicken until golden brown on all sides. Remove chicken from skillet.

Add remaining tablespoon of butter to skillet and saute carrots and onion until tender, about 5 minutes. Add mixed vegetables and sprinkle veggies with garlic powder. Stir for 2 minutes. Return chicken to pan.

Add soup and chicken broth to pan and simmer until warm and well combined, about 4 minutes. Combine corn starch with enough water to make a thick paste. Add to chicken/veggie mixture and continue to stir until thickened. Remove mixture from heat and allow to cool.

On a floured suface, roll puff pastry sheets into an 11-12inch square. Be sure not to roll dough to thinly. Cut each sheet into 4 squares.

Spoon mixture evenly among squares. Brush edges of square with water and fold over to create triangle. Place on 2 separate baking sheets.

Bake for 20-25 minutes or until golden brown.

If you happen to have a great recipe idea more exciting than portable chicken pot pie, try entering the 1,2,3 Puff! Recipe contest or a chance for a trip to Montana!

Wednesday, December 2, 2009

Soft Potato Quick Rolls

After consecutive days of being unable to breathe due to an unfortunate constriction in my waistband, I began to seriously second guess my holiday gluttony. I love my family but more importantly, my family loves to eat. After a yummy Thanksgiving feast and days of shuttling my parents around to each of our favorite restaurants in town, things were surely getting a little tight. Luckily, I awoke this morning to discover that my pants had finally granted me a freebie by stretching out so I can resume eating leftovers. {{sigh of relief}}.

Soft Quick Dinner Rolls
Last night hubby and I desperately wanted turkey sandwiches but could not subject ourselves to a 10th grocery store trip in a week. I scoured the internet for a quick sandwich roll recipe and found several using a common theme of potato flakes, onion powder, yeast and a muffin tin. With a total rise time of about 50 minutes (split between two sessions), these rolls were ready right before bed time, a perfect time to gorge on bread, dont you think?

I must say i'm desperately in love with this easy recipe. I added Parmesan cheese, used roasted garlic potato flakes and threw in a little extra sugar. Next time, I may try adding real garlic and some cheese. The possibilities are endless!

Soft Potato Quick Rolls
adapted from Allrecipes and King Arthur's Flour

2 1/4 teaspoons active dry yeast
1 cup warm water (110 degrees F/45 degrees C)
3 tablespoons white sugar
1/4 cup dry roasted garlic potato flakes
1 teaspoon salt
1 egg
2 tablespoons canola oil
3/4 teaspoon onion powder
1 tablespoon parmesan cheese
2 1/4 cups all-purpose flour


In a large bowl, dissolve yeast in warm water. Add sugar and stir. Add potato flakes, salt, egg, oil, onion powder, cheese and 1 cup of the flour. Beat until smooth. Stir in remaining flour. Continue stirring until smooth, scraping batter from sides of bowl.

Cover and let dough rise in warm place until doubled, about 20 to 30 minutes. Lightly grease 12 muffin cups.

Once risen, punch down dough. Spoon dough evenly into greased muffin cups. Let rise until batter reaches tops of cups, or about 20 minutes. Meanwhile, preheat oven to 400 degrees.

Bake for 15 minutes.

Thursday, November 19, 2009

Pumpkin Cream Cheese Roll

Pumpkin RollI feel a little bit older every time I find myself saying "Can you believe its already {insert current month}?" I surely don't remember muttering things like that in college. Perhaps my more youthful self had more exciting things to talk about, but I now find myself saying this phrase every month and even every holiday. Seriously though -- Can you believe its already Thanksgiving?

For the 3rd year in a row, I'm hosting Thanksgiving in San Diego for my family. This year, I think I need to shake things up a bit. Any ideas? I've been glued to the Food Network looking for some inspiration, but I just end up wondering how did all these people get their own TV show?

In the meantime, if you're looking for a fantastic Thanksgiving dessert try this pumpkin roll. Not only is it pretty, but its orange. Classic Fall if you ask me.

Classic Pumpkin Cream Cheese Roll
courtesy of Libby's Pumpkin

1/4 cup powdered sugar (to sprinkle on towel)
3/4 cup all-purpose flour
1/2 teaspoon baking powder
1/2 teaspoon baking soda
1/2 teaspoon ground cinnamon
1/2 teaspoon ground cloves
1/4 teaspoon salt
3 large eggs
1 cup sugar
2/3 cup canned pumpkin

Cream Filling
1 package cream cheese, softened
1 cup sifted powdered sugar
6 tablespoons butter, softened
1 teaspoon vanilla extract
Powdered sugar for sprinkling on cake

1. Preheat oven to 375° F. Spray a 15 x 10-inch jelly-roll pan with cooking spray or butter pan; line with wax or parchment paper. Grease and flour paper. Sprinkle a thin, cotton kitchen towel liberally with powdered sugar.

2. Combine flour, baking powder, baking soda, cinnamon, cloves and salt in small bowl. Beat eggs and sugar in large mixer bowl until thick. Beat in pumpkin. Slowly stir in flour mixture. Spread evenly into prepared pan.

3. Bake for 13 to 15 minutes or until top of cake springs back when touched. Immediately loosen and turn cake onto prepared towel. Carefully peel off paper. Roll up cake and towel together, starting with narrow end. Cool on wire rack.

4. In a mixing bowl, beat cream cheese, 1 cup powdered sugar, butter and vanilla until smooth. Slowly & carefully unroll cake; remove towel. Spread cream cheese mixture over cake. Re-roll cake tightly. Wrap in plastic wrap and refrigerate at least one hour. Sprinkle with powdered sugar before serving, and slice.

Thursday, November 12, 2009

Soft Pumpkin Chocolate Chip Muffies

A lot of women have specific characteristics they seek out in a potential mate or husband - say, sexy & rich yet romantic & can ride a unicycle. Me? Not that I have low standards but I always just wanted someone who could make me laugh and swoon simultaneously. It never even crossed my little black book to find someone who could cook.

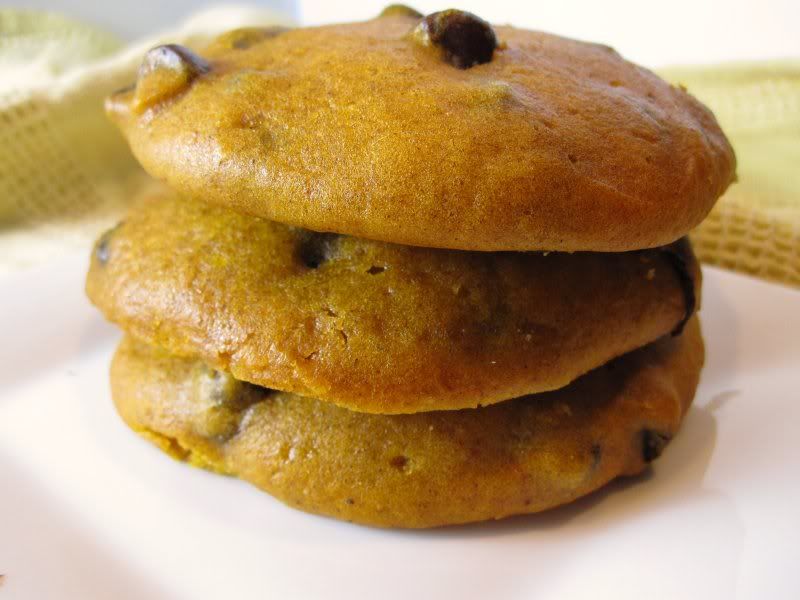
pumpkin chocolate chip muffieLuckily, hubby has become quite the chef on his own (well under my tutelage, of course!). First Man Food Mondays, now cookies?! Apparently marriage does get better with age. These cookies are so soft they're more like muffies to me. Regardless of what they are, I know that they taste good and I just ate one too many of these tonight.

Super Soft Pumpkin Chocolate Chip Muffies (Muffin + Cookie)
Adapted from Joy the Baker and Spork or Foon?

2 cups all-purpose flour
1 1/2 teaspoons baking powder
1 teaspoon soda
1/2 teaspoon salt
2 teaspoons ground cinnamon
1/2 teaspoon ground ginger
1/4 teaspoon pumpkin pie spice
1/4 teaspoon ground cloves
2 eggs
1 cup sugar
1/2 cup canola oil
1 cup canned pumpkin
1 teaspoon vanilla extract
1 cup semi-sweet chocolate chips

Position a rack in the middle of the oven . Preheat the oven to 325 degrees F. Line two baking sheets with parchment paper and butter the paper.

Stir the flour, baking powder, baking soda, salt and spices together in a medium bowl and set aside. In a large bowl, using an electric mixer on medium speed, beat the eggs and sugar until smooth and lightened in color, about 1 minute. Stop the mixer and scrape the sides of the bowl as needed during mixing. On low speed, mix the oil, pumpkin, and vanilla until blended. Mix in the flour mixture to incorporate it. Mix in the chips.

Using an ice cream scoop with a 1/4-cup capacity, scoop mounds of the dough onto the prepared baking sheets, spacing the cookies at least 2 1/2-inches apart. You could also simply use a 1/4-cup measuring cup if you don’t have a scoop. Use a thin metal spatula to smooth and flatten the rounds.

Bake the cookies one sheet at a time until the tops feel firm and a toothpick inserted in the center comes out dry, about 16-18 minutes. Cool them on the baking sheet for 5 minutes, then use a wide metal spatula to transfer the cookies to a wire rack to cool completely.

Tuesday, October 20, 2009

Lazy Baker Oatmeal Cherry Raisin Spice Cookies

Confession Time...I'm still feeling a little under the weather and haven't cooked dinner in oh, 2 weeks?! Luckily, hubby has stepped in as the happy house-husband and uses the blog like a virtual cookbook. I knew this site would come in handy one day!

Oatmeal Raisin Cherry Spice CookiesWhile I may not be preparing meals, this does not mean I won't bake! Every sick woman needs cookies and breads, don't you think? The lovely folks at Lazy Baker must have been channeling my inner laziness and offered to send me a sample of their cookie mix. Though not typically a huge fan of prepackaged foods, anything with the name lazy sounds great right about now.

Oatmeal Raisin Cherry Spice Cookies
Wanting something out of the ordinary, I tried their Oatmeal Cherry Raisin Spice cookie mix, which comes in a very cute package by the way. See the sleeping chef? That's me.
Just add butter, egg, and vanilla and you're good to go. Seriously, it doesn't get easier than this.

Lazy Baker CookiesVerdict: If you're anything like us and like a little spice in your cookies, these are perfect for you. If not a fan of spice, keep looking! These came out much more plump and round than pictured on their website, but that's how I like 'em - thick and soft yet chewy! Mmm... Seriously, these are perfect and tasted even the better the next day! Check 'em out.

Tuesday, August 4, 2009

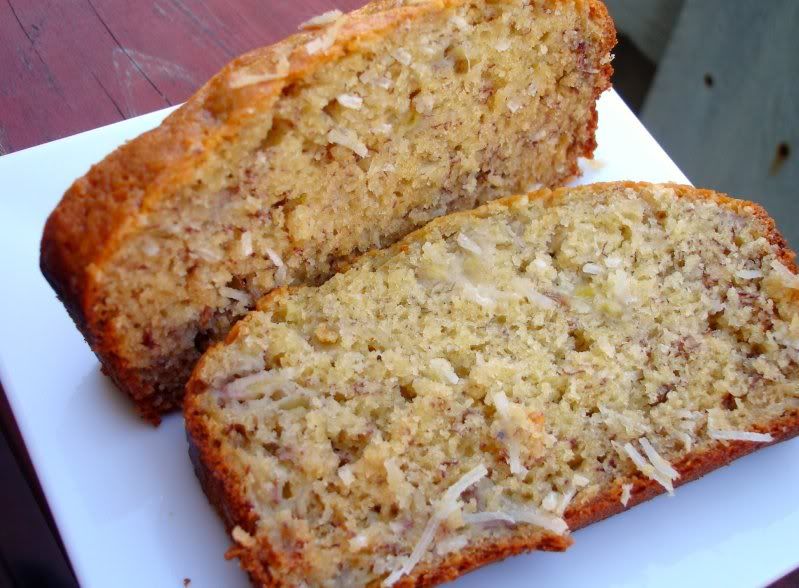
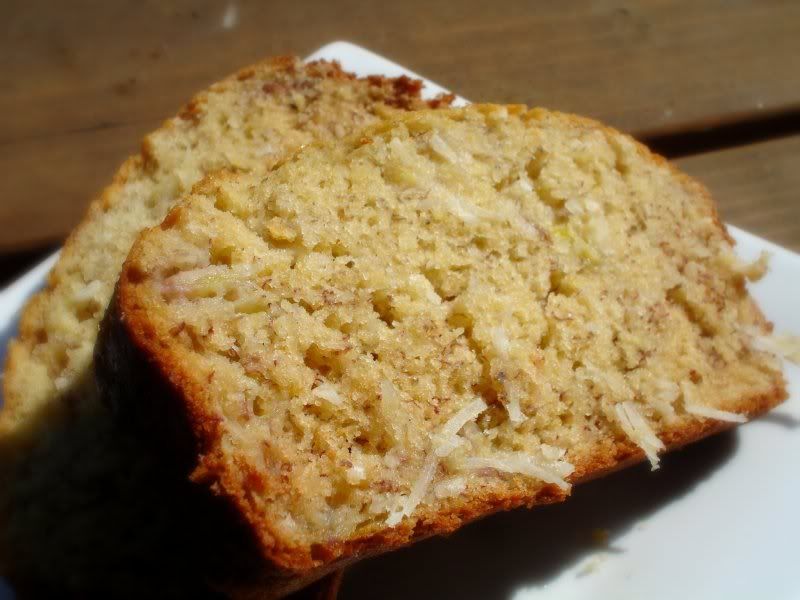
Coconut Banana Bread with a Boozy Twist

coconut banana breadSome days I wonder if my sweet tooth mysteriously disappeared, would I become a supermodel?? OK, ok. I'd have to grow about a foot, get a few tweaks here and there, find myself a new hairdo, but seriously...I live to eat dessert. Case in point - tonight I decided a slow leisurely jog would be best because of the hot temps. Upon arriving home a hot & sweaty mess, I decided it'd only be appropriate to satiate myself with a huge slice of Coconut Banana Bread. Do you think the slow jog canceled out the bread? Fat chance (no pun intended)!


coconut banana bread
Lucky for me, this bread is based on a Cooking Light recipe so all is not lost! I've made Coconut Banana Bread before, last time using coconut milk but no real coconut. This time, I decided to shake things up. With 3 bananas and lots of shredded coconut, this one is so full of flavor and quite tropical. You wouldn't even guess what kind of booze I snuck in there. It works, I promise.

I say if we can't be supermodels, eat bread baked with booze! :)

Coconut Banana Bread
Adapted from Cooking Light

1 1/2 cups all-purpose flour
1/2 cup whole wheat pastry flour
3/4 teaspoon baking soda
1/2 teaspoon salt
1 cup granulated sugar (use baker's sugar if possible)
1/4 cup butter, softened
2 large eggs
3 mashed ripe banana
1/4 cup vanilla yogurt
3 tablespoons Kentucky Whiskey (can use dark rum)
1/2 teaspoon vanilla extract
1/2 cup flaked sweetened coconut + 1 tbsp coconut, divided
Cooking spray

1. Preheat oven to 350°.

2. Combine flour, baking soda, and salt in a medium bowl and stir with a whisk.

3. Place granulated sugar and butter in a large bowl; beat with a mixer at medium speed until well blended. Add eggs, 1 at a time, beating well after each addition.

4. Add banana, yogurt, whiskey, and vanilla; beat until blended. Add flour mixture; beat at low speed just until moist. Stir in shredded coconut. Spoon batter into a 9 x 5-inch loaf pan coated with cooking spray; sprinkle with 1 tablespoon coconut.

5. Bake at 350° for 1 hour or until a wooden pick inserted in center comes out clean. Cool in pan 10 minutes on a wire rack; remove from pan.

Wednesday, June 3, 2009

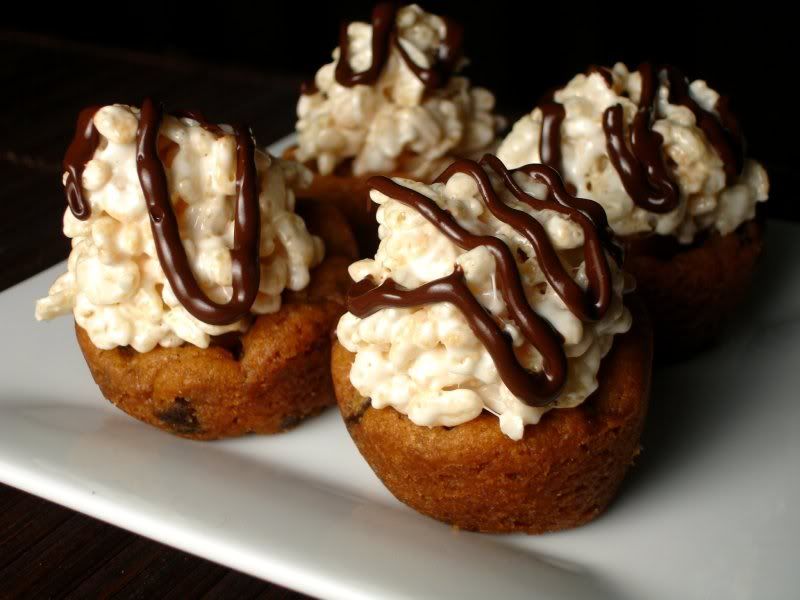
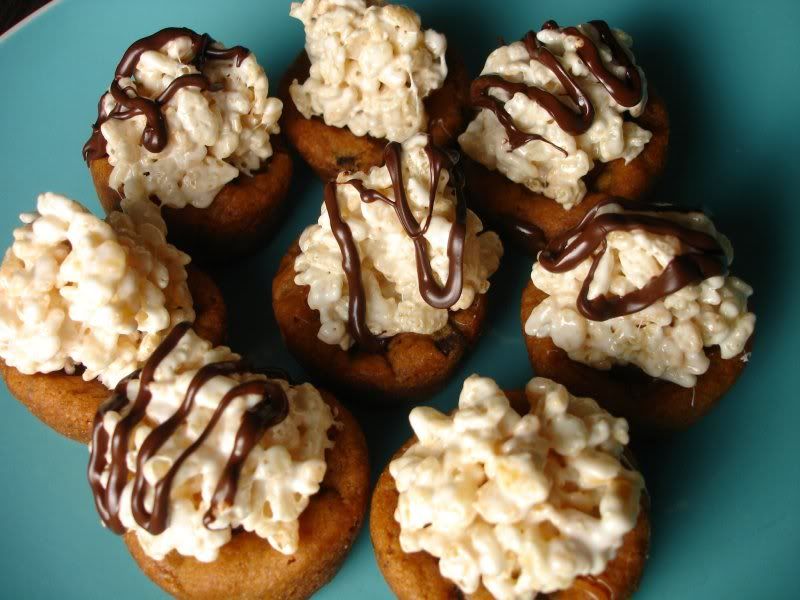
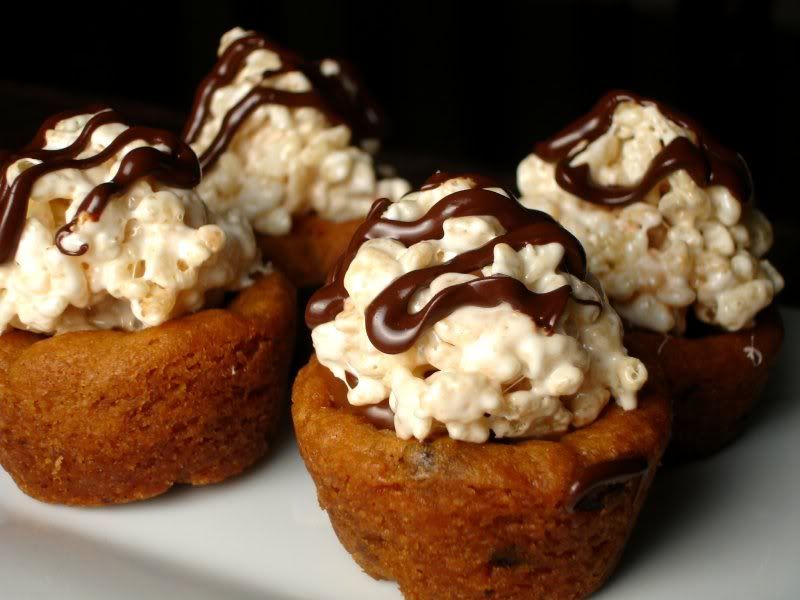
Chocolate Chip Cookie Cups with Rice Krispy Treat Topping

It's quite possible that my entire party's menu will consist of food blog recipes. You all are a creative bunch! It's also quite possible that both hubby and I gain at least 10 pre-party pounds since I just have to do a trial run of every delicious thing I consider making. Really, I'm not a control freak, I just like an excuse to make us indulgent food. Exhibit A, for example:

Cookie Cups
I spotted these ridiculously cute cookie cups topped with rice krispy treats(!) on Jenny's amazing blog, Picky Palate. She never ceases to amaze me with the delicious treats she comes up with that also leave me wondering, "why didn't I think of that?" ....as all great inventions do.

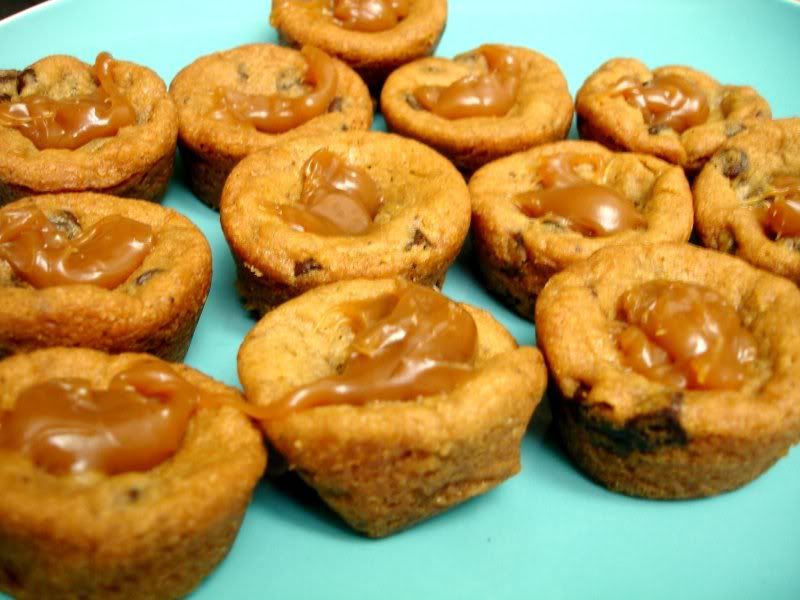
Simplicity at its finest, these treats require you to use your favorite cookie dough recipe and bake the dough in muffin tins. I baked the cookies a little longer than usual to ensure the cookie cups were sturdy and could hold a mountain of rice krispy treat :) After baking and letting cool slightly, top with a little caramel sauce and try not to eat them all at this stage:

Cookie Cups with Caramel ToppingI had some fancy cinnamon caramel sauce that was given to me by a friend, so I clearly dealt the caramel with a heavy hand. I'm sure simple caramel sundae sauce would be just as good.

Proceed to whip up a batch of Rice Krispy Treats which after years of making for hubby, I now use no measurements to make. In my opinion, go heavy on the marshmallow to cereal ratio. We like 'em gooey.

Finally, drizzle some melted semi-sweet chocolate chips over the top and you're ready to impress!

Cookie Cups with Rice Krispy Topping

Cookie Cups with Rice Krispy Topping
Here's a link to Picky Palate's original post. I followed her recipe but didn't add any oil to the melted chocolate chips. Also, when shaping the rice krispy treats, I found it helpful to have a wet towel to wipe my hands off and prevent stickiness.

Thursday, March 5, 2009

Honey Pistachio Biscotti

Honey Pistachio Biscotti
The other night a girlfriend and I went out for margaritas. We had great fun and a few drinks, but realized we were a little old when we couldn't take the loud music anymore and ended up at a nearby coffee shop sipping chai tea lattes and nibbling on biscotti. Margaritas and chai tea? That's a girls night if you ask me.

Pistachio Biscotti
If you're in the San Diego area, The Living Room in La Jolla is quite an eclectic little spot, perfect for people watching and GOOD biscotti. I fell in love with their pistachio biscotti, most of all because it had a cute green tint. I'm one of those people who will like food if it's cute, mini, or a fun color.

Pistachio Biscotti
Since we're in a recession and all, I figure that I should make my own biscotti as opposed to spending $3 for one small, but oh-so-heavenly stick. I even decided I'd make mine green too, but ultimately forgot that part while cooking. I'm known to do that. Hubby was happy because unlike me, he doesn't think green food is attractive unless it's a veggie.

Pistachio Biscotti
I found this recipe from Ellie Krieger, one of my favorite monotone Food Network chefs. At least she doesn't have a big head, right?!

These biscotti are not quite as sweet as others I've made, but it's a nice change of pace. They pair well with tea and are an excellent mid-day snack. Other biscotti recipes instruct to turn down the oven after the first bake and let the biscotti harden at a low temperature for a slow bake; Ellie's bake at the same temperature throughout, so the process is a little more speedy! Enjoy.

Honey Pistachio Biscotti
Courtesy of Ellie Krieger

1 1/4 cups all-purpose flour
1 1/4 cups whole-wheat pastry flour
1 1/2 teaspoons baking powder
1/2 teaspoon salt
1/2 cup sugar
2 tablespoons honey (I also added a few dollops of agave nectar for good measure)
2 large eggs
1/4 cup olive oil
1 teaspoon lemon zest
1 tablespoon lemon juice
1 teaspoon vanilla extract
1 cup unsalted, shelled pistachios
sugar for sprinkling

Directions

Preheat oven to 350 degrees F.

In a medium bowl, whisk together the all-purpose and whole-wheat flours, the baking powder and salt. In a large bowl beat together the sugar, honey, eggs, oil, zest, lemon juice and vanilla extract until well combined. In batches add the dry ingredients until the mixture forms a dough. Stir in the pistachios.

Transfer the dough to a floured work surface and knead several times. Shape into a log about 10 inches long and 3 inches wide. Sprinkle the top with sugar to taste. Transfer to a parchment lined baking sheet and bake for 25 minutes,or until the top is firm. Transfer to a wire rack and let cool for 15 minutes. With a serrated knife, cut 1/2-inch diagonal slices. Arrange on the baking sheet and bake 10 minutes. Turn the cookies over and bake the biscotti until golden 5 to 10 minutes longer. Transfer to a wire rack to cool. If you like yours crunchy, turn off the oven and let the biscotti sit in there for a little while longer.

Sunday, January 4, 2009

Pink Strawberry Cupcakes for a Special Birthday

We often joke that Hallmark has a card for just about every obscure, random, and questionable holiday though I believe we celebrate a holiday that Hallmark hasn't quite captured yet. For the 2nd glorious year in a row, hubby and I have celebrated Bling's Birthday. For those that need a little clarification, Bling is my lovely dear friend that I wear everyday on my ring finger.

On New Year's Eve of 2004/2005, hubby proposed and Bling officially became a part of our lives. Since then we've celebrated Bling's Birthday on New Year's Eve, complete with cupcakes and of course, a little champagne. We're easily amused. And clearly a little crazy.

This year, hubby acquiesced to my very girly request of pink, strawberry cupcakes. A man who can make fresh strawberry cupcakes with strawberry icing is a keeper, don't you think?! With no guidance from this micro manager of the kitchen, hubby pulled off some absolutely delicious cupcakes that were gone in a just a few short days.


Fresh strawberries are folded into the cupcake batter which is lightened with non-fat yogurt; softened butter eagerly brings back the sinfulness factor. Powdered sugar, more butter and more fresh strawberries make for a sweet, light and very strawberry frosting. These are amazing and I look forward to my upcoming birthday for a few more of these treats!

Bling's Strawberry Cupcakes
Found by Hubby on Cooking with Amy

1/2 cup sugar
1/4 cup (1/2 stick) unsalted butter, softened
1 large egg
6 ounces vanilla yogurt
1 tsp. vanilla extract
1 1/2 cups all purpose flour
1 1/2 tsp. baking powder
1/4 tsp. kosher salt
1/4 tsp. baking soda
1/2 cup fresh strawberries, diced

Frosting:
2 Tbsp. butter, softened
1 cup powdered sugar
2 fresh strawberries (we used about 3)

1. Preheat oven to 350 degrees. Line a muffin tin with paper liners. With a mixer, beat the sugar and butter until light and fluffy. Add the egg, yogurt and vanilla, blending until smooth.

2. Whisk together the dry ingredients in a separate bowl. Add slowly to the wet ingredients and blend, then fold in the strawberries.

3. Divide the mixture equally between the 12 paper-lined cupcake cups. Bake for 20-25 minutes or until cake tester comes out clean.

4. Beat together butter, powdered sugar, and mashed strawberry in medium-size bowl until creamy and smooth. Chill frosting for 15 minutes or until thick. Frost cupcakes with a spatula. Keep cupcakes in the refrigerator loosely covered.

Monday, December 15, 2008

Pumpkin 'n Spice Cinnamon Streusel Buns

Yet again I find myself with a huge can of pumpkin, just waiting to be thrown into a treat. It's clearly the perfect excuse to continually make, bake and cook us sweets. I have been browsing around for temporary health insurance and though I'm not a smoker and have no pre-existing heart condition, should I confess my daily consumption of desserts to the powers that be? Uh probably not. I wonder if addiction to desserts counts as a health condition.

I have a whole bevvy of pumpkin recipes to share, but in between the sweet potato buttermilk rolls, homemade apple butter, and somewhat orangish turkey soup I didn't want anyone to get the idea that I was obsessed with orange foods. Quite the contrary - orange is my least favorite candy flavor. Hmm, though maybe one of my favorite fruits. I'm so confusing.

In any case, I made these delectable cinnamon rolls for our breakfast last weekend. They're warm, gooey, not to sweet and full of spice (as a result of adding lots o' cinnamon to the filling and dough!).

These are much easier than a previous Ooey Gooey Cinnamon Roll recipe I posted, though they're not nearly as sinful. This is a lightened recipe that gets the job done and satiates a cinnamon bun hunger, but if you're really looking to ward off the health insurance companies, try this guy.


Oh, and if you're anything like me and also looking to use up some pumpkin, this recipe only uses a 1/4 cup. Guess I'll just have to make some more desserts!

Check out Yeastspotting for some great inspiration!

Pumpkin 'n Spice Cinnamon Rolls
Adapted from Cooking Light

1 package dry yeast (about 2 1/4 teaspoons)
1/4 cup warm water (100° to 110°)
3 3/4 cups all-purpose flour, divided
1/2 cup pumpkin, room temperature
1/2 cup milk, room temperature
1/4 cup butter, melted and slightly cooled
2 tablespoon granulated sugar
1 1/4 teaspoons salt
1/2 teaspoon pumpkin pie spice
1 teaspoon ground cinnamon
Nonstick Cooking spray

3 tablespoons granulated sugar
3 tablespoons brown sugar
2 tablespoons all-purpose flour
1 1/2 heaping teaspoons ground cinnamon
2 tablespoons chilled butter, cut into small pieces


Glaze:
3/4 cup sifted powdered sugar
1/4 cup hot water
1/4 teaspoon vanilla extract


To prepare the buns, dissolve yeast in warm water in a large mixing bowl; let stand for 5 minutes. Lightly spoon flour into dry measuring cups, and level with a knife. Add 3 cups flour, pumpkin, milk, butter, sugar, salt, and spices; beat with a mixer at medium speed until smooth. If using a Kitchenaid, knead with a dough hook until smooth and elastic (about 10 minutes); while kneading, add enough of the remaining 3/4 cup flour, 1 tablespoon at a time, to prevent dough from sticking to hands (dough will feel tacky). Otherwise, knead by hand on a lightly floured surface.

Place the dough in a large bowl coated with cooking spray, turning to coat top. Cover and let rise in a warm place , free from drafts for approximately 1 hour or until doubled in size. Press two fingers into the dough. If an indentation remains, the dough has risen enough.

Combine 3 tablespoons granulated sugar, brown sugar, 2 tablespoons flour, and 1 1/2 teaspoons cinnamon in a small bowl. Cut in butter with a pastry blender or 2 knives until mixture resembles coarse meal.

Punch dough down; cover and let rest for 5 minutes. Roll the dough into a 12 x 10-inch rectangle on a floured surface. Sprinkle with brown sugar mixture. Roll up the rectangle tightly, starting with a long edge, pressing firmly to eliminate air pockets; pinch seam and ends to seal. Cut roll into 12 (1-inch) slices. Place slices in a 9-inch square baking pan coated with cooking spray. Cover and let rise 25 minutes or until doubled in size.

Preheat oven to 375°.

Bake the rolls at 375° for 20-25 minutes or until golden brown. Cool for 15 minutes in pan on a wire rack.

To prepare the glaze, combine the powdered sugar, vanilla extract and 1 tablespoon of water in a small bowl, stirring with a whisk. Add water 1 tablespoon at a time, whisking in between until smooth. Drizzle glaze over buns. Serve warm.