Showing posts with label main dish. Show all posts

Tuesday, December 8, 2009

Chicken Pot Pie Turnovers

Let's be honest. What's better than chicken pot pie?

Chicken Pot Pie Turnover**Ahem, eating chicken pot pie out of your hands, of course!**

Maybe its just me but taking any culinary classic and modifying it for portability is culinary genius (think Mickey D's handheld apple pies!). And thanks to the Foodbuzz Tastemaker Program and the fine folks at Challenge Dairy butter, I had some delicious ingredients on hand to make a one of a kind, creative dish.

Though chicken pot pie is really nothing new or cutting edge, I thought I'd spice up the filling with grilled chicken seasoned with beau monde seasoning, a blend of celery, onion and salt, and smoked paprika for a little extra zing.


Chicken Pot Pie TurnoverI've seen pot pie topped with pastry pie dough, biscuits, and cornbread, so I thought I'd give puff pastry a try for a change. I ended up loving these turnovers for the crust to filling ratio. I've always been a fan of the crust top, but not bottom, so this is just perfect for me. Flaky goodness all around. Delicious. And portable. Yum.

Chicken Pot Pie Turnovers
1 package Pepperidge Farms frozen puff pastry (2 sheets), thawed on counter for 30-40 minutes
1 lb chicken tenders, cubed
2 tablespoons butter, divided
1 teaspoon beau monde seasoning
1/2 teaspoon smoked paprika
1/4 teaspoon salt
1/4 teaspoon pepper
2 carrots, peeled and diced
1/3 cup diced onion
1 cup frozen mixed vegetables
1/4 teaspoon garlic powder
1 can reduced fat cream of mushroom or celery soup
1/2 cup chicken broth
1 teaspoon corn starch

Preheat the oven to 400 degrees.

In a large skillet or saucepan, melt 1 tbsp butter over medium heat. Sprinkle beau monde seasoning, paprika, salt and pepper on to chicken. Saute chicken until golden brown on all sides. Remove chicken from skillet.

Add remaining tablespoon of butter to skillet and saute carrots and onion until tender, about 5 minutes. Add mixed vegetables and sprinkle veggies with garlic powder. Stir for 2 minutes. Return chicken to pan.

Add soup and chicken broth to pan and simmer until warm and well combined, about 4 minutes. Combine corn starch with enough water to make a thick paste. Add to chicken/veggie mixture and continue to stir until thickened. Remove mixture from heat and allow to cool.

On a floured suface, roll puff pastry sheets into an 11-12inch square. Be sure not to roll dough to thinly. Cut each sheet into 4 squares.

Spoon mixture evenly among squares. Brush edges of square with water and fold over to create triangle. Place on 2 separate baking sheets.

Bake for 20-25 minutes or until golden brown.

If you happen to have a great recipe idea more exciting than portable chicken pot pie, try entering the 1,2,3 Puff! Recipe contest or a chance for a trip to Montana!

Thursday, November 5, 2009

Gourmet's Latin Style Chicken and Rice

When hubby and I moved to San Diego two years ago we couldn't wait to fully embrace an active, outdoorsy lifestyle - hikes on the weekends, laps in the Pacific ocean, kayaking & surfing, perhaps a few evening sunset runs. While we have indulged ourselves of each of these activities, life and work tend to get in the way and make for some very good excuses.

Gourmet's Latin Style Chicken and Rice
After two years of gym free living, we finally took the plunge and decided to join one, realizing our appetites were larger than our desires for physical movement. Ho Hum. I'm both excited and a little sad. Maybe joining a gym will get me running outside more often :) Funny how I need to pay someone else money to inspire myself to indulge in a free activity!

On to the food, I made this Latin Style Chicken and Rice when looking for a quick and easy weeknight meal. First spotted by Cate from Sweetnicks this yummy dish originated from the soon to be defunct Gourmet Magazine (sad, very sad). The dish doesn't strike me as particularly Latin, but I liked it nonetheless. Hubby especially loved the chicken thighs as we traditionally eat chicken breasts or tenders out of habit and ease. As a compromise, I used half and half and was happy with the results. The original recipe calls for bone-in chicken thighs so proceed as you please!

Gourmet's Latin Style Chicken and Rice
adapted from Gourmet Magazine

1 pound boneless, skinless chicken thighs
1 pound boneless, skinless chicken breasts cut in half
2 tablespoons unsalted butter, cut into bits
1 tablespoon olive oil
1 large onion, chopped (2 cups)
3 garlic cloves, minced
1 cup medium grain white rice
1 cup reduced-sodium chicken broth
3/4 cup water
1/4 teaspoon crumbled saffron threads
1 teaspoon tumeric
1/2 teaspoon garlic salt
1 bay leaf
1 cup frozen peas (not thawed)
salt & pepper

Season chicken salt and pepper to taste. Heat butter and oil in a 12-inch heavy skillet (at least 2 inches deep) over medium-high heat until foam subsides, then brown chicken, turning once, about 10 minutes total. Transfer chicken with tongs to a plate.

In the same pan, cook onion and garlic with 1/4 teaspoon each of salt and pepper over medium heat, stirring, until golden, about 6 minutes. Add rice and cook, stirring, 1 minute. Add broth, water, saffron, tumeric, garlic salt and bay leaf and bring to a full boil. Nestle chicken in rice, keeping as much rice around (rather than under) chicken as possible, and add juices from plate.

Simmer, covered tightly with lid, over low heat until chicken is cooked through, rice is tender, and most of liquid is absorbed, about 20 -25 minutes. Remove from heat and stir in peas. Cover with a kitchen towel and then lid and let stand until all of liquid is absorbed, about 15 minutes. Discard bay leaf.

Tuesday, September 22, 2009

Black Bean Mushroom Burgers

First off, congrats to the winners of the Macy's shopping giveaway! Amber (lucky #3) would host a black and white themed party while Kerstin (lucky # 15) wants to host a Mexican themed party with guac and margs. Yum! Thanks for entering the giveaway and let us know what you buy!

On to other good stuff...Do you ever find yourself making something that tastes so delicious but looks utterly unattractive? Well, file me under "ugly but yummy" because I truly struggled whether I should post these or not. In the end, I couldn't resist because we loved these Black Bean Mushroom burgers so much.


Black Bean Mushroom BurgerAmong good things in life, black beans and mushrooms hang out at the top of my list. Unlike other things that hang out up there (cake & ice cream), these ingredients are actually good for me and you. Even better, my carnivore hubby gave these a big thumbs up so rest assured, you too can subject a vegetarian meal upon your favorite meat eater.

Grab your handy dandy food processor and get to work. Black beans are whirled with sauteed baby bellas, a little bread crumb action and cilantro. Add goat cheese and form into yummy patties. Though we fired these up on the grill, things got a little messy and next time I will just saute them in a pan with a lot of cooking spray and/or olive oil. They're a little too fragile for the grill in my opinion. Serve on toasty English Muffins and you have yourself a veg treat!

I found these tasty burgers on Culinary in the Country and stayed pretty true to the recipe so head on over there to check it out. My only recommendations would be to use a full tub of goat cheese, consider using more bread crumbs, and to saute these babies!

Tuesday, August 25, 2009

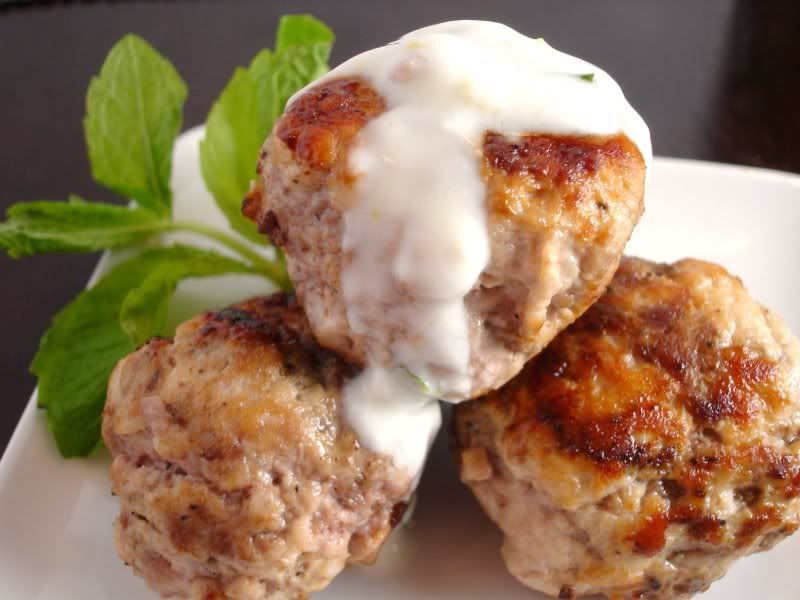
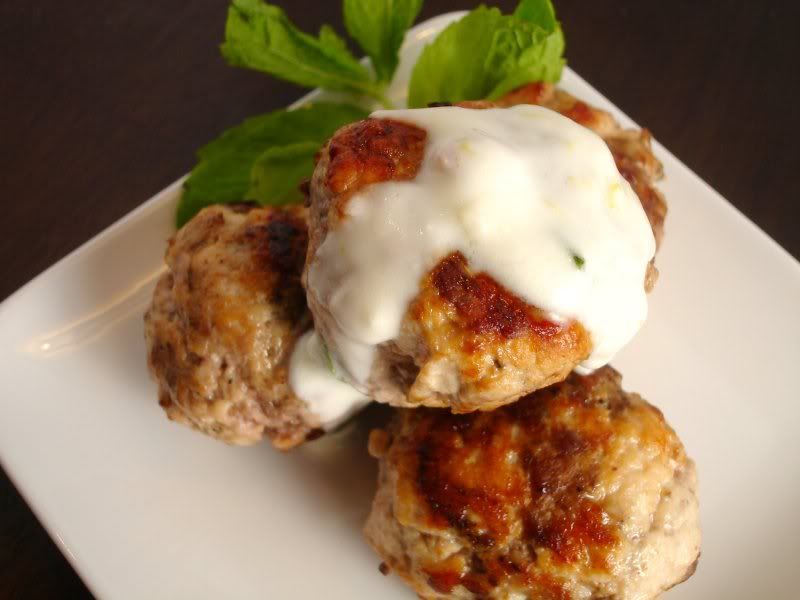
Spiced Lamb Meatballs with Lemon Mint Yogurt Sauce

Sad, but true. Over the weekend I ran over my laptop's power cord with the vacuum. Darn dog sheds too much! Oh, and I don't pay enough attention. Alas, I am computer-less. Hubby stays mentally fit with a Mac yet while I consider myself tech savvy, I just can't jump on board.

So, my internet time has been drastically cut short. Perhaps that will be a good thing so I can spend more time cooking?

We loved these Moroccan spiced lamb meatballs but missed out on the one key Moroccan ingredient: ras el hanout, a mix of about 12 spices like cardamom, clove, cinnamon, paprika, coriander, cumin, mace, nutmeg, peppercorn, and turmeric! I figured that in a pinch a blend of garam maslala and curry powder would suffice. Don't ask how I came to that conclusion but it worked :) Hopefully you'll find it easier to locate in your town; I went so far as to email a local Moroccan restaurant for a recommendation but she didnt know of any markets in the area that sell it. Next time, I'll plan ahead and order on the internet.


To top off the meatballs, we made a lemon mint yogurt sauce that nicely complimented the meat. I really never had any idea I would love the mint / lamb combo so much but it just works. And I can't really explain why, so just try it. Find some top quality pita bread and you have yourself a very tasty and exotic meal! I found this recipe in the same Sunset magazine I keep oohing and ahhing over {that I swiped from the gym.oops.}

Moroccan Spiced Lamb Meatballs with Lemon Mint Yogurt Sauce
Adapted from Sunset Magazine

sauce:
1 1/2 cups (14 oz.) low fat Greek yogurt
finely shredded zest of 1 lemon (use a Microplane zester)
1 tbsp finely chopped fresh mint
1 tbsp extra virgin olive oil
1/2 tsp Kosher salt
1/2 tsp minced garlic

In a small bowl, combine all ingredients and set aside until ready to serve meatballs. Chill, if desired.

meatballs:
2 tbsp finely grated ginger
1 tbsp minced garlic
1 tbsp ras el hanout (or 2 tsp curry powder and 2 tsp garam masala)
1 tsp salt & 1 tsp pepper
1 1/2 lb ground lamb
1/2 lb ground turkey
1 tbsp olive oil

1. In a large bowl, combine ginger, garlic, ras el hanout, salt and pepper. Add meats and gently combine with hands until spices are just evenly distributed. Do not overmix.

2. Gently roll meat into 1 1/2 inch balls and set on a rimmed baking pan or jelly roll pan. Preheat the oven to 200 degrees and line another baking pan with paper towels.

3. Heat a large frying pan over medium heat. Add oil and swirl to coat. Brown meatballs in batches on all sides, turning as needed for about 10-12 minutes (medium rare). Transfer meatballs to towel lined pan.

4. Transfer meatballs to serving dish and serve with yogurt sauce & pitas.


Monday, March 16, 2009

MFM: Curry Beef Short Ribs

Not to be completely boring, but here's another coconut & red curry dish paired with Lacinato kale. Of course, to keep you stimulated & interested I'm presenting the Man Food Mondays, version: beef short ribs slow cooked with tons of garlic & shallots, onions, coconut milk and red curry paste.

Coconut Curry Beef Short RibsBelieve it or not, this is the first time I've had ribs! OK...well I've had bites of someone else's ribs, but I've certainly never tackled a plate on my own. Part of my issue with ribs lies in the fact that I don't enjoy eating off of bones, regardless of the meat. Luckily, this recipe calls for shredding the meat and serving over rice. We used brown Basmati rice, which nicely soaked up the sauce.

Curry Beef Short RibsSpeaking of the sauce, when all was said and done, the meat looked a little dry & we are definitely sauce lovers so I added extra coconut milk & red curry paste to moisten things up a bit and give the meat an extra zing.

The next day we made beef sammies...oh my. Yum! Maybe I do like ribs after all.

Curry Beef Short Ribs
Adapted from Cooking Light

2 teaspoons canola oil
2 pounds beef short ribs, trimmed
1 1/2 teaspoons kosher salt, divided
1/4 teaspoon freshly ground black pepper, divided
1/3 cup minced shallots
1/4 cup chopped onions
3 tablespoons minced garlic
3 tablespoons minced peeled fresh ginger
1/4 cup water
3 tablespoons red curry paste, divided
1/2 cup light coconut milk, divided
1 tablespoon sugar
1 tablespoon fish sauce
1 teaspoon grated lime rind
1 tablespoon fresh lime juice
4 cups hot cooked basmati rice (we used brown Basmati)

Preparation

1. Heat oil in a large nonstick skillet over medium-high heat. Sprinkle ribs with 3/4 teaspoon salt and 1/8 teaspoon pepper. Add half of ribs to pan; cook 2 minutes on each side or until browned. Place ribs in an electric slow cooker. Repeat procedure with remaining ribs.

2. Add shallots, onion, garlic, and ginger to pan; sauté 2 minutes. Stir in 1/4 cup water and 2 tablespoons of red curry paste; cook 1 minute. Stir in 1/4 cup coconut milk, sugar, and fish sauce. Add to slow cooker. Cover and cook on low for 5 hours (depends on your slow cooker. Ours is turbo speed!)

3. Remove ribs from cooker. Strain cooking liquid through a colander over a bowl; discard solids. Place a large ziploc bag inside a bowl or measuring cup. Pour cooking liquid into bag; let stand 10 minutes (fat will rise to the top).

4. Seal bag; carefully snip off a small bottom corner of bag. Drain drippings into a small bowl, stopping before fat layer reaches opening; discard fat. Stir 3/4 teaspoon salt, remaining 1/8 teaspoon pepper, rind, and juice into liquid. Add liquid back to slow cooker and turn on "keep warm" setting.

5. Shred rib meat with 2 forks; discard bones. Add meat back to slow cooker & stir to combine with liquid.

6. In a small bowl, stir 1 tablespoon red curry paste & 1/4 cup coconut milk until combined. Pour over meat and stir. Keep in slow cooker on "keep warm" until ready to serve. Serve meat and sauce over Basmati rice.

Thursday, March 12, 2009

Halibut with Coconut Red Curry & Garlic Lacinato Kale

There's a little game we I play in our house and it goes a little something like this:
ME: Honey?! Did you eat any of these cookies/biscotti/Wheat Thins/dessert?
HUBBY: Uh, no.
ME: But, uh. they're almost all gone! Surely I didn't eat these ALL by myself. You had to have had at least one, right? I mean, really. I couldn't have finished a whole batch....
HUBBY: Well,ok. Maybe I had one. Oh, uh...I mean two?
Me: (silence) {...look of horror takes over my face}.
HUBBY: Wait, maybe I had more than that. Don't you worry, babe. I ate a lot. (little white lie told by my spouse to prevent annoying "Am i getting fat?" questions).

Coconut Red Curry Halibut
It's wonderful having someone around to tell itsy-bitsy-little white lies just to make you feel better about your crazy appetite. It's really wonderful, actually, until I had to change my outfit before work because the pants I had put on were a little too tight. Not so wonderful.


Curry Halibut with KaleOn to happier things, this tasty dish isn't exactly low fat, but it tastes light and is quite healthy nonetheless. Flaky & mild halibut works well with a flavorful red curry coconut sauce. I paired the halibut with sweet brown rice, a thick & sticky version of the brown rice you're probably used to. Being so thick, the rice may have overpowered the sauce a little bit and next time I'd try this with Jasmine rice and add a little somethin' somethin' to the sauce to give it a kick.


Curry Halibut
Lastly, I cooked Garlic Lacinato Kale as our side. I cannot begin to tell you how much we love this veggie. Unlike curly kale, Lacinato kale has flat broad leaves and looks a little bit like something a Triceratops would eat. It's huge. We called it dinosaur food the first time we bought it and later found out that it's also sometimes called Dino Kale. Gosh, we're observant.

Coconut Red Curry Halibut
adapted from Cooking Light

canola oil
4 (6-ounce) halibut fillets
salt & fresh ground pepper
1 cup chopped onion
1/2 cup chopped green onions
1 tablespoon grated peeled fresh ginger
1 cup light coconut milk
1 tablespoon sugar
1 tablespoon fish sauce
2 teaspoons red curry paste
1/2 teaspoon ground coriander
1 tablespoon chopped fresh basil
2 teaspoons fresh lime juice

1. Heat 1 teaspoon oil in a large nonstick skillet over medium-high heat. Season halibut with salt & fresh ground pepper. Add fish to pan; cook 5 minutes on each side or until fish flakes easily when tested with a fork or until desired degree of doneness. Remove fish from pan; cover with foil to keep warm.

2. Add additional oil to pan. Add onion. Sauté 2 minutes. Add green onions, and ginger; sauté 2 additional minutes. Stir in coconut milk, sugar, fish sauce, red curry paste & coriander. Bring to a boil; cook 1 minute. Add salt & pepper to taste. Remove from heat. Stir in basil and juice.

Garlic Lacinato Kale

bunch of Lacinato Kale
1 large garlic clove
Kosher salt
olive oil

Rinse kale thoroughly. Strip leaves from the middle stem. Tear into smaller pieces.

Heat olive oil in a large saucepan over medium heat. Add kale and sprinkle with Kosher salt. Stir a few times, and allow to cook down slightly. Add garlic cloves and stir until garlic is fragrant. Add a teaspoon of water to the pan. Cover and reduce heat to low. Allow to simmer for about 2 minutes.

Sunday, March 8, 2009

Quick & Easy Creoleesque Chicken & Shrimp

I don't usually wake up too late on the weekends, but for some reason Daylight Savings really did a number on me. After taking a nice long stroll around Lake Miramar, hubby and I went to grab some groceries for the week. Upon returning home, I couldn't keep my eyes awake and proceeded to pass out for 2 hours...on the ground...like an animal! I enjoy naps and all but typically those of the 15 minute variety. Waking up from a 2 hour nap just leaves me groggy and crabby.

Chicken & Shrimp CreoleNeedless to say I wanted to make something quick and easy for dinner. Chicken & Shrimp Creole is an old standby that I love to make, especially after a long day at work. Or... a long day of sleeping on the ground. It's easy, flavorful and I usually have everything on hand. Well, maybe not the okra, but I feel that's an expendable ingredient if you have to omit. I served this on top of short grain brown rice, but it's equally as tasty with some noodles or even just a hunk of bread.

PS. I don't claim that this is in any way "authentic" Creole. I just don't really have a better name for it :)

Quick Creoleesque Chicken & Shrimp

nonstick cooking spray
1 pound chicken breast tenders, chopped into cubes
Montreal chicken seasoning
1 red bell pepper, seeded and sliced
1 cup frozen cut okra, thawed
3/4 cup thinly sliced celery
1/2 cup frozen sweet corn
3/4 teaspoon sugar
1/2 teaspoon salt
1/2 teaspoon dried thyme
1/2 teaspoon dried oregano
1/4 teaspoon ground red pepper
1 (14.5-ounce) can diced tomatoes, undrained
1/2 lb medium shrimp, peeled & deveined
1/4 cup chopped fresh parsley
1 tablespoon butter

1. In a medium bowl, season the chicken with Montreal Chicken Seasoning. Stir to combine evenly.

2. Heat a large nonstick skillet over medium-high heat. Coat pan with cooking spray. Add chicken; cook 3 minutes on each side or until browned. Add red bell peppers, okra, corn and spices (sugar through ground red pepper), stirring to combine. Pour tomatoes over chicken mixture; bring to a boil. Cover, reduce heat, and simmer for 5 minutes.

3. Uncover; stir in shrimp and cook until just turning pink, about 3 minutes. Add parsley and butter, stirring until butter melts.

Monday, March 2, 2009

Cornmeal Crusted Mango Salmon

After a combined 18 hours of travel, we've managed to sit in 6 planes, bum around the airport for 8 hours, sit in 1 "Chili's Too" and have miraculously returned from West Palm Beach in one piece. I must say that I did pass out last night at 8pm, and didn't wake up this morning until well after my alarm went off, but it was definitely worth it. A best friend of mine just got married at an absolutely fabulous place, The Sundy House. If you're looking to get married in Florida, this is the place! We were surrounded by palm trees, cute fish ponds and a very romantic, tropical setting.

Cornmeal Crusted Mango SalmonUnlike many wedding receptions, the food was absolutely wonderful. I chose the light Florida grouper entree which was served with.....coconut sweet mashed potatoes! I must try to make this soon.

Though I live in sunny San Diego, Florida just seems more tropical to me. Perhaps it's the balmy temperatures or the ritzy beachside mansions. Or all the Floridians who look a little like this...

George Costanza's parent
In any case, all this tropicalness reminded me of a mango salmon dish I made awhile back. It's a perfect summery dish that can be served in the doldrums of winter to remind you of sunshine and vacation.
Cornmeal Crusted Mango SalmonCheck out Meeta's Monthly Mingle - Caribbean Cooking - for more tropical delights!

Cornmeal Crusted Mango Salmon
courtesy of Sunny Anderson

1 cup mango nectar
1 large mango, diced
1/2 cup all-purpose flour
1/2 cup cornmeal
2 teaspoons sugar
1 teaspoon salt
4 (6-ounce) center-cut salmon fillets with skin
Freshly ground black pepper
1 tablespoon extra-virgin olive oil
1 tablespoon butter

1. In a small saucepan over high heat, bring mango nectar and mango to a boil. As mango begins to break down, press down on it with a fork or potato masher, to mash it. Continue cooking until mango cooks down to form a chunky puree, about 15 minutes. Remove half to serve as a sauce. Set the other half aside for dredging.

2. On a large plate, mix together flour, cornmeal, sugar and salt.

3. Preheat a large skillet. Season salmon with salt and freshly ground black pepper (and a touch of cayenne if you're feeling crazy). Brush glaze over top of salmon, then dredge in cornmeal mixture. I covered the sides of the salmon with the cornmeal mix. Add oil and butter to skillet. Over high heat, sear salmon cornmeal mixture face down until golden, about 6 to 8 minutes for medium rare, flipping halfway through to crisp skin. If you cover all sides with the breading, lightly sear each side until the coating is crisp.

4. Drizzle mango sauce on salmon and serve immediately.

Wednesday, February 4, 2009

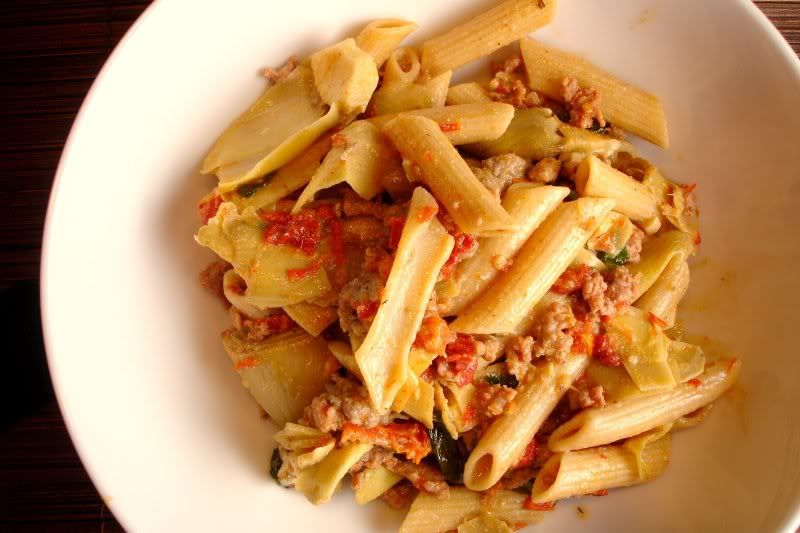
Rustic Penne with Sausage, Artichokes and Sun Dried Tomatoes

For those of you who applauded my food journal efforts, thank you. It was a valiant effort, but my inner beast took a hold of me and forced me to eat faster than I could write. It happens. Maybe I'll put it on 2010's list of resolutions.

Sun Dried Tomato Sausage Penne
I may eat a lot, but I can at least attempt to cook & eat healthy. This penne pasta recipe was inspired by a dish I saw in Giada's Family Dinners. I made quite a few tweaks, including adding additional veggies, using whole wheat pasta and subbing turkey sausage for the meat. In order to add a little creaminess without adding a lot of fat, I added a few dollops of part-skim ricotta cheese to thicken up the sauce. After buying a tub of ricotta on sale, I've found that it works wonders and have happily been throwing it in to just about every dish I make, whether it belongs or not!

Bowl of Penne with Artichokes, Spinach & Sun Dried TomatoesThe pasta is a hearty, easy to throw together meal that filled us up. We happily had the dish for leftovers the next night. Instead of microwaving, which tends to dry out pasta in my opinion, I threw the leftover pasta into a wok with some olive oil, broccoli, a few more scoops of ricotta cheese and finally green peas. We liked this version the best so I've included it in the recipe below.
whole Wheat Penne with Artichokes
Rustic Penne with Sun Dried Tomatoes, Artichokes & Sausage (and too many other goodies for a recipe title...)
Inspired by Giada's Family Dinners

3/4 cup drained oil-packed sun-dried tomatoes, sliced with 2 tbsp of oil reserved
1 large link (1/2 lb) of sweet Italian turkey sausage, casings removed
1 large link (1/2 lb) of hot Italian turkey sausage, casings removed
2 8 oz packages of artichoke hearts, coarsely chopped & thawed
2 large garlic cloves, chopped
1 3/4 cup chicken broth
1/2 cup dry white wine
1/4 cup frozen green peas
1/4 tsp red pepper flakes
Kosher salt & freshly ground pepper
12 oz whole wheat penne
1/2 cup freshly grated good-quality Parmigiano Reggiano cheese
1/4 cup fresh parsley, chopped
1/2 cup loosley packed baby spinach
cooked broccoli florets (optional)

1. Heat 2 tbsp of sun dried tomato oil in a large skillet. Add the sausage and break up into pieces. Cook until brown, about 6-8 minutes. Transfer the sausage to a bowl.

2. Add artichokes & garlic to the same skillet and cook until garlic is tender, about 2 minutes. Add the broth, wine, and sun dried tomatoes. Bring to a boil and allow to simmer until the sauce reduces slightly, about 8 minutes. Add peas & red pepper flakes.

3. While sauce is simmering, bring a large pot of salted water to a boil. Add the penne and cook until al dente, about 8-10 minutes. Drain the pasta, do not rinse.

4. Add pasta, sausage, 1/2 cup of cheese, parsley, spinach, and broccoli (if using) to the mixture. Toss until combined. Add two scoops of Ricotta cheese and continue to toss until cheese is melted and incorporated in sauce. Season with salt and freshly ground pepper, to taste.

Thursday, January 29, 2009

Chicken Pastry Bundles with Red Pepper and Cream Cheese

Chicken Pastries with Red Pepper and Cheese
OK. I've done it. Following the good example of many of you do-gooders out there, I've decided to return to tracking my *many* eats. I'm a completely excessive snacker, and somehow have the appetite of a 300lb man who hasn't been fed in days. Thankfully, nature has been kind to me and I'm merely a 300lb man stuck in a woman's body, but don't look like it! :) Eating 3 granola bars a day isn't the worst thing you could do to your body but probably not the best, either. I tend to eat and forget exactly how much I consume when I'm hungry, stressed, and at work.

In any case, from here on out I'll be writing down what I eat. Hopefully I'll now eat 9 pieces of candy as opposed to 10. :)

Chicken Pastry Bundles served with broccoli

Prior to my food journal days, I ate copious amounts of this tasty dish, courtesy of hubby's Man Food Mondays. For those of you new to the game, hubby has graciously offered to cook us dinner on Mondays and I must say he's gone from not cooking to a total chef. I may have competition here, folks! It's been awhile since my last MFM post but that's out of my own sheer laziness, not his. Oh, and it's not Monday, but work with me here.

Chicken Pastry Bundles with Red Pepper and Cheese
We're not sure where this recipe came from, though it's one of the first meals that my boyfriend-now-husband cooked for me. Diced chicken is mixed with a cream cheese and dill mixture along with sauteed red pepper and onion. The delightful result is wrapped with crescent dough, then dunked in a bath of breading before baking to a golden crisp. Sound like a lot of calories? Well, it may be, but it's worth it! Try using reduced fat crescent dough and/or cream cheese if you're worried. I've given it a fancy name, but really we just call them Chicken Pockets!


Chicken Pastry Bundles with Red Pepper and Cream Cheese aka "Chicken Pockets" in our house

2 tablespoons of diced onion
1/2 cup diced red pepper
2 cups cooked chopped chicken
3 oz of cream cheese softened at room temp
1/4 - 1/2 tsp dill (to taste)
2 tablespoons of milk
3 tablespoons of melted butter
Italian bread crumbs
2 tubes of crescent roll dough

Directions:

1. In a pat of butter, saute diced red pepper and onion in a pat of butter. Cook until softened, about 4 minutes. Allow to cool slightly.

2. In a medium bowl, combine chicken, cream cheese, dill, onion, red pepper, and milk.

3. Roll out crescent rolls. Take two sections and press edges together to form a rectangle. Place 1/3 cup filling onto dough; wrap mixture with dough & seal the corners with warm water.

3. Dunk pocket into melted butter and then in Italian breadcrumbs.

4. Place on sprayed cookie sheet and bake at 350 degrees for 20 minutes until golden brown.

Monday, August 11, 2008

Athenian Shrimp & Orzo

As much as I love sweets, I try to be on average, a healthy grocery shopper. I usually select whole grain over white breads, and will pick reduced fat items when I know it won't compromise taste. In general, here's my thoughts: fat free salad dressing = quasi-edible; fat free cheese = gummy, scary mess; nonfat yogurt = yummy.

A few weeks ago, I purchased a tub of vanilla yogurt that blatantly advertised that it was "FAT FREE." After making his daily breakfast combo of yogurt, granola and fruit, hubby proclaimed that fat free yogurt was "gross. thin. unflavorful." mmm, kay. I tried to point out that his anti-fat free product aversion was most likely a creation of his head, but I was only met with a frown.

Fast forward to what's probably our 4th grocery shopping trip of the week (obviously not always the best of planners). We cruise by the dairy aisle and hubby mentions that Light 'n Fit has always been his favorite yogurt brand and tosses a few in the cart.

My response: "Really? I also love Light 'n Fit because it's fat free!"

He refused to believe me until this morning when he opened the refrigerator, groaned as he checked the yogurt label and saw with his own eyes a big fat zero next to grams of fat. He didn't say anything else 'bout it. It's all in your head, my love.

What does Athenian Shrimp and Orzo have to do with yogurt? Well, not much except that this dish is also healthy and low in fat. Though being low fat typically counts as a virtue, its sometimes best to keep those facts a secret from the ones you love. So, for all of you turned off by low fat meals, pretend I never told you.

Today's dish comes from Eating Well and is advertised as a heart healthy, high in calcium, high in potassium and low in fat meal. Because we still have no baking dishes, I skipped the baking, kept the house relatively cool and cooked everything on the stove. Low fat or not, we both loved this dish!

Check out Presto Pasta Nights, hosted this week by the fabulous Ruth of Once Upon a Feast.

Athenian Orzo and Shrimp
Source: Eating Well
1 1/2 teaspoons extra-virgin olive oil
1 small onion, chopped
4 cloves garlic, minced
1/4 cup dry white wine
1 28-ounce can diced tomatoes
3 tablespoons chopped fresh parsley, divided
1 tablespoon drained capers
1/2 teaspoon dried oregano
1/2 teaspoon dried basil
1/2 teaspoon salt, or to taste
Freshly ground pepper to taste
Pinch of crushed red pepper
1 pound medium shrimp (30-40 per pound), peeled and deveined
1 cup orzo
1/2 cup crumbled feta cheese

1. Preheat oven to 450°F Coat a 9-by-13-inch (or other 3-quart) baking dish with cooking spray. (or skip the baking if your house is too hot already and cook entirely on the stove).
Put a large pot of lightly salted water on to boil.
2. Heat oil in a 2-quart saucepan over medium heat. Add onion and garlic and cook, stirring, until softened, 3 to 4 minutes. Add wine and cook for about 1 minute. Stir in tomatoes, 1 1/2 tablespoons parsley, capers, oregano, basil, salt, pepper and crushed red pepper; cook for 5 minutes. Drop in shrimp and cook, stirring, until barely pink, about 2 1/2 minutes.
3. Cook orzo in the boiling water until tender but still firm, 8 to 10 minutes. Drain and transfer to the prepared baking dish. Toss with the tomato-shrimp sauce. Sprinkle with feta and the remaining 1 1/2 tablespoons parsley. If not baking, simply toss in the orzo to the shrimp mixture. Add feta and parsley and serve.
4. Bake, uncovered, until the feta is bubbly, about 10 minutes.

Tuesday, August 5, 2008

Curry Orzo Shrimp, a leftover remake

Blink...Blink...Blink...

I've been trying to compose a post for days now, and finally realized that I have developed quite the friendship with the blinking cursor. Despite the multitude of daily inspirations, my Blogger screen has remained blank, and for once in my life I'm at a loss for words! I'm hoping it's just a funk and I'll soon snap back into reality.

In the meantime, I've done a fair amount of cooking recently, though we've been eating out a lot with visitors and friends. As a result, our refrigerator is fully stocked with leftovers from DC's finest eating establishments. If anyone's interested in a city-wide restaurant taste test, just come a knockin at our door.

Last week, we enjoyed dinner at Satay Club, an Asian fusion restaurant highlighting Chinese, Japanese, Thai and Malaysian cuisine. I may be missing some, but those are the main countries I noticed on the expansive menu. The food bordered on excellent, with our favorite being the Curry Laksa, a mixture of rice and egg noodles in a coconut curry broth. We loved that tasty broth so much that even after we devoured the rest of the meal, we brought home just the broth for a little leftover re-do. Every gal deserves a cheatin' speedy dinner, don't ya think?

Using the rich coconut curry as a start, I sauteed red bell peppers, mushroom and garlic until softened, then added them to the simmering curry broth. I threw a little spinach in there for vitamins and good measure...A few peeled and deveined shrimp make everything tasty, also feeding my ever lasting shrimp addiction. Simmer until they are barely pink.

...and throw in cooked orzo (1 cup uncooked). Continue to simmer for about 5 minutes and voila! you've got yourself a hearty meal! I'm not sure if its common to combine orzo with curry, but we loved how the little pasta soaked up the sauce and turned these leftovers into a main dish. I'll certainly be using this combo in the future.

If you're an adventurer, try these recipes for laksa, found through the wonderful Food Blog Search.

Asian Satay Club
4654 Wisconsin Ave NW
Washington, DC 20016 (202) 363-8888

Tuesday, July 29, 2008

Turkey Feta Pizzas & More DC Happenings

More on this guy later...

Every couple should be forced to spend at least one summer in a studio with no TV. Hubby and I have been more active than we ever could have imagined. Gone are the lazy Saturdays of San Diego, spent lounging in bed all morning, then rolling out of bed to lay a little bit longer on the beach. We've been out and about and DC's great (free) museums have something to do with that. First off, can anyone tell me what's the name of this tree? They're everywhere and absolutely gorgeous.

This Saturday, we visited the US Botanic Gardens to mourn my lovely garden that has surely died of neglect in my absence. We were a little weary of the Botanic Gardens as D.C.'s heat makes for a little bit of a bloodbath and the last thing we needed was to be subjected to any junglesque greenhouse temperatures. I was delighted to see that one of the first exhibits was not only air conditioned, but featured "The Aroma of Food and Drink," showcasing exotic and native spices and plants that go into many of the foods we enjoy. Best of all (well, second to the air conditioning), you could get up close and take a whiff of the spices. Of course, vanilla smelled so good and the thought of French Vanilla Ice Cream was more than I could handle at the time.


Could this place get any better? The orchid exhibit was next, displaying my all time favorite flowers and the main flower of our wedding. See those beauts up top in the banner? That's our wedding cake!


After too much fun for one day, we hiked to the Metro & came home to pass out after all this excitement.

Once I awoke from my nap, I got working on our dinner. A wife's work is never done, huh? :)This treat was inspired by none other than Elle from Elle's New England Kitchen. There are a lot of great blogs out there, so I'd be hard pressed to choose a favorite, but if some crazy man demanded that I choose one or else, I'd say Elle's is definitely up there.

From the moment I saw Elle's post about Turkish Pizzas, I knew that the recipe would hijack all the others on my burgeoning 'to-make' recipe list, and take top spot. Boy, am I glad that these pizzas made it to the top. This was easily one of my favorite recipes to date and I can't wait to have these again.

I followed Elle's recipe for the dough, though I added a 1/2 tsp of garlic powder to the flour. Garlic makes everything better, don't ya think? The crust came out perfectly soft on the inside with a slight crisp on the outside. Fluffy bread like this is the stuff of dreams for carb-a-holics like us.


For the filling, I went ahead and used ground turkey since I purchased a package on sale, and cooked it directly with the spices and other ingredients instead of cooking them seperately. I also added diced red pepper, cilantro, cinnamon, red pepper flakes and a dash of lemon juice to the mixture because I'm crazy like that. Elle mentions in her post that the original recipe suggests feta as an optional add-on, but I would say do not skip the feta as it definitely makes the filling!

This smelled so good while cooking that we couldn't wait to take pictures. The pics were snapped in a little bit of a starvation-half tired from a nap-too much activity for one day-frenzy so pardon if they're a teensy bit of out of focus. I served the pizzas with a side of coucous and we were in heaven...once I put the camera away.

Turkey Feta Pizzas
Adapted from Elle's New England Kitchen & Oriental Basics

Elle's dough recipe (I added 1/2 tsp garlic powder)

Filling:
1/2 large sweet onion, finely diced
1/2 cup red bell pepper, finely diced
2 garlic cloves, minced
1 tbsp olive oil
1 pound lean ground turkey
1/2 cup chopped & seeded tomato
2 tsp tomato paste
2 tsp sweet paprika
1/2 tsp ground cinnamon
1/2 tsp cumin
1/8 tsp red pepper flakes
Kosher salt and pepper
4-5 oz crumbled feta
1/4 cup chopped cilantro (optional)
half of a lemon


1. Heat oven to 450°.
2. Heat a large wok over medium high heat. Heat the oil and saute the onions until they begin to soften, about 3-4 minutes. Add red pepper and garlic and saute for an additional 2-3 minutes, or until red pepper begins to soften. Add diced tomatoes and saute 1-2 minutes. Push the veggies to the side of the wok.
3. Add a bit of oil to the skillet if needed, then saute the meat until barely pink. Mix veggies into turkey and add tomato paste and spices. Mix until incorporated. Remove from heat and add feta. Taste and adjust seasonings.
4. Divide dough into 8 portions and roll out to thin circles. Line 2 baking sheets with parchment, and place 4 dough circles on each one. Spread some of the topping on the first 4, then put the baking sheet in the oven. Have 1/2 cup of cold water ready, and toss it in the bottom of the oven quickly, then shut the door.Bake for 8-10 minutes. Repeat with last 4 pieces of dough. Remove from pan to a cooling rack. Sprinkle with chopped cilantro & lemon juice.

Friday, July 11, 2008

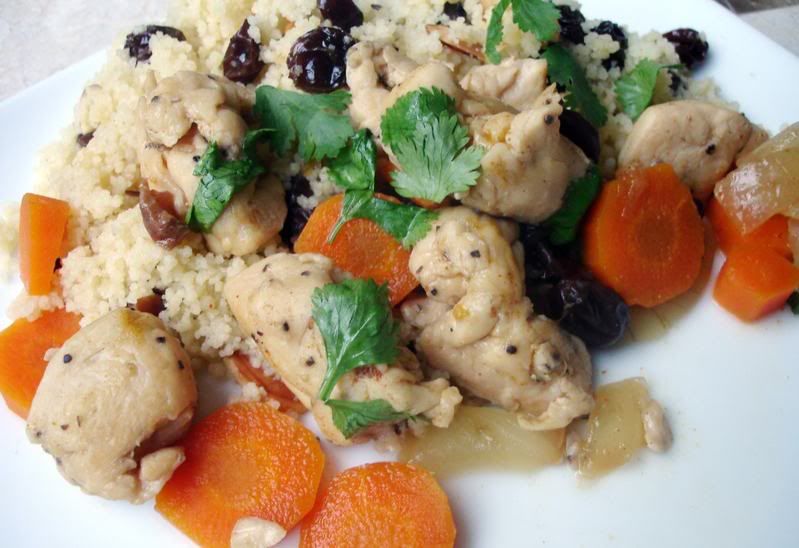
Moroccan Spiced Chicken with Saffron Coucous

Moroccan Spiced ChickenI'd like to put a disclaimer out there that this dish is probably not authentically Moroccan in any way. Because of poor planning and evening commitments, I had to bastardize this guy to fit my needs. Though the original calls for apricots, I had none and used raisins. The chickpeas I thought were in my pantry were somehow missing so I left those out. I added cannellini beans to the leftovers, and would highly suggest these as an alternative. Lastly, the original calls for a whole chicken. I imagine bone-in chicken would be delicious, but since I was cooking for one, I used boneless skinless chicken. I like leftovers, but not sure about a whole chicken. Lots of changes made on the fly, huh? Thankfully, this turned out delicious and full of flavor. Cinnamon and the sweet raisins offset the spiciness from the red pepper while simmering the chicken in the spices results in juicy and tender meat.

Since the couscous calls for raisins, the raisins in the chicken dish may be overkill for some. I love them, so didn't mind the extras. If you decide to make this, maybe you should plan ahead unlike me!

Moroccan Spiced Chicken
Adapted from Cook's Illustrated


1 1/4 teaspoons sweet paprika
1/2 teaspoon ground cumin
1/4 teaspoon cayenne pepper
1/2 teaspoon ground ginger
1/4 teaspoon ground coriander
1/4 teaspoon ground cinnamon
2 tsp fresh lemon zest
3 tablespoons fresh lemon juice , from 1 to 2 lemons
5 medium cloves garlic , minced or pressed through garlic press (about 5 teaspoons)
1 whole chicken, cut into 8 pieces (I used about 1.5 lbs of boneless skinless chicken)
salt & pepper, to taste
1 tablespoon olive oil
1 large onion , halved and cut into 1/4-inch slices (about 3 cups)
1 3/4 cups low-sodium chicken broth
1 tablespoon honey
1 medium carrot , peeled and cut crosswise into 1/2-inch-thick coins
1 cup dried apricots , halved (I used about 1/2 cup raisins)
1 (15 ounce) can chickpeas , drained and rinsed
2 tablespoons chopped fresh cilantro leaves

1. Combine spices in small bowl and set aside.

2. Season chicken liberally with salt and pepper. Heat olive oil in large heavy--bottomed Dutch oven over medium-high heat until beginning to smoke. Brown chicken pieces in single layer until seared, but not cooked through, about 4-5 minutes. Transfer chicken to large plate;if using whole chicken, peel off skin and discard.

3. Add onion and lemon zest to the pot, stirring occasionally, until onions have browned at edges but still retain shape, 5 to 7 minutes (add 1 tablespoon water if pan gets too dark). Add garlic and cook, stirring, until fragrant, about 30 seconds. Add spices and cook, stirring constantly, until darkened and very fragrant, 45 seconds to 1 minute. Stir in broth and honey, scraping bottom of pot with wooden spoon to loosen browned bits.

4. Add carrots, apricots or raisins, and chicken (with any accumulated juices) to pot, arranging breast pieces in single layer on top of carrots. Cover, reduce heat to medium-low, and simmer for approximately 10 to 15 minutes.

5. Transfer chicken to plate or bowl and tent with foil. Add chickpeas to pot; increase heat to medium-high and simmer until liquid has thickened slightly and carrots are tender, 4 to 6 minutes. Return chicken to pot and add cilantro and lemon juice; stir to combine and adjust seasoning with salt and pepper. Serve immediately with couscous.

Saffron Couscous with Toasted Almonds
From Cook's Illustrated
4 tablespoons unsalted butter
2 cups plain couscous
3/4 cup sliced almonds
pinch of saffron threads, crumbled with fingers
1 small onion , chopped fine
3/4 cup raisins
Table salt
1 3/4 cups canned low-sodium chicken broth
2 cups water
1 1/2 teaspoons fresh lemon juice from 1 lemon
Ground black pepper

1. Melt 2 tablespoons butter in a large skillet over medium-high heat. When the foaming subsides, add the couscous and cook, stirring frequently with a wooden spoon, until some grains are beginning to brown, about 3 minutes. Scrape the grains from the skillet into a large bowl and return the pan to medium heat. Add the almonds and cook, stirring frequently, until they are lightly toasted and aromatic, about 1 1/2 minutes. Scrape them into a small bowl.

2. Add the remaining 2 tablespoons butter to the skillet. Once it melts, add the saffron, onion, raisins, and 3/4 teaspoon salt and cook, stirring occasionally, until the onion has softened and is beginning to brown, about 5 minutes. Add the broth and water, increase the heat to medium-high, and bring to a boil.

3. Add the boiling liquid to the bowl with the toasted couscous, cover tightly with plastic wrap, and allow to sit until the couscous is tender, about 12 minutes. Remove the plastic wrap, fluff the grains with a fork, and gently stir in the almonds and lemon juice. Adjust the seasonings with salt and pepper to taste and serve immediately.

Wednesday, June 25, 2008

Grilled Pizza Adventure

What had meant to be a quick and relaxing celebration of summer turned into a long & exhausting walking tour of our apartment grounds. Out here in California, we’ve settled into a little bit of a retreat for young, former city dwellers. The sprawling joint is equipped with multiple pools and barbeque grills, lest any of us actually have to actually more than 100 feet from our apartments to enjoy the community amenities. Ritz Carlton, it’s not but it’s certainly a far cry from our previous shoebox sized city apartment.

We had been meaning to make grilled pizza for awhile. Both patience (allotting time for the dough to rise) and a warm evening had been eluding us. A few weekends ago, inspiration hit us and we followed all of the many tutorials that strongly suggested having a mise en place – having all the fixin’s ready at the go.

We marched out to the pool, only to find an army of hungry residents and screaming kids waiting in line at the grills. Usually, we’re greeted with one or two other couples, quietly grilling up a hamburger or two. To make a long story short, we spent the next hour and a half hopping from pool to pool, armed with 2 risen pizza dough rounds and a heavy bag full of sauces and toppings. We soon discovered that our lovely management had closed every pool area for the night. That evening, only? What luck! We even tried to sneak into a neighboring complex’s pool. If only we had succeeded and been detained for trespassing, I’d have a much more entertaining pizza story for you all. Instead I have an UGLY yet DELICIOUS pizza to share.

I was constructed in darkness, please pardon my ugliness.

Despite our setbacks, we managed to have a great time making these pizzas. By the time we secured our own functioning grill, it was nearly pitch black outside and almost bedtime for me. Not knowing too much about grilling pizzas, we forged ahead and created these masterpieces in the dark.

Making grilled pizza certainly isn’t as easy as calling up Papa John’s, but the crust was the perfect combination for us: doughy on the inside (for me), crusty on the outside (for hubby).

We went with our favorite flavor combination, Barbeque Chicken Pizza with a Garlic Herb Crust. Follow these tips & the recipe and you’ll be off to another dreamy land – that’s how good these were. Just make sure you have a grill to use :)

Tips for Grilling Pizza

  • Liberally oil the grill grates & pizza dough before grilling
  • After grilling one side of the dough, flip the dough onto a flat plate or pizza paddle and place the sauce & toppings on the grilled side. Pulling the dough off the grill allows you ample time to arrange the toppings as you wish
  • Once the pizza has been “dressed” return the dough to the grill and close the lid to allow the toppings to warm and the cheese to melt.

The recipe below is for the garlic herb crust. Play around with the toppings as you like. For the Barbeque Chicken Pizza, we simply used Sweet Baby Ray’s BBQ sauce, grilled chicken (cooked on the grill), sauté mushroom and sweet onion (cooked inside), Monterey jack cheese, and lots and lots of cilantro.

Grilled Garlic Herb Pizza Dough
Adapted from Allrecipes.com and Cooks Illustrated

Pizza Dough
1 (.25 ounce) package active dry yeast
1 cup warm water
1 teaspoon granulated sugar
2 tablespoons olive oil
2 cloves garlic, finely minced
2 teaspoons Kosher salt
1 tablespoon olive oil
3 1/3 cups bread flour
1 tablespoon chopped fresh basil
Cornmeal for dusting

Garlic Oil for grilling
½ cup olive oil
1 teaspoon minced garlic

  1. In a bowl, mix yeast with warm water and mix in sugar. Let stand for 10 minutes, or until frothy.
  2. While yeast is proofing, heat 2 tablespoons olive oil in a small skillet. Add garlic and sauté over low heat until garlic softens, about 4 minutes. Remove from heat and allow garlic and oil to cool.
  3. In a mixing bowl, combine yeast mixture, salt, garlic oil, and flour until dough pulls away from sides of bowl. I used a Kitchen Aid Mixer with a dough hook to complete these steps. Knead until smooth, about 8 minutes. If dough is too dry, add 1 tablespoon of water at a time. Place dough in a well oiled bowl and cover with a damp kitchen towel. Set aside until doubled, about 1 hour. Punch down and knead in fresh basil. Cover and set aside to rise for 1 more hour, or until doubled in size.
  4. Heat ½ cup olive oil and garlic for 30 seconds in the microwave and set aside to cool. Punch down dough and divide in half. Roll each into a round shape about 3/8 – ½ inch thick. Sprinkle a plate, cookie sheet or parchment paper with flour & cornmeal. Place dough round on sheet.
  5. Heat grill and brush grill grates with garlic oil. Brush tops of dough with garlic oil and sprinkle with Kosher salt if desired. Grill oil side down until grill marks begin to appear and the crust is lightly browned, about 3-4 minutes. While pizza is grilling, lightly brush the other side of the dough with olive oil.
  6. Carefully remove dough from grill and place onto a flat plate or cookie sheet, grilled side up. Dress pizza dough with sauce and toppings. Return pizza dough to the grill and close the cover to allow the toppings to heat and the cheese to melt, about 2 – 3 minutes.

Wednesday, June 11, 2008

Spinach Black Bean Lasagna

Back in the day when hubby and I were glowing and engaged, we had the great joy of planning our wedding and the most fun of all: the reception menu. With the carnivores in charge (our families and hubby) we of course, had Filet Mignon as the main act. For my sake, we added a Lobster Tail as the supporting act. For the sake of our 3-5 vegetarian friends, we decided to offer the option of a vegetarian plate on the RSVP cards.

A ridiculous number of invitations went out (big families all around), and finally, I had a wave of relief after surviving several wedding invitation disasters. After practically dancing and skipping out of the post office, I came home and looked lovingly at one of our extra invitations.

“WE SPELLED VEGETERIAN WRONG!"

That’s right, ladies and gents. 300+ of these babies went all across the country & over the Pacific Ocean to Asia asking my dearest friends and family if they were “vegeterian.” Ever since then, I’ve had it against vegeterians :)

#2 of the Carnivore’s Vegetarian Menu:
Spinach Black Bean Lasagna


Though I absolutely love black beans, I wasn’t quite sure I wanted them in my lasagna. Where’s all the creamy cheese and ground meat? Well, the cheese is still there. Black beans stand in for the usual ground turkey or beef and make both the sauce and filling hearty with a little dose of protein for good measure. The beans are mashed into the pasta sauce so their taste, while still present, is much more subtle than you’d expect. Spinach, red pepper, mushrooms and onion round out the filling with zesty Mexican cheese topping each lasagna layer. Though it may not look all that appetizing below, I promise it is!

Ricotta/Parm/Spinach/Pepper/Mushroom Goodness:

I usually like to make my own pasta sauce, though it typically simmers for about 2 hours; the lasagna takes 1 hour to bake so unfortunately, I didn’t have 3 hours to dedicate to dinner this go-around. I cheated and used two jars of pasta sauce: 1 Mushroom Marinara and 1 jar of Newman's Own Sockarooni sauce. If you are lucky enough to have a big batch of homemade sauce in the freezer, this would be a perfect time to bring it out!

Kevin from Closet Cooking is hosting Presto Pasta Night this week so hurry up and get your entry in!

Spinach Black Bean Lasagna

Lasagna Filling
½ large red bell pepper, finely chopped
1/4 cup sweet onion, finely chopped
½ teaspoon cumin
¼ teaspoon chili powder
1 tsp olive oil
½ cup sliced mushrooms
2 large eggs, beaten
1 (15 oz) container ricotta cheese (lowfat is OK, but don’t use nonfat)
1 (10 oz) package frozen chopped spinach, thawed and drained
1/4 cup chopped fresh cilantro
1/2 teaspoon Kosher salt
¼ cup fresh Parmesan
4 cups shredded Mexican Cheese blend (or Monterey Jack), divided

Black Bean Lasagna Sauce
2 cans black beans, rinsed and drained
2 (26 oz) jars pasta sauce or approximately 5 cups homemade pasta sauce
1/2 teaspoon ground cumin
¼ teaspoon ground black pepper (approximate, add more to taste)
9 precooked lasagna noodles (can use no-boil lasagna noodles, if available)

chopped fresh cilantro , for garnish

Preheat oven to 350 degrees and spray a 13 x 9 baking dish with nonstick spray.
Heat olive oil in a medium nonstick skillet over medium high heat. Add red pepper, onions, and ½ teaspoon cumin and the chili powder; sauté until tender about 6 minutes. Set aside to cool.

In a large bowl, stir together mushroom, eggs, ricotta, spinach, cilantro, salt, Parmesan cheese and 1 cup of the Mexican cheese. Add red pepper / onion mixture. Set aside.

Mash black beans with a potato masher or a hand held immersion blender (I have neither and tried using a fork – not recommended without high levels of patience!) Stir in pasta sauce, cumin and black pepper, to taste. Spread 1/3 of the sauce on the bottom of the baking dish. Layer with 3 noodles, half of spinach filling mixture, and 1 cup Mexican cheese. Repeat next layer with sauce, 3 noodles, remaining filling and cheese. Top with remaining noodles, sauce and cheese.

Bake, covered, at 350° for 1 hour. Uncover and top with remaining cheese. Bake 5 minutes or until cheese melts and is bubbly. Garnish, with chopped cilantro.

Thursday, June 5, 2008

Bubba Gump, who? Chipotle Lime Glazed Shrimp Satisfies the Obsession

Chipotle Lime Glazed ShrimpBy nature, my mother is a worrier. To this day, she still worries that I may forget to thank someone when they've done something nice for me, she frets that I forget to lock my doors, and even worries when I leave hubby to go out of town (lest he get lonely & have to cook for himself!). She's a very caring woman, and now that I'm well past my rebellious teenage years, I have a much greater appreciation for her worries.

Among her many worries is my love of shrimp. If you read the blog regularly, you may have noticed that I have a teensy obsession with both shrimp and desserts. Per my worrisome mother, I'm in for a lot of cholesterol problems with my shrimp addiction. I've always taken her concerns to heart, but to be honest have never really looked into the validity myself.
While its true these small yet tasty crustaceans have high cholesterol, they manage to pack a mighty nutritional punch. In a recent study, researchers at Rockefeller University and Harvard tested several different types of low fat diets on 18 people with normal cholesterol levels, including a diet containing more than half a pound of steamed shrimp a day. "The scientists found the shrimp diet did not raise participants' overall cholesterol levels. They're not sure why, however, the scientists say perhaps it's because shrimp is low in fat and contains fish oils that are good for your heart."

Moreover, just a four ounce serving of shrimp, provides as much as 28.2% of the recommended daily value for vitamin B12 and and around 20 grams of protein. As mentioned, shrimp are full of the "good fats," providing the much sought after omega 3 fatty acids in a low mercury form.
Ahh, now with the guilt out of the way and a rather clear conscience, I bring you Chipotle Lime Glazed Shrimp. Though I've seen them in countless recipes, I've never cooked with chipotle peppers in adobo sauce. The adobo adds a nice, smoky flavor while the peppers add quite a kick so be cautious if you're a spicy foods wimp like me. Brown sugar is used to counteract the heat and helps create the 'glaze' that coats the shrimp. I served these plump and juicy shrimp with Coconut Cilantro Rice.
*Source: World's Healthiest Foods

Chipotle Lime Glazed Shrimp
adapted from The Best Light Recipe

shrimp seasoning:
1 tablespoon olive oil
1 - 1 1/2 pounds of jumbo shrimp, peeled & deveined
1/4 teaspoon Kosher salt
1/4 teaspoon ground black pepper
1/8 teaspoon sugar

chipotle lime glaze:
2 tablespoons fresh lime juice
2 tablespoons fresh cilantro, chopped
1 chipotle chile in adobo sauce from can, chopped
2 teaspoons of adobo sauce from can
4 teaspoons brown sugar

1. Create the glaze by combining lime juice, cilantro, chile, adobo sauce and brown sugar in a small bowl. Set aside.

2. In a large skillet, heat olive oil over high heat. Toss the shrimp with the salt, pepper, and sugar. Once skillet is preheated add half the shrimp to the pan in a single layer and cook until the edges are pink, about 1 minute. Remove the pan from the heat and using tongs, flip the shrimp and let stand until the shrimp is opaque, about 45 seconds. Transfer the shrimp to a large plate. Repeat with remaining shrimp.

3. After the second batch has turned opaque, add the first batch of shrimp along with the Chipotle glaze to the pan. Toss until combined and shrimp are fully cooked through.

Wednesday, May 28, 2008

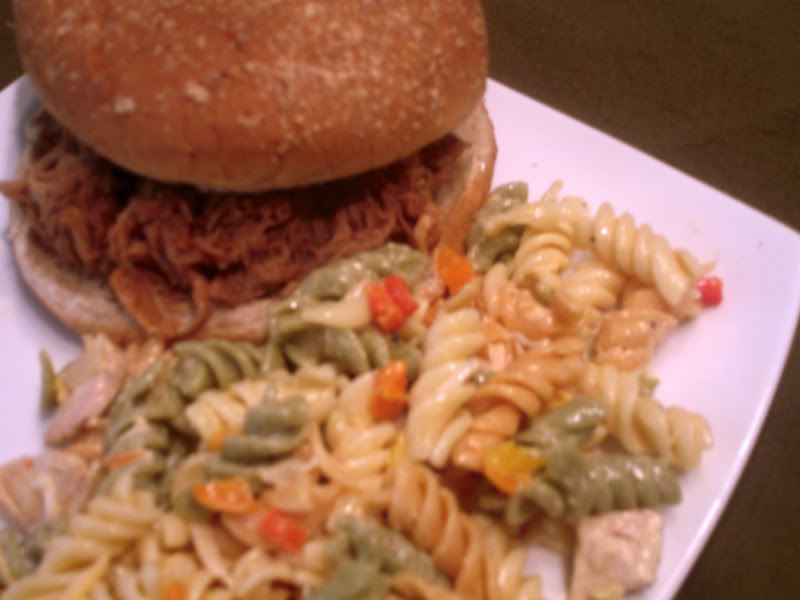
Labor of Love: Pulled Pork BBQ Sammies & Chicken Pasta Salad

Pulled Pork Sammie

I was a little bit of a precocious child. I'd find something and when I decided to like it, I LOVED it and took it upon myself to become an expert. One year, my obsession became dolphins - bottlenose, spotted, spinner- it didn't matter, I loved them all. I put my little heart into scouring through encyclopedias, books about dolphins, reading and learning just about everything my developing brain could soak in.

Hey, I even went through a dolphin fashion phase where I would wear dolphin earrings to match my dolphin t-shirt and socks (somehow I made it through these years with friends). Well at some point during my research, I read that dolphins were unfortunately being caught in nets by tuna fisherman. From that day forward, I swore I would never eat tuna. And I didn't...until I was in my 20s and decided I LOVED eating tuna, not studying them. Thankfully, I believe fishing practices have also improved.

I similarly decided as a child that I would not drink milk at the tender age of 3. Later in my childhood, I simply would not and could not eat a pig. That day, at the age of 8, I swore off pork. The tuna and the milk were not such a huge deal in my family. However, swearing off meat in a carnivorous family does not go over well. For many years, my Mom (being the saint she is) would have to make me my own "special" dish while the rest of the family dined on beef and pork. We'd go out for Pizza Hut and while the rest of the family shared a Meat Lovers pie, I'd have to get my own cheese pizza. Faces would sour when they saw my barren pizza; my parents would often wonder where I came from!

Fast forward to many years later: I'm no longer a picky eater in the least bit. I'll try anything once though the last time I said this I ended up eating chicken feet and feeling a tad bit ill.

As you'll notice, most of my posts and cooking concentrates on desserts (for obvious reasons), chicken/poultry and seafood. Even though I am no longer picky, old habits die hard and I have never been much of a meat eater. I had my very first bites of steak when I met my husband.

Hubby should probably hang out with my family more often since he's also quite a carnivore. He has been more than patient, altering his diet to accommodate mine so that we can share dishes at restaurants and I don't need to cook him anything "special" that I wouldn't enjoy myself. Though I will say that I'm less than skilled at cooking pork or beef, I've made a conscious effort to try it out from time to time to be fair to his tastes. While the rest of the world is moving towards a vegetarian diet, I'm bucking the trend. I'm a quasi-wannabe vegetarian trying to eat more meat!

Pulled pork is one of my favorite 'compromises' and this recipe is beyond easy. I usually save it for nights I know that I'll be working late or unable to make a fancy dinner. Lean pork tenderloin goes into the slow cooker with a magic tenderizing ingredient...Root Beer! The first time I used this recipe, I was a little skeptical, but it has tasted great every time. After several hours of slow roasting, add your favorite bbq sauce (Sweet Baby Rays is best in my opinion) and allow to cook on low for another hour. Voila, you have wonderful slow roasted pulled pork! If you have more time, consider serving these with cole slaw on the top. It's also delicious on the mini Hawaiian rolls you can purchase at most groceries.

This may be my shortest & easiest (& tastiest) recipe to date. (check out those superlatives!) J

Pulled Pork BBQ Sammies
2 pounds pork tenderloin, trimmed
salt & pepper
1(12 oz) can of root beer
sweet onion, cut into 5 rings ½” wide (reserve remainder of onion for other use)
1 bottle Sweet Baby Ray's BBQ Sauce (or your favorite)
toasted kaiser buns, makes about 6-8 sandwiches depending on bun size

1. Rub salt and pepper into pork tenderloin, to taste.
2. Cover the bottom of the slow cooker with sliced onion rings, about 4-6. Place pork tenderloin on top of onions in slow cooker. Pour root beer over the pork, cover and cook on low until tender, about 5-6 hours.
3. Remove pork from the slow cooker and shred with a fork and knife. Drain half of the juice from the slow cooker and save onions in the juice.
4. Add pork back to slow cooker and pour bbq sauce over pork. Eyeball the amount to use based on how saucy you would like your pulled pork. Combine well and cook on low for an additional hour. Serve on toasted kaiser buns.

Chicken & Pasta Salad
adapted from Cooking Light
1 1/2 cups chopped red,yellow and orange bell pepper
1/2 cup frozen green peas, thawed
3/4 cup plain fat-free yogurt
1/3 cup chopped onion
1/4 cup light mayonnaise
2 teaspoons prepared mustard
1/2 teaspoon celery seeds
1/4 teaspoon salt
1/4 teaspoon pepper
2 cups chopped cooked chicken breast (about 1 pound)
1 cup cooked tri color rotini pasta
1/2 cup shredded cheddar cheese

1. Combine the first 9 ingredients in a medium bowl. Add the chopped cooked chicken, cooked pasta,and cheese and toss mixture well. Cover salad and chill 1 hour.


Print out the recipe here:

Slow Cooker BBQ Pulled Pork

An easy and tasty way to make pulled pork. Perfect ...

See Slow Cooker BBQ Pulled Pork on Key Ingredient.

Monday, May 19, 2008

Last of the Limes: Chicken Fajita Marinade

Courtesy of LibraryMan from FlickrAnd Then There Were None! (always one of my favorite Agatha Christie books...) After going on a lime blitz, I nearly reached the end of my lime stockpile and successfully made Cilantro Lime Hummus, Coconut Cilantro Rice, and Fish Tacos.With some leftover tortillas from the fish tacos and just one lime left I decided to make one of my favorite Mexican dishes: Chicken Fajitas.

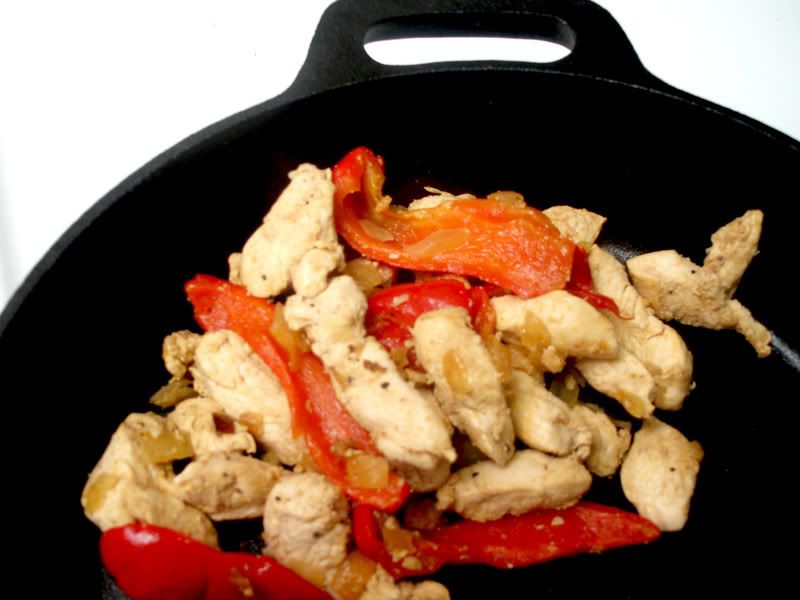
It's Monday, so I'm at a loss for words, but I can tell you these were so good. So yummy in fact that we ate so much we polished off all the tortillas so I can only show you the picture of the chicken/veggie combo. I'd imagine if you'd like to make this vegetarian, you could omit the meat. Similarly, shrimp or beef would work well.

Ok, off to go let my brain rest. Too much fun in one weekend. I promise I'll have more interesting anecdotes later in the week!

Chicken FajitasChicken Fajita Marinade
2 tablespoons lime juice
2 tablespoons chicken broth
1 tablespoon olive oil
2 cloves garlic, crushed
1 teaspoon soy sauce
1/2 teaspoon salt
1/4 cup balsamic vinegar
1/8 teaspoon cayenne pepper (add more depending on heat level desired)
1/4 teaspoon ground black pepper
1 lb boneless, skinless chicken breasts, cut into strips
1/2 large red bell pepper, seeded and cut into long strips
1/2 onion, chopped

2 tsp olive oil for sauteing

1. In a large Ziploc bag, mix together all ingredients (from lime juice to chicken).
2. Place chicken in the marinade, and refrigerate at least 2 hours, or overnight.
3. Heat oil in a large nonstick skillet over high heat. Add red peppers and onions. Saute for approximately 3 minutes or until vegetables start to become tender (I cooked the onions for longer to create a caramelized effect). Add chicken strips and saute until browned, approximately 5 minutes.
4. Remove from heat and serve with desired accompaniments (i.e. cilantro, salsa, avocado, lettuce, sour cream, etc.)

Tuesday, May 6, 2008

You Want What for Dinner?!

...spaghetti & meatballs of course.

You see, I have a bad habit of pestering hubby about helping me come up with dinner ideas. I say 'pester' because with as much time as I spend perusing cooking blogs and participating on boards, I really shouldn't need too much of hubby's input for dinner ideas. Though it is nice from time to time, the poor man couldn't pick out leeks and rhubarb from shallots in a lineup.

So, after a particularly stressful day and an inability to think straight, I forced hubby to come up with our Sunday dinner and of all things, he chose homemade spaghetti and meatballs. Though this would probably be the last thing I order in an Italian restaurant, I couldn't scoff at the idea and come off as the crazy wife who requests opinions but doesn't like any of them. Well, actually I suppose this happens all the time, but who's keeping track?

Spaghetti & MeatballsFor hubby, spaghetti & meatballs reek of nostalgia - family dinners and quality homemade food with fresh ingredients. For me, I think of $5.99 all-you-can-eat church spaghetti dinners. Growing up in an Asian household, I get nostalgic over things like nasi goreng, lemper ayam, and kue lapis. Dishes like spaghetti & meatballs usually came from Mr. Chef Boyardee, a sauce packet or the local Pasta House. Nonetheless, I forged on and began my search for a true, hearty & homemade recipe.

I wasn't quite sure where to start but as usual, a simple Google search resulted in a bevy of delectable recipes from fellow food bloggers. After reading through a few, I chose Chelley's spaghetti sauce from Sugar and Spice since I had over-zealously plucked my basil plant and needed to use dried basil. Then, knowing how much hubby likes Italian sausage, I found Elise's meatball recipe from Simply Recipes that uses both ground beef and Italian pork sausage. Plain breadcrumbs are used in the original recipe, but I tried Italian style breadcrumbs to give the meatballs an extra flavor kick.

Like many wonderful things in life, good things come to those who wait. Though we live in an instant gratification society, this homemade sauce is best when simmered all day, or at the very least a few hours. You'll be rewarded with tempting aromas wafting through your house and a sauce that is so much better than any kind you could buy in the store. Since I was at first skeptical, but certainly won over by this recipe, I'm submitting it to this week's Presto Pasta night.

While not the most sophisticated of dishes, homemade spaghetti & meatballs is ultimate comfort food. Sorry, Chef Boyardee.

Homemade Spaghetti Sauce
adapted from Sugar & Spice

2 Tablespoons olive oil
1 large sweet onion, chopped
4 cloves garlic, chopped
1 28-oz. can tomato puree
1 28-oz. can tomato sauce
2 ½ teaspoons dried parsley
1/2 teaspoon dried basil
Water from rinsing extra sauce and puree from inside of cans
2 teaspoons salt
2 Tablespoons sugar
1/2 teaspoon ground black pepper
1 bay leaf

1. Saute onion and garlic in olive oil over medium-low heat until onion is tender.
2. Add tomato sauce, tomato puree, parsley, basil, water, salt, sugar, pepper and bay leaf.
3. Stir and lower heat to a slow simmer. The sauce is best when simmered for at least 2 hours. Remove bay leaf before serving

Italian Meatballs
(adapted from Simply Recipes)

1 lb ground beef
½ lb fresh sweet(mild)Italian pork sausage, casings removed
2 Tablespoons finely chopped basil (I used 2 tsp dried basil)
2 Tablespoons finely chopped fresh Italian parsley
½ cup finely chopped crimini brown mushrooms
2 eggs, lightly beaten
¾ cup Italian style bread crumbs
¼ cup grated Parmesan cheese
1 ½ teaspoons Kosher salt
2 teaspoons fresh ground black pepper
1 Tbsp olive oil

1. Prepare the meatballs. Mix by hand in a large bowl beef, Italian sausage, basil, parsley, mushrooms, eggs, breadcrumbs, Parmesan cheese, salt, and pepper until well mixed. Use small melon baller, or teaspoons to form 1-inch round meat balls. Roll and compress into tight balls. (We made ours a little larger).

2. Heat frying pan over high heat and add olive oil. Sear and brown meat balls on all sides, about 2-5 minutes depending on size of meatballs. You may need to brown two batches of the meatballs. Do not crowd the pan by stacking the meatballs. Cook in a single layer and do not over-cook as these will simmer with the sauce.

3. Add meatballs to spaghetti sauce, and gently stir. Simmer sauce and meatballs for 30-45 minutes, stirring occasionally.