Showing posts with label chocolate. Show all posts

Monday, February 7, 2011

You Heard Me, It's a Belgian Chocolate Giveaway!

Though I haven't actually filled it out myself, the creepy snoop in me loves perusing through the "info" section of people's Facebook profiles.  The other day, I came across a friend who I hadn't spoken to in probably 20 years.  If you haven't spoken to someone in that long, are they still considered a friend?  In any case, she listed a "things I love" section which really made me smile and wonder what I'd put on my own list.

...white wine in the summer, hot chocolate in the winter...wagging doggie tails and running to the dog park...laughing until my stomach hurts...girls weekends and slow weekends with hubby.  giggling babies... ice cream and cake.  Cake and chocolate. ...Chocolate.
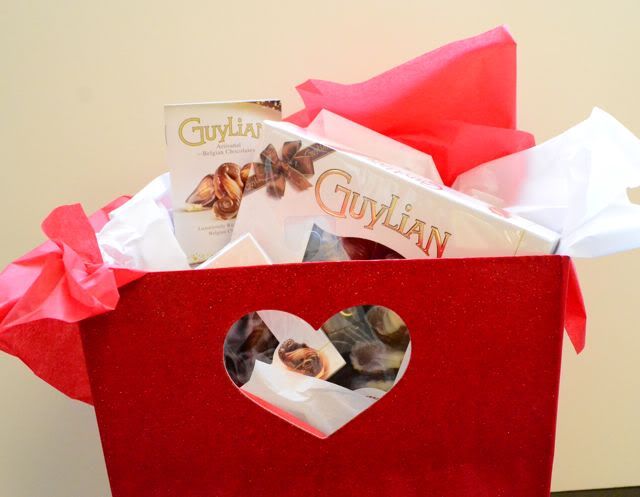

Guylian Chocolates
My very unscientific hypothesis states that a majority of you ladies and gentlemen may put chocolate right up there on your list as well.  And if chocolate makes you happy, it's chocolate that I'll give you! Details on the Guylian Belgian Chocolates giveaway at the end of this post.

Meanwhile, I have a great non-chocolate dessert recipe to share.  I'm aiming for sugar overload here, folks.
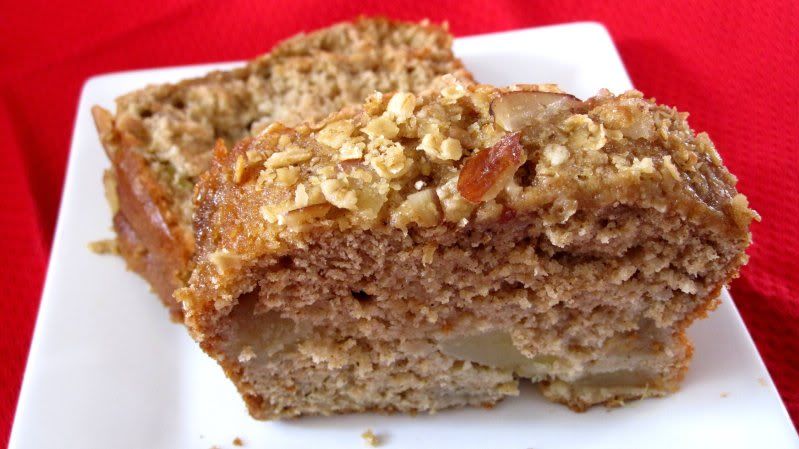
Apple Pie Bread
Confession time: I have never made any type of fruit pie...not cherry pie, not apple pie, not even the God of all pies: key lime pie.   Something about making homemade pie crust and pastries just thoroughly intimidates me.  Add it to the cooking bucket list, I suppose.  Well, if you're like me and love apple pie but are also dreadfully lazy, this quick bread recipe just might fit the bill.  It's filled with the good things in life - cinnamon, gooey apples and a nice nutty crunch without all the hassle.  If you have a great apple pie recipe that is delicious and not too time consuming to make, please send my way!


Apple Pie Bread
3 cups flour
1/2 teaspoon salt
1 teaspoon baking soda
1/2 teaspoon baking powder
1/2 teaspoon ground cinnamon
2 teaspoons apple pie spice
4 eggs, beaten
1 21 oz can apple pie filling
1 cup apple sauce
3/4 cup packed brown sugar (divided)
2/3 cup canola oil
1/2 cup sliced almonds

Preheat oven to 350 degrees.  Grease and flour two loaf pans.

1. In a large bowl combine flour, salt, baking soda, baking powder, cinnamon and apple pie spice.  In a separate bowl, combine eggs, apple pie filling, apple sauce, 1/2 c. brown sugar and canola oil.  Add egg mixture slowly to eggs, stirring until just combined.

2. Divide batter evenly among pans.  Top each loaf with remaining brown sugar and almonds.

3.  Bake for 55 minutes or until a toothpick inserted in the center comes out clean.  Cool in pans on a wire rack.

-------------------------------------------------------------------------------------------------------------

And now on to the good stuff.  The fine folks at Guylian Chocolates have graciously offered to send one of my awesome readers a Valentine's gift basket of chocolates. They sent me some chocolates to sample, and I must tell you that this stuff is divine.  Just think about this...chocolate seashells with milk, dark and white Belgian Chocolate filled with rich, decadent creamy chocolate praline truffle. um,YEA. Seriously.  If you don't have a Valentine's day gift yet, here's your chance.  Or...if you're selfish like me, you can just keep the chocolates to yourself :)
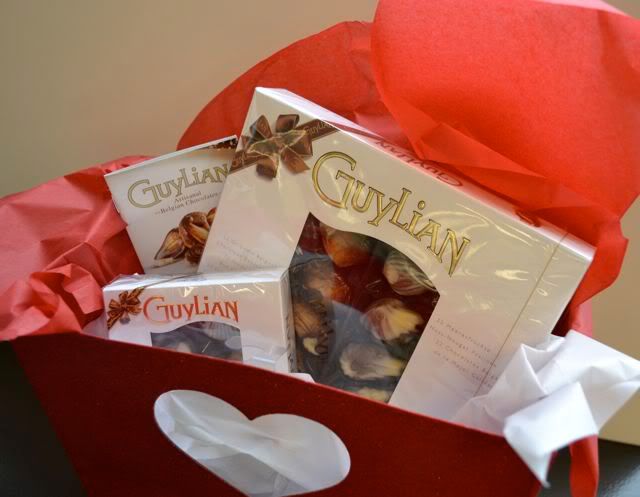
Guylian Chocolates

Giveaway: Guylian Belgian Chocolates!

Starts today and ends Friday, February 11 at midnight (EST). Winner will be chosen at random through random.org

To enter into the giveaway:
Leave a comment letting me know what truly makes you happy or list your favorite chocolate dessert

Additional Entries can be earned by:
1. Tweeting about this post: Guylian Belgian Chocolate Giveaway http://bit.ly/gdVimS @newlywedcook Please RT!

2. Follow @newlywedcook on Twitter, then come back to this page and leave a separate comment telling me you did so. (if you already follow, let me know, that counts!)

3.  Share a link to this post via Facebook or email and leave a separate comment telling me you did so.

Tuesday, February 9, 2010

Granola Chocolate Chip Cookies

If you're anything like me, you're on a continual quest for "THE BEST" recipe for many of life's staples: mac 'n cheese, apple pie, and of course, chocolate chip cookies.  I've made many that I thought were the best, but somehow I still find myself questioning if I can tweak or find a better recipe.  Honestly, this drives hubby absolutely nuts since my scatter-brained brain often forgets these tweaks and the "best" is lost in history.

Granola Chocolate Chip Cookies

Though these cookies are different than your average chocolate chip cookie, I must say they're some of my favorites. After receiving a delicious box of the new granola from Special K, I set off on a quest to use the granola in a recipe other than my usual fruit and yogurt parfaits. I happened upon this Granola Chocolate Chip Cookie recipe at one of my favorite blogs, Baking Bites and could barely contain my excitement.  Granola? check.  Butter? check.  Chocolate? check.  I'm in.
Equally crisp yet chewy, the granola adds a nice crunch and a hint of saltiness that sends these cookies over the edge for me.  The granola I used wasn't too chunky, but if you have one full of clusters, try and chop up the pieces so that the cookies aren't overburdened by the granola.  Go forth and bake.  Just try not to eat the whole batch like me!

Recipe here @ Baking Bites. 
Granola Chocolate Chip Cookies
slightly adapted from Baking Bites
 1 1/3 cups all purpose flour
1/2 tsp baking soda
1/2 tsp salt
1/4 tsp cinnamon
1/2 cup butter, melted and cooled
1/3 cup sugar
1/2 cup brown sugar
1 large egg
1 tsp vanilla extract
1 cup granola, small pieces (I used Special K which is a honey/nut type of granola)
1/2 cup chocolate chips


1. Preheat oven to 350F. Line a baking sheet with parchment paper.

2. In a large bowl, whisk together flour, baking soda, salt, cinnamon and both sugars until well combined. In a small bowl, whisk together cooled butter (room temp), egg and vanilla extract. Pour into flour mixture and stir well to combine.

3. Stir in granola and chocolate chips until all are well-distributed in the dough.  The dough will be a little dry, but don't fret!  Roll dough into 1-inch round balls (this is most easily done by hand) and place on baking sheet. Press each gently to flatten.

4. Bake for 10-12 minutes, or until cookies just begin to take on a light golden brown color.
Cool completely on a wire rack before storing in an airtight container.


Thursday, November 12, 2009

Soft Pumpkin Chocolate Chip Muffies

A lot of women have specific characteristics they seek out in a potential mate or husband - say, sexy & rich yet romantic & can ride a unicycle. Me? Not that I have low standards but I always just wanted someone who could make me laugh and swoon simultaneously. It never even crossed my little black book to find someone who could cook.

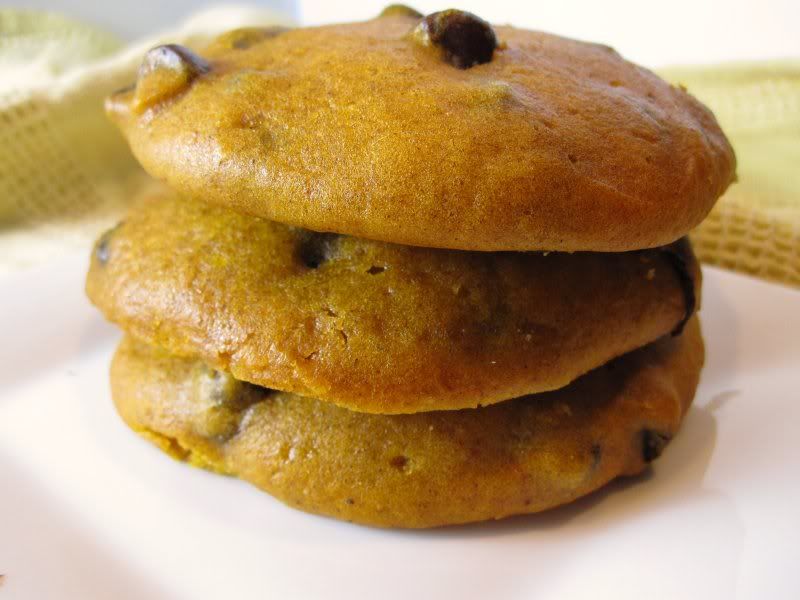
pumpkin chocolate chip muffieLuckily, hubby has become quite the chef on his own (well under my tutelage, of course!). First Man Food Mondays, now cookies?! Apparently marriage does get better with age. These cookies are so soft they're more like muffies to me. Regardless of what they are, I know that they taste good and I just ate one too many of these tonight.

Super Soft Pumpkin Chocolate Chip Muffies (Muffin + Cookie)
Adapted from Joy the Baker and Spork or Foon?

2 cups all-purpose flour
1 1/2 teaspoons baking powder
1 teaspoon soda
1/2 teaspoon salt
2 teaspoons ground cinnamon
1/2 teaspoon ground ginger
1/4 teaspoon pumpkin pie spice
1/4 teaspoon ground cloves
2 eggs
1 cup sugar
1/2 cup canola oil
1 cup canned pumpkin
1 teaspoon vanilla extract
1 cup semi-sweet chocolate chips

Position a rack in the middle of the oven . Preheat the oven to 325 degrees F. Line two baking sheets with parchment paper and butter the paper.

Stir the flour, baking powder, baking soda, salt and spices together in a medium bowl and set aside. In a large bowl, using an electric mixer on medium speed, beat the eggs and sugar until smooth and lightened in color, about 1 minute. Stop the mixer and scrape the sides of the bowl as needed during mixing. On low speed, mix the oil, pumpkin, and vanilla until blended. Mix in the flour mixture to incorporate it. Mix in the chips.

Using an ice cream scoop with a 1/4-cup capacity, scoop mounds of the dough onto the prepared baking sheets, spacing the cookies at least 2 1/2-inches apart. You could also simply use a 1/4-cup measuring cup if you don’t have a scoop. Use a thin metal spatula to smooth and flatten the rounds.

Bake the cookies one sheet at a time until the tops feel firm and a toothpick inserted in the center comes out dry, about 16-18 minutes. Cool them on the baking sheet for 5 minutes, then use a wide metal spatula to transfer the cookies to a wire rack to cool completely.

Wednesday, June 3, 2009

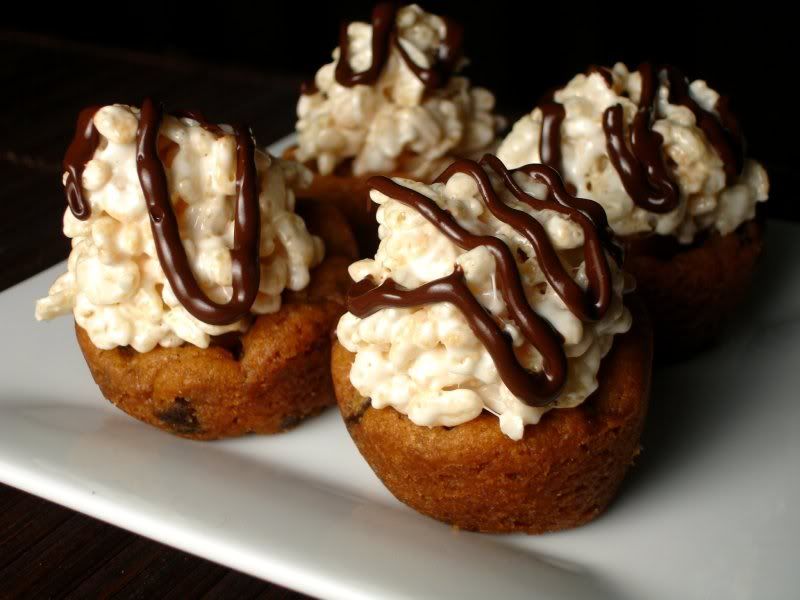
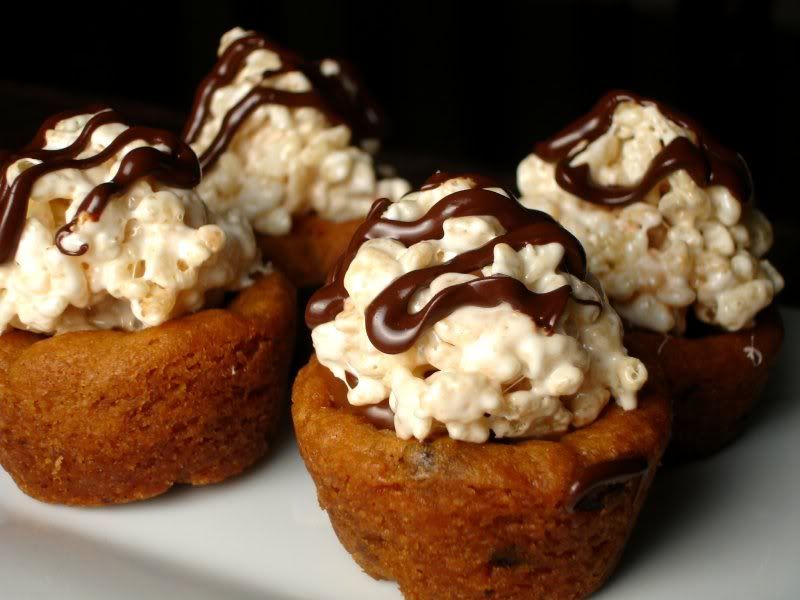
Chocolate Chip Cookie Cups with Rice Krispy Treat Topping

It's quite possible that my entire party's menu will consist of food blog recipes. You all are a creative bunch! It's also quite possible that both hubby and I gain at least 10 pre-party pounds since I just have to do a trial run of every delicious thing I consider making. Really, I'm not a control freak, I just like an excuse to make us indulgent food. Exhibit A, for example:

Cookie Cups
I spotted these ridiculously cute cookie cups topped with rice krispy treats(!) on Jenny's amazing blog, Picky Palate. She never ceases to amaze me with the delicious treats she comes up with that also leave me wondering, "why didn't I think of that?" ....as all great inventions do.

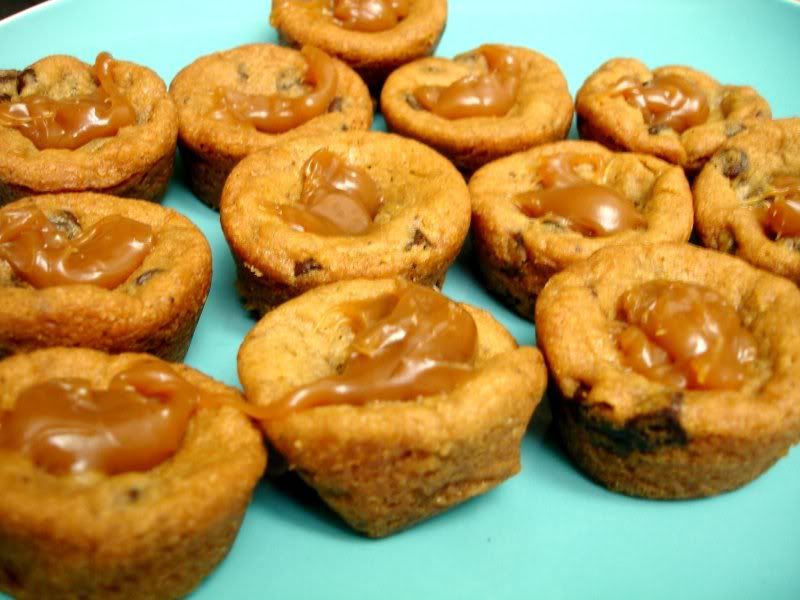
Simplicity at its finest, these treats require you to use your favorite cookie dough recipe and bake the dough in muffin tins. I baked the cookies a little longer than usual to ensure the cookie cups were sturdy and could hold a mountain of rice krispy treat :) After baking and letting cool slightly, top with a little caramel sauce and try not to eat them all at this stage:

Cookie Cups with Caramel ToppingI had some fancy cinnamon caramel sauce that was given to me by a friend, so I clearly dealt the caramel with a heavy hand. I'm sure simple caramel sundae sauce would be just as good.

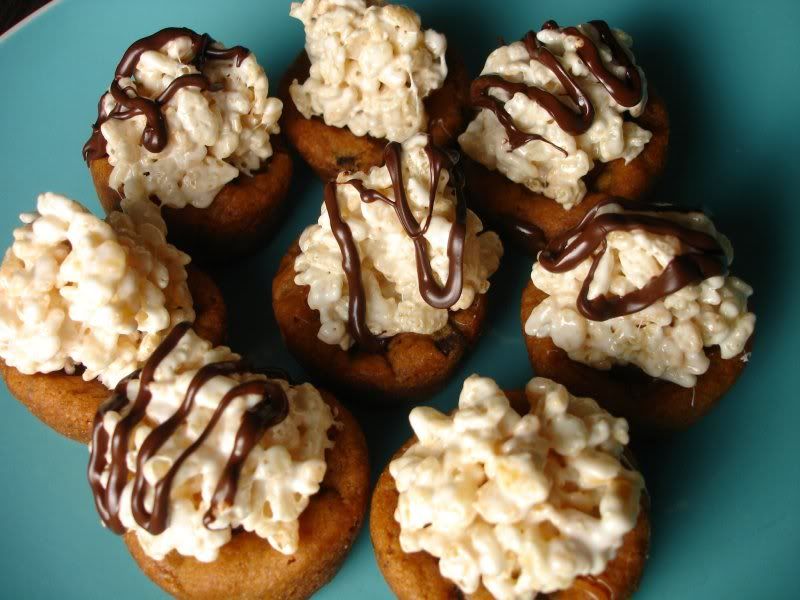
Proceed to whip up a batch of Rice Krispy Treats which after years of making for hubby, I now use no measurements to make. In my opinion, go heavy on the marshmallow to cereal ratio. We like 'em gooey.

Finally, drizzle some melted semi-sweet chocolate chips over the top and you're ready to impress!

Cookie Cups with Rice Krispy Topping

Cookie Cups with Rice Krispy Topping
Here's a link to Picky Palate's original post. I followed her recipe but didn't add any oil to the melted chocolate chips. Also, when shaping the rice krispy treats, I found it helpful to have a wet towel to wipe my hands off and prevent stickiness.

Monday, April 6, 2009

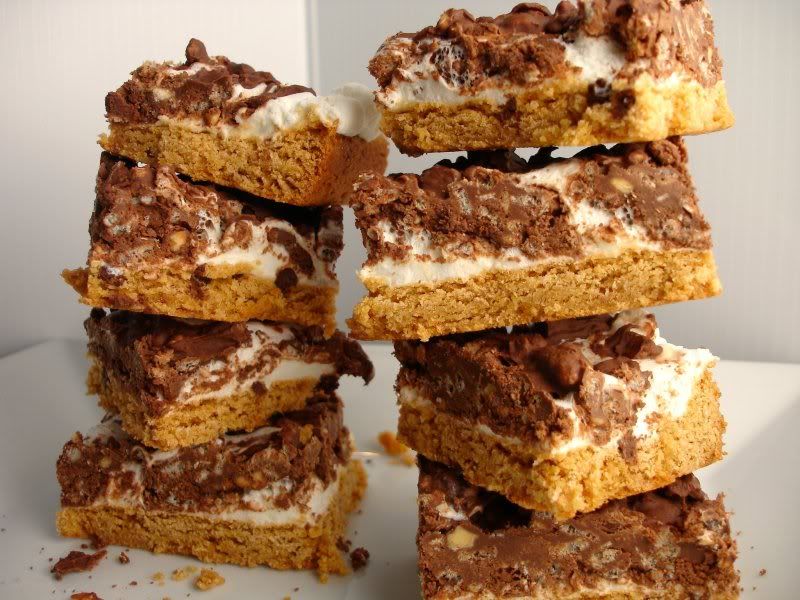
'Loser' Peanut Butter Cookie Crunch Bars

Could it have been the too long, cumbersome name? Or, perhaps it was the utter deliciousness of everything good in life perched atop a cookie crust, but sadly I was not chosen as a finalist in Betty Crocker's Cookie Contest. I like to think of myself as humble to a fault, but this recipe was pretty kick ass if I can so humbly say so myself.

Peanut Butter Cookie CrunchIf only Betty knew what I could do with $4,000 cash! Obviously, I would have gone to great lengths to stimulate the economy like no other with new and fabulous gladiator sandals, a flat iron to keep my hair sleek and a snazzy espresso machine for good measure.

Well, I suppose I'll just keep clippin' coupons for now.


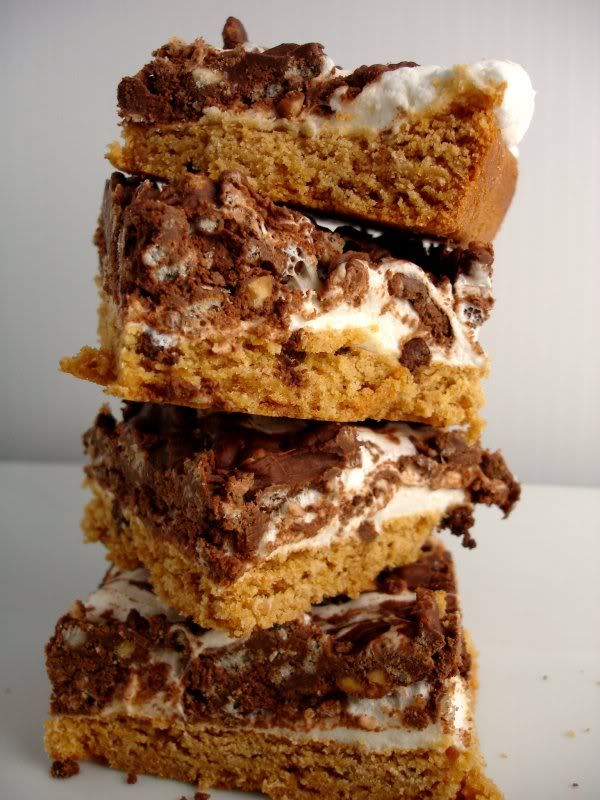
This recipe is inspired by a few of my favorite things: cookies (obviously), toasted marshmallows, chocolate, peanut butter and rice krispy treats. Overkill? It may sound like it, but this dessert was neither too rich, nor too sweet. Rather, it's just a nice balance of yes, all the good things in life. I can't stress this enough!

In my very scientific approach to coming up with a $4,000 recipe I created this first with a peanut butter cookie crust and then tried out a sugar cookie crust. Hubby and I were so baffled as to which version was superior that we just had to polish off both batches to provide an objective taste test. Did I tell you we're on a diet now?

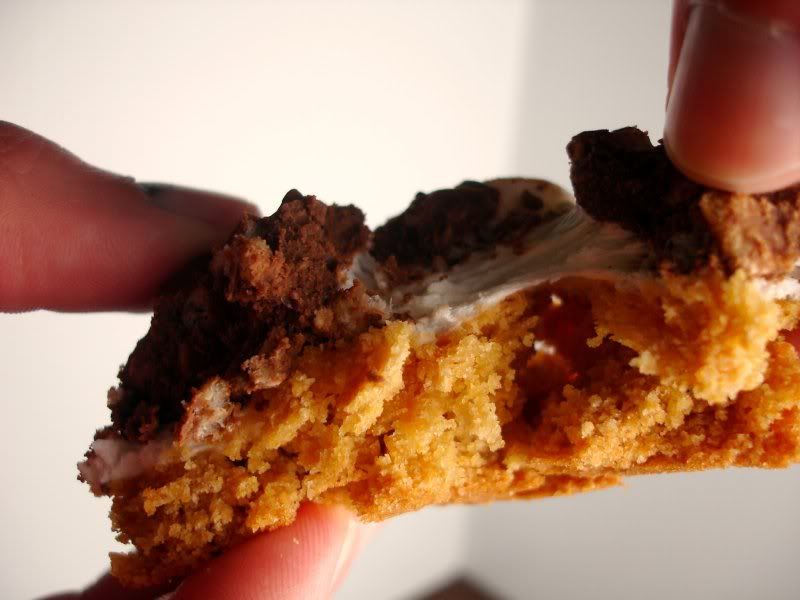
Ooey gooey goodness piled high! After making either a sugar cookie or peanut butter cookie crust, cover the cookie with marshmallows and toast in the oven until they're lightly brown. Chocolate is melted with a little peanut butter and mixed with a touch of oats and a good dose of Rice Krispy Cereal and then spread over the toasted marhsmallows. The chocolate crunch topping is a little difficult to spread out, but with some patience and love, you'll get there. When all else fails, I like to marble things to make my difficulties look professional!


Here's the recipe!!
Peanut Butter Cookie Crunch Bars
Like I mentioned, I made these with both a sugar cookie and a peanut butter cookie crust. They were both amazing. Here is the recipe with peanut butter cookie.
**If you want to try the sugar cookie base, follow the instructions on the bag since that variety has different add-ins.

1 package peanut butter cookie mix (Betty Crocker)
3 tablespoons vegetable oil
1 egg
1 tablespoon water
4 cups mini marshmallows
topping:
1/4 cup mini marshmallows
1 1/2 cups semisweet chocolate chips
1/2 cup creamy peanut butter
1/2 cup chunky peanut butter
1 tablespoon butter
1/4 cup oats
1 1/2 cup Rice Krispy Cereal

Heat oven to 350 degrees and spray a 13x9 inch pan with nonstick cooking spray.

In a large bowl, combine cookie mix, egg, oil and water until a soft dough forms. Press dough onto bottom of pan. Bake for 14-15 minutes or until lightly golden brown.

Remove from oven and cover cookie base evenly with marshmallows. Return to oven for 5 minutes or until marshmallows are lightly toasted.

Meanwhile, melt marshmallows, chocolate chips, peanut butters, and butter in a large saucepan over medium heat. Mix constantly until melted. Stir in oats and rice krispy cereal. Allow to cool slightly.

Spread mixture over marshmallow layer evenly. The mixture may be a little thick so spread as well as you can. With a knife, run the marshmallow layer and chocolate layer to create a marble.

Allow to cool before cutting.

Congrats to the finalists! Go check 'em out!

Tuesday, February 10, 2009

Lemon Angel Food Cupcakes

If you couldn't tell, I absolutely love, adore, & worship desserts. Ask me to pick a favorite and I'd first salivate thinking of all the delicious treats I've come to know and love. Tiramisu? Bourbon Bread Pudding? Mint Chocolate Chip ice Cream....Oh my. The choices. The calories.

Lemon Angel Food Cupcakes
Believe it or not, I'd have to say that I'd pick angel food as one of my top 3 favorites (I just can't pick a favorite, ok?). A treat that even Gym Barbie could love, angel food is essentially made from cake flour, egg whites, sugar, and cream of tartar. Read my lips: I am yummy but fat free!

I've always wanted to make my {one of top 3} favorite dessert, but buying a huge tube pan that I'll use for nothing more than one dessert seems like a whole lot of commitment to me. You also need to let the whole angel food cake cool upside down for an hour. Not one for patience or large kitchen pans, homemade angel food cake hasn't really been an option until I came across this tasty recipe from Baking Bites.


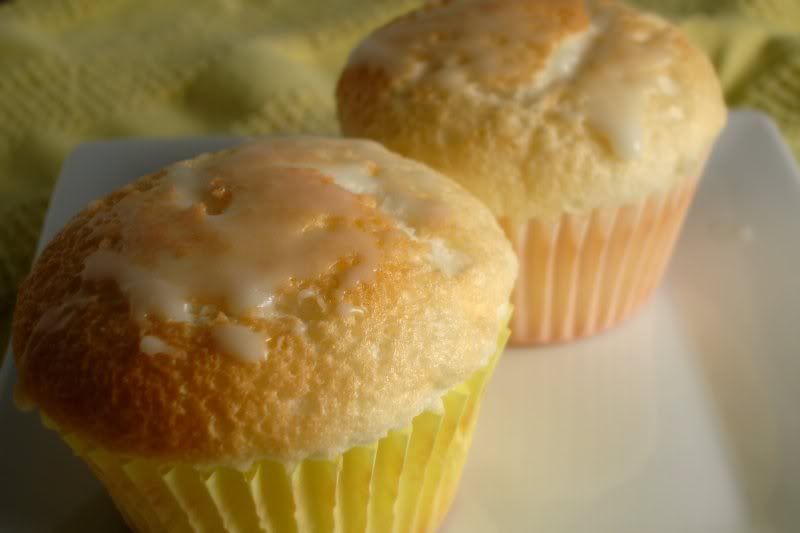
Lemon Angel FoodWith a hint of lemon, these cupcakes are light, fluffy and sweet. I absolutely loved them. Hubby loved them too, but finally admitted to me that he felt a little *cheated* because they were so light! Back to chocolate and calories, I guess :)

Lemon Angel Food Cupcakes with Icing

Lemon Angel Food Cupcakes
Courtesy of Baking Bites
3/4 cup superfine sugar, divided
1/2 cup sifted cake flour
5 large egg whites, room temperature
1/2 tsp cream of tartar
1/8 tsp salt
1 tsp vanilla extract
zest of one lemon

1. Preheat oven to 350F. Line a 12-cup muffin tin with paper liners.
2. In a small bowl, sift together cake flour and 1/4 cup superfine sugar.
3. In a large bowl, beat room-temperature egg whites until foamy, then add in cream of tartar and salt. Gradually add in the remaining 1/2 cup of superfine sugar while the mixer is on high speed, beating the egg whites to soft peaks.
4. Fold in flour mixture, adding it in two or three additions.
5. Divide evenly into prepared muffin tins. The tins should be quite full.
6. Bake for 16-18 minutes, until golden brown. The tops will spring back when lightly touched.
7. Cool on a wire rack (no need to flip them upside down, as is usually done with full-sized angle food cakes).

Lemon Icing Drizzle
Confectioner's Sugar
fresh lemon juice

Combine confectioners sugar with lemon juice until the icing is a drizzable (is that a word?!) consistency. Drizzle on top of cooled cupcakes.
Makes 12 cupcakes.

Sunday, December 28, 2008

Ginormously Delicious Chocolate Chip Cookies

Hope everyone enjoyed the holidays! Though I had every intention of keeping up with the blog and wishing everyone a Merry Christmas, I came home to find my parents' internet connection moving at the speed of well, dial-up. Even with DSL, something was clearly off and internet surfing took a backburner to make time for eating. Seriously, I realize everyone talks about holiday eating, but with our two families in the same city, we took holiday eating to a new level. Two-dinner-a-day habits are hard to break. My stomach feels empty if an hour has gone by without a feeding.

Huge Chocolate Chip CookiesAs you can imagine, it feels good to be back home and getting back to a more normal eating schedule. I've increased the veggies in my diet, tried to return to running and limited myself to three meals a day (down from 5-6!) Even with my new healthy outlook, I certainly still make room for ginormous chocolate chip cookies.

Chocolate Chip Cookie DoughAfter indulging in days of Momma's Asian delights, I had a hankering for good ol' chocolate chip cookies. I spent a few minutes drooling over Tastespotting's cookie gallery and settled on the cookies made by Easy Peasy. Her cookies looked huge, soft and well, perfect. I used mini chocolate chips (my new obsession) and about 1/4 cup of white chocolate chips to shake things up. Michelle measured out about 1/2 cup dough for each cookie. Wanting to have cookies to take to work (and prevent us from eating them all) I used a 1/4 cup of dough for each. My cookies were still huge!

Giant Chocolate Chip CookieI. Love. These. Cookies. These were so fabulous and sinful. If you're not feeling overindulged yet, I suggest you get yourself into the kitchen and make these. Dieting should be addressed after the New Year! :)

Enjoy the rest of the holidays!! It'll be sad when we get back to full work weeks, huh? :)

Giant Chewy Chocolate Chip Cookies
Adapted from Easy Peasy

2 cups plus 2 Tbsp all-purpose flour
1/2 tsp baking soda
1/2 tsp salt
1/2 tsp ground cinnamon (we all know cinnamon makes everything better!)
12 Tbsp (1 1/2 sticks) unsalted butter, melted cooled until warm
1 c brown sugar, packed
1/2 c granulated sugar
1 large egg plus 1 yolk
2 tsp vanilla extract
1 cup mini semisweet chocolate chip
1/4 cup white chocolate chips

Directions
1. Heat oven to 325 degrees. Line cookie sheets with parchment paper.
2. Whisk dry ingredients together; set aside.
3. With electric mixer, beat butter & sugars until thoroughly combined.
4. Beat in egg, yolk and vanilla until just combined.
5. Add dry ingredients; beat at low speed until combined. Stir in chips.
6. Measure 1/4 cup of dough and roll into ball. Holding dough ball in fingertips of both hands, pull into 2 equal halves. Place dough halves together, ragged side up. Place formed dough onto cookie sheet with about 2 inches in between (the cookies will spread).
7. Bake, reversing position of cookie sheets halfway through baking, until cookies are light golden brown and outer edges start to harden yet centers are still soft and puffy.
8. Cool cookies on sheets until able to lift without breaking and place on wire rack to cool.

Monday, November 3, 2008

Peanut Butter Chocolate Chunk Blondies

I hope everyone is well rested, ready to vote tomorrow & of course, stay up to watch the results! Lucky me, I voted early by mail so I hope there were no mail mishaps preventing the delivery & count of my oh-so-important ballot. Hubby has to go wait in line tomorrow morning (sucker!). Hopefully it won't be too bad despite all of the media footage of snaking, long lines. Oh, he is also one of the 8% of Americans still undecided 3 hours until election day. I told him to flip a coin. I jest.

peanut butter chocolate chunk blondies
On another note, I feel as if I'm being watched. Hear me out. Every time I go running, I feel as if the masses are "checking me out." And by "checking me out," I'm not talking about sauntering into a bar with a cute outfit on and grabbing attention. I'm talking about sweaty me, running, breathing laboriously, trying with all my energy to finish a run.

For the 3rd run in a row, I got at least one "looking good!" from a passerby. Uh, what is it?!

Sometimes I panic. Did I forget to wear a shirt?! Is something popping out of my sports bra?! Do I look like I'm about to die? Can they hear my stomach sloshing? It baffles me.

I ran with a girlfriend last week and as we're running, she casually mentions,
"you know, everyone we pass seems to be watching you."
Me: OK, THANK YOU. I'M NOT CRAZY!
"Maybe it's because you're exotic looking."
Me: Uh, everyone in California is Asian, don't you know?

I've resigned to the fact that I must run funny. I like to imagine that maybe I run like a duck or with the grace of a 2 legged dog... who knows? I'm not being humble here. If I walked down the street half nude, I probably wouldn't get as much attention. **Sigh**

peanut butter chocolate chunk blondies
Back to Peanut Butter Chip Blondies. Check these out! I found this ridiculously easy yet delicious recipe on Bakingblonde's website. If you're ever in need of an idea for a sweet treat, head over to her site and you won't be disappointed. This is a true one bowl, no mixer needed dessert.

Though she suggests chopping up Reese's and placing them atop the blondies mid-baking, I sadly did not have any so replaced them with the remainder of my mini-chips. Now that it's post - Halloween I may need to try the Reese's version soon!
Check out her recipe here. I pretty much followed her recipe though I used chocolate chunks in the dough and sprinkled chocolate mini chips on top.

Oh, and if you're out on the streets & see me running, be a kind one and let me know what's so intriguing. :)

Peanut Butter Chocolate Chunk Blondies

An easy to make, one bowl, no mixer needed treat ...

See Peanut Butter Chocolate Chunk Blondies on Key Ingredient.

Monday, October 27, 2008

Tired of pumpkin recipes?

...well, too bad. Here's one more.

Pumpkin Chip MuffinsIn California, the sunny days and warm temperatures do nothing to remind me of Autumn. Where are all the gorgeous red and yellow leaves, the cool fall breezes, perfect football weather...even the Halloween decorations?! Pretty much, my only reminder of Fall around these parts are the comforting stews, spicy breads and pumpkin recipes I've been spotting all over the blogosphere. So, to all you cooks out there, thanks for keeping me in touch with reality.

I purchased a huge can of pumpkin in an overzealous attempt to remind myself of my once favorite season in the Midwest. Ever since, we've been enjoying pumpkin after pumpkin after pumpkin recipe. I'm not sick of it yet.

These pumpkin mini-chocolate chip muffins are a byproduct of a loaf recipe I've been making for quite awhile now. I thought I'd vary things a little by making these into bite sized portions so I could pack them in hubby's lunch.

Pumpkin Chocolate Chip MuffinsAdding in a packet of fat free vanilla pudding mix keeps the muffins moist. After reading the original recipe again, I believe you're supposed to add in actual pudding, but after baking several batches of the mistake, we think we'll keep it this way! You can also halve the recipe since this will make either 2 8x4 inch loaves or a lot of muffins.

For those on a healthy kick, raisins make a good substitute for the chocolate chips.

If you haven't already, don't forget to enter here for the cookbook giveaway!

Pumpkin Chocolate Chip Muffins / Bread

2 cups sugar
2 cups canned pumpkin
1/2 cup canola oil
1 packet of fat free vanilla pudding mix
4 large egg whites
3 cups all-purpose flour
1 1/2 teaspoons ground cinnamon
1 teaspoon pumpkin pie spice
1 1/4 teaspoons salt
1 teaspoon baking soda
1 cup mini chocolate chips (or raisins)

Preheat oven to 350°.

Combine first 5 ingredients in a large bowl, stirring well with a whisk. Lightly spoon flour into dry measuring cups; level with a knife. Make sure to measure flour lightly and not pack it in.

Combine flour, cinnamon, pumpkin pie spice, salt, and baking soda in a medium bowl with a whisk. Add flour mixture to pumpkin mixture, stirring just until moist. If mixture is too dry, add in a tablespoon of yogurt. Stir in chocolate chips.

Spoon batter into 2 (8 x 4-inch) loaf pans coated with cooking spray or greased standard muffin tins. For loaves, bake at 350° for 1 hour or until a wooden toothpick inserted in the center comes out clean; or, for muffins, 15-20 minutes or until a wooden toothpick comes out clean. Cool 10 minutes in pans on a wire rack, and remove from pans. Cool completely on wire rack.

Saturday, September 27, 2008

Birthday Cupcake Bites


By now, you've probably (taste) spotted, ooh and aahed over Bakerella's fabulous cupcake pop creations. I've always admired from afar, thinking nothing could be cuter but well, more time consuming. Though simple in principle, these babies require a cake to be baked then deconstructed, formed into little balls, then stuck into the freezer for multiple intervals and finished with a few baths in chocolate (hmm....can I take a bath in chocolate)?

Well, after much drooling and envy, I decided to take the plunge and try these out. It's hubby's birthday, what could be a more fitting occasion?


I started with homemade red velvet cake, though you can use a boxed cake mix of nearly any flavor. Next time I'll consider this route since it was so painful to take my beautiful cake and feed it to the food processor. Once your pretty cake is reduced to crumbs, mix it up with some good cream cheese frosting and lick your fingers once or twice. It tastes pretty good, just don't double dip.

Fill in your candy mold, and place the cake ball on top. Pop in the freezer to firm up and dip with your favorite artificially colored chocolate :)

Come to think of it, purple isn't the manliest of colors. I hope hubby can forgive me.

Check out Bakerella's more precise and less stream of consciousness instructions for your own darling cupcake bites.
Here's some tips:
  • I purchased my supplies at Do It With Icing in San Diego. If you're not in San Diego, find a local baking supply store which will save you from traveling from store to store searching for ingredients. If you're an internet kind of person, you can buy the candy molds here.
  • Bakerella's recipe doesn't mention putting the cake into a food processor, though it does on her Martha Stewart video. I went ahead and used the food processor and found it to be easy for crumbling the cake
  • I used my beloved Kitchen Aid mixer to combine the cream cheese frosting with the cake crumbs.
  • When rolling the dough into balls, wash your hands periodically so the dough doesn't stick to your hands
  • Colored chocolate can be very thick, so unless you have paramount crystals to thin the chocolate, I found twisting the cupcake bite into the chocolate was the best method
  • Consider this a weekend activity because it's time consuming though worth it!
Have a great rest of the weekend!

Tuesday, September 9, 2008

Espresso Chocolate Chip Cookies for the Irish

First things first. Thank you SO much for all the sweet anniversary wishes. We had a wonderful weekend, spent relaxing by the pool & spa at a nearby resort. I feel refreshed and like a newlywed all over again. Here's a picture of one of the last slices of the Triple Layer Anniversary Carrot Cake, still holding up well after a week. Perhaps we should save it for our 2 year anniversary?


Now, on to the good stuff....

What do Espresso Chocolate Chip Cookies have to do with the Irish?

Well, not much really except that I made these delicious cookies to bring to a Notre Dame tailgating party.

I know, I know... the team has seen better days, but let a fan have her moments, k? :)

Though cookies may not be your typical tailgating food, after a day of eating hot dogs, chips and drinking beer all day, I always crave sweets to round out an otherwise absurdly unhealthy day. Cathy over at Noble Pig created this recipe and considers these "grown up cookies," so I figured why not unleash them on some football-crazed adults?

Though I had originally been excited to say that I didn't modify anything in the original recipe, I did make a few changes (though some were by mistake). Instead of using nuts, I put my free sample of TCHO Nutty chocolate to use and along with some semisweet chocolate chunks, ground it up with oatmeal for the base of the cookie. Espresso powder adds a sophisticated taste to the cookies while even more chocolate chips are then added for good measure.
I pretty much followed the rest of the recipe to a tee, but somewhere along the way I accidentally forgot 1 cup of white sugar and only used 1 cup of brown. Whoops! They were still delicious and I told everyone at the tailgate that they were low carb cookies ;)


You can find the original recipe here. Just don't forget the 2 cups of sugar and consider using TCHO's amazingly delicious chocolate as an added flavor bonus!

Aggie's hosting a Foodie Event in honor of football to see what else is cooking on game day. Head on over to her blog and show her what you have cookin' by September 15th.

Monday, August 25, 2008

A Lemony Blueberry Vegan Treat


When hubby and I embarked on our vegetarian experiment a few months ago, I was absolutely amazed by the number of quality vegetarian and vegan blogs, recipes, and guides available on the web. Oh, about 15 years ago I'll go out on a limb and say that at least 20% of the population thought Vegans were part of a freaky New Age religion led by PeeWee Herman.

These days, fabulous blogs like the Veggiegirl and Susan's Fatfree Vegan Kitchen have been convincing carnivores like hubby and omnivores like me :) that there is life beyond meat. During our veggie days, I found a lot of inspiration from both those blogs, amazed at the delicious creations I thought vegans only pined for.
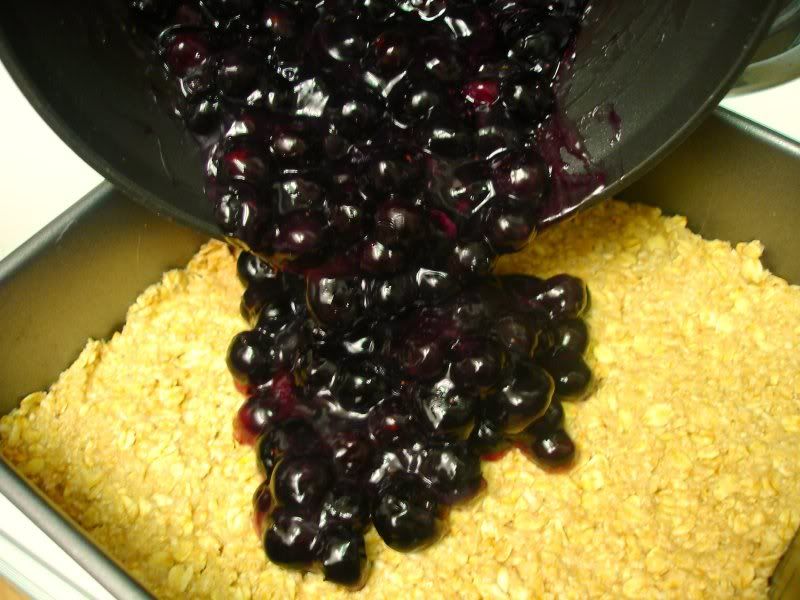
Though that part of our lives is over, I've had Susan's Blueberry Oat Bar recipe bookmarked, just waiting for the appearance of juicy and plump blueberries to show up in the markets. Mostly, I have been eager to answer life's most important question: can baked goods truly be delicious without eggs, butter, white sugar...or even flour for that matter? Though I attempt to curb my consumption of the aforementioned ingredients, to me they're the heart and soul of baked goods. Take them away and what are you left with?


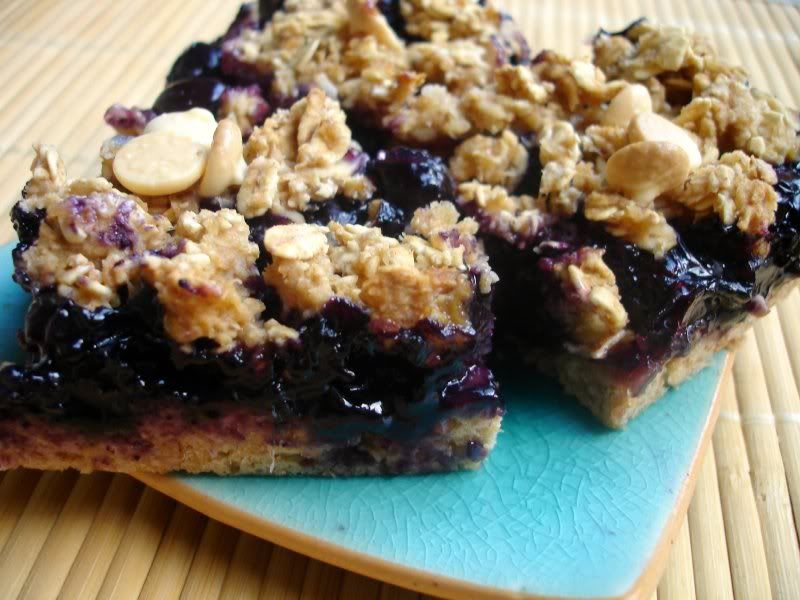
Blueberry goodness, I guess. For starters, this recipe uses Agave Nectar Syrup, an all-natural sweetner. No high fructose corn syrup or refined sugars here! Rolled oats are blended into a fine powder and moistened with unsweetened apple sauce along with some other goodies. Fresh blueberries cook in an agave sweetened syrup that makes the house smell absurdly good.

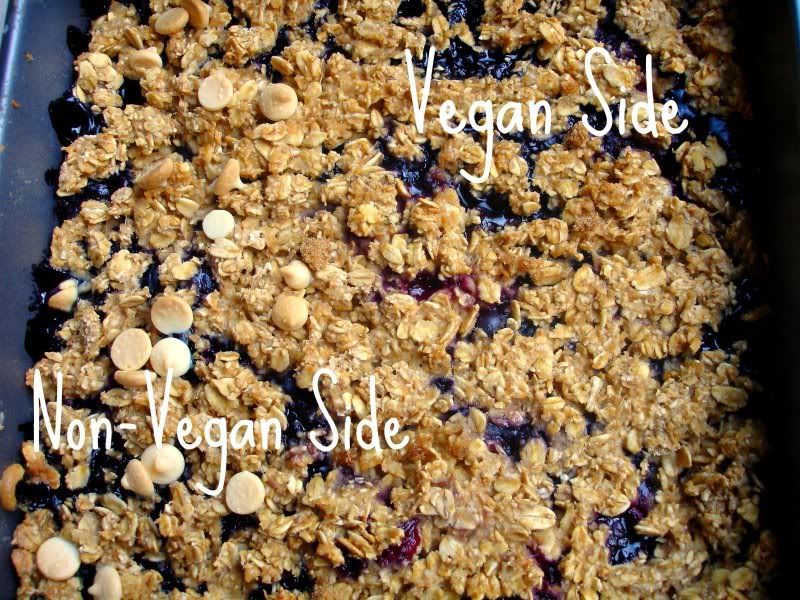
I tried to stay as true as possible to Susan's recipe, lest I make anything un-vegan. I added extra cinnamon, lemon zest, a bit more agave nectar, and a sprinkling of brown sugar over the topping. Well, I managed to do all this and then bastardized half of the bars by throwing a few (non-vegan) white chocolate chips I found in the pantry. Oops. It was only half. Forgive me.


These bars were exceptionally good. I will admit that they do lack the crumbly, rich goodness of a butter based crumb. However, if you eat these without expectation of what the bars should taste like, they are marvelously delicious on their own. I've been eating them cold out of the refrigerator, and cannot believe how many I've already gone through. Yum! Thanks for the great & healthy recipe, Susan!

Original recipe here from Fat Free Vegan Kitchen.

Lemony Blueberry Oat Bars
Adapted from Fat Free Vegan Kitchen
1 pint fresh blueberries (I ended up adding about 1/4 cup more)
zest from one lemon
1/3 cup agave nectar
1/4 cup apple juice
1/2 teaspoon vanilla
2 tablespoons cornstarch mixed with enough water or juice to form a smooth paste

3 cups rolled oats
1 teaspoon cinnamon
1 1/2 teaspoons baking powder
1/4 teaspoon salt
3/4 cup (6 ounces) unsweetened applesauce
6 tablespoons (3/8 cup) agave nectar
6 tablespoons (3/8 cup) water
1 teaspoon vanilla
1/4 cup brown sugar
1/4 cup white chocolate chips (optional)

Preheat oven to 375F. Grease an 8x8-inch baking dish.

1. In a small saucepan, combine the lemon zest, blueberries, agave nectar, and apple juice. Bring mixture to a boil over medium-high heat. Once boiling, add vanilla and cornstarch mixture, stirring until mixture returns to a boil and thickens. Remove from heat and set aside.

2. Put 1 1/2 cups of the oats into a blender or food processor and grind to a medium fine powder (I kept mine with a little texture). Pour into a medium-sized mixing bowl and add the remaining oats, cinnamon, baking powder, and salt. Mix well. Stir in the apple sauce, agave nectar, water, and vanilla, and mix well.

3. Spread half of the batter into the prepared pan, smoothing well to cover the bottom of the pan. Spoon the blueberry filling over the batter, and spoon the remaining batter over the blueberries. Sprinkle with brown sugar and chocolate chips.

4. Bake for 30 minutes, or until the top is lightly browned. Allow to cool before cutting into bars.

Tuesday, July 8, 2008

I'm Back with Bread Pudding!

After a fun and crazy week in our old stomping grounds, Chicago, I’m back and ready to catch up. The weekend was a fun one filled with sunshine, good times with friends and LOTS of food. We made a point to visit many of our old haunts and favorite food spots-- cheap, yummy Thai food being the #1 victim of our hunger. Oh, and how can you not love such a gorgeous city? For inquiring minds, the tall building in the middle is Trump's latest monstrosity which is coming together quite nicely.

Though I spent the entire weekend drowning in gluttony, swearing to never eat again, my first post back is one of our favorite gluttonous treats: bread pudding.

Bread pudding is a strange one. Definitely one of my favorite desserts, but one with such a mediocre name. French Silk Pie… Tiramisu… even Mississippi Mud Pie conjure up images of deliciously sinful treats. Ones with sexy names.

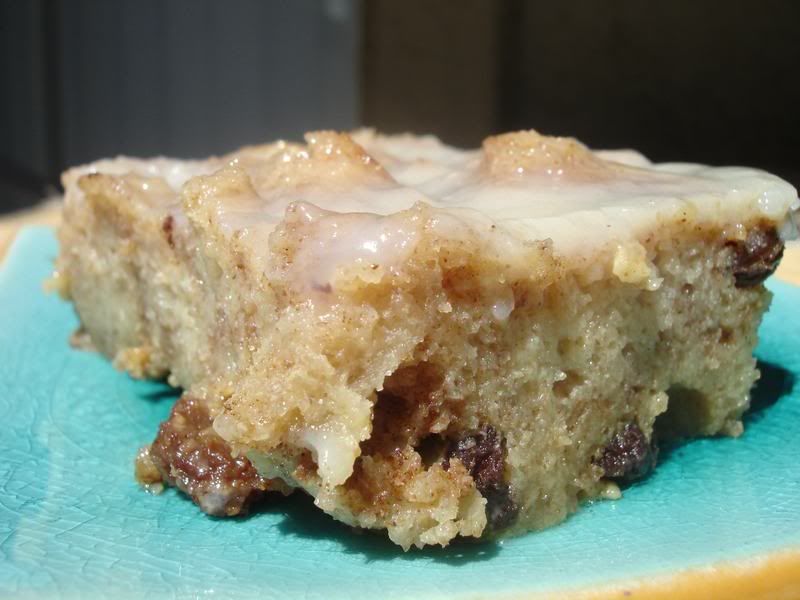
Bread pudding, on the other hand, sounds like something probably served at the local Hometown Buffet.Cinnamon Bread Pudding

Well, sexy or not bread pudding is amazingly delicious and though it may contain enough calories to last you a week, its worth it. I’ve used this recipe with a variety of breads, usually whatever’s leftover and I’ve had success with all experiments thus far. Cinnamon Raisin bread and whole wheat baguettes have historically turned out the best. Try it with your leftover, stale bread and let me know what you like! Off to go catch up on all the delicious blog posts I've missed out on.....

Cinnamon Bread Pudding with Warm Vanilla Bourbon Sauce

8 slices cinnamon raisin bread cubes, crusts removed (an equivalent amount of day old whole wheat baguette works well too)
1/4 cup raisins
1 tbsp butter
½ cup mini chocolate chips
3/4 cup brown sugar
1/4 cup sugar
1 cup low fat evaporated milk
3/4 cup skim milk
1/4 cup butter
1 teaspoon ground cinnamon
1/2 teaspoon vanilla extract
2 eggs, beaten
dash of rum

Warm Vanilla Bourbon Sauce

1 tablespoon butter
1 teaspoon ground cinnamon
1/4 cup sugar
1/2 cup milk and 3 tbsp milk mixed with 2 tsp cornstarch
1 tablespoon Bourbon whiskey
1 tablespoon vanilla

1. Preheat oven to 350 degrees F (175 degrees C). Lightly grease a round 9 inch cake pan.

2. Cut cinnamon raisin bread into medium sized cubes and arrange evenly in cake pan.

3. In a small frying pan over medium heat, sauté the raisins with a dash of cinnamon in a tbsp of butter until soft. Toss raisins and chocolate chips with bread cubes.

4. In a small saucepan over medium heat, combine sugars, milk, 1 tbsp cinnamon and butter. Stir until butter is melted. Allow to cool slightly and stir in vanilla. Temper the eggs by adding a few tablespoons of the butter sauce to the eggs. (This step raises the temperature of the eggs to prevent ‘scrambling!’) Add eggs to butter mixture and pour over bread cubes.

5. Create a water bath by filling a large baking pan with sides with ½ inch of water. Place cake pan in water bath & cover cake pan with foil. Bake in preheated oven 40 minutes. Remove foil and bake another 10 minutes uncovered.

Vanilla Bourbon Sauce
6. After replacing the bread pudding in the oven to finish cooking, prepare the Bourbon sauce.

7. Whisk together 3 tbsp milk and cornstarch in a small bowl. Melt butter in a small saucepan over medium heat. Once butter is melted, add Bourbon and sugar and stir constantly until boiling. Slowly add cornstarch mixture to thicken the sauce. Continue cooking until thick, stirring constantly. Remove from heat when thick.

8. After removing bread pudding from oven, pour Bourbon sauce over the bread pudding. Let sit 5 minutes before serving to allow sauce to flavor the bread pudding. The sauce will continue to thicken and form a beautiful glaze over the bread pudding.

Monday, June 30, 2008

Chocolate Whoopies & Homemade Skinny Cows

What recipes do you avoid? I'm sure that just like me, there are recipes you shy away from for big or little reasons: obscure ingredients, exotic spices, homemade pastry, maybe just a fear of the unknown.

As for me, I've always avoided recipes requiring a candy thermometer for no better reason than well...I've never had one. Obviously, a candy thermometer is no big purchase considering they're typically less than $10 or so. Well, I finally learned my lesson when I tried to become a human thermometer and estimate temperature by sight. I found a recipe for Chocolate Sandwiches with Marshallow Cream Filling.

Isn't that quite the title? I'm not sure what exactly constitutes a whoopie pie, but I hearby rename my culinary concotion Chocolate Whoopies, especially because it reminds me of my favorite 80's phrase: "What's the big whoop?!" In any case, because I'm stubborn and refused (or neglected) to buy a candy thermometer before making these, I ended up with a frothy sugary white mess instead of the fluffy white filling you see below:

While I did have to throw away the first batch of filling, a girl needs her nightly sweets fix, so I improvised and made Homemade Skinny Cow sandwiches with the already baked cookies. Skinny Cows are my absolute favorite "healthy" packaged treat, but boy are they expensive. Using free frozen yogurt I had been awarded from my Golden Spoon frequent customer card, I was happy to make myself some economical treats. That's peanut butter frozen yogurt swirled with chocolate peanut butter for those of you drooling. The chocolate cookies were perfectly textured and I will definitely be making these again. They were a little less chocolatey than the originals, so I may experiment with them next time around.

Back to the Chocolate Whoopies. After a lot of heartache (by principle, I try to never throw kitchen mishaps away), I returned to the store the following day and picked myself a trusty thermometer. Start again. Sugar, corn syrup, and water (otherwise known as the holy trinity) with a pinch of salt are allowed to stew together until the thermometer reaches 244 degrees. This process actually takes a long time and it's now clear why I previously ended up with a goopy mess. Once the syrup has thickened up, its added to softened gelatin and blended until fluffy and gooood. Seriously, it took all my adult willpower not to eat up all the marshamallow creme goodness and get sick from all the sugar. It's been known to happen.

Working quickly, the marshmallow filling is sandwiched between two chocolate cookies and voila you have yourself a Chocolate Whoopie Pie! I've frozen these and pull them out when I get a little chocolate craving. Within a few minutes both the cookies & the filling soften up and they're ready for my gobbling.

Chocolate Whoopies
Source: Cooking Light, July 08

1 cup sugar
5 tablespoons butter, softened
1 teaspoon vanilla extract
2 large eggs
2 cups all-purpose flour (about 9 ounces)
5 tablespoons unsweetened cocoa
1 teaspoon salt
1 teaspoon baking powder
1 teaspoon baking soda
1 cup fat-free buttermilk (I used reduced fat)
Cooking spray

Filling:
1 envelope unflavored gelatin (about 2 1/2 teaspoons)
3/4 cup cold water, divided
1/2 cup sugar
1/4 cup light-colored corn syrup
1/8 teaspoon salt
1/2 teaspoon vanilla extract

1. Preheat oven to 375°.
2. To prepare cookies, combine 1 cup sugar and butter in a large bowl. Beat with a mixer at medium speed until well blended (about 2 minutes). Add 1 teaspoon vanilla and eggs; beat until combined. Lightly spoon flour into dry measuring cups; level with a knife. Combine flour, cocoa, 1 teaspoon salt, baking powder, and baking soda; stir well with a whisk. Add flour mixture and buttermilk alternately to sugar mixture, beginning and ending with flour mixture.
3. Drop dough by rounded tablespoonfuls 2 inches apart onto baking sheets coated with cooking spray. Bake at 375° for 10 minutes or until set. Cool on pans 5 minutes. Remove from pans; cool completely on wire racks.
4. To prepare filling, sprinkle gelatin over 1/2 cup cold water in a large bowl; set aside. Combine remaining 1/4 cup water, 1/2 cup sugar, syrup, and 1/8 teaspoon salt in a medium saucepan over medium-high heat. Cook, without stirring, until a candy thermometer registers 244° (don't try to eyeball this!) Remove from heat. Gradually pour hot sugar syrup into softened gelatin mixture, beating with a mixer at low speed, then at high speed until thick (about 6 minutes per the original recipe...it took me much longer, maybe 15 -18 minutes), scraping sides of bowl occasionally. Add 1/2 teaspoon vanilla; beat until well blended.
5. Quickly spread about 2 tablespoons filling over bottom side of 1 cookie; top with another cookie. Repeat procedure with remaining filling and cookies.

Homemade Skinny Cow Sandwiches

1. Follow recipe above (steps 1-3) for cookies. Allow cookies to cool completely and place cookies in refrigerator for approximately 1 hr so they aren't too soft to handle.

2. Allow ice cream or frozen yogurt of choice to soften. Scoop ice cream onto cookie and top with another. Return to freezer until ice cream hardens.

Tuesday, June 3, 2008

Mexican Chocolate Crunch Brownies!


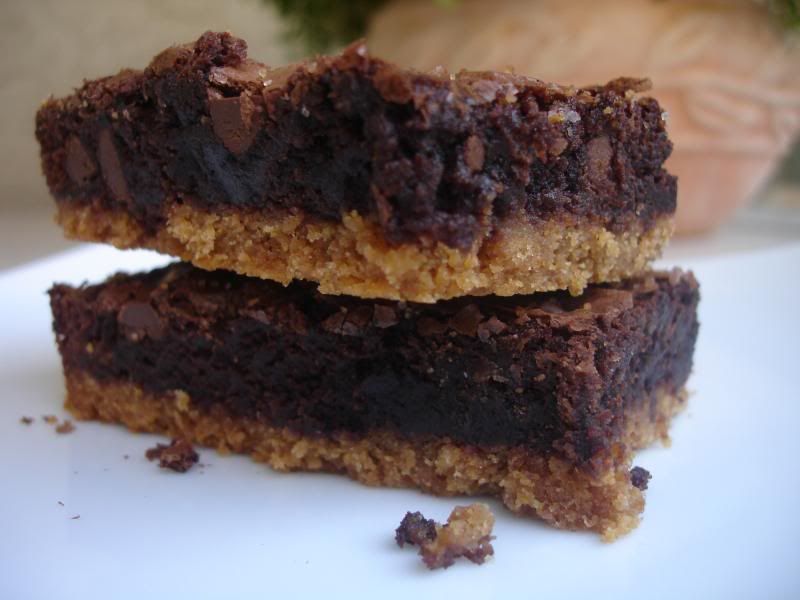
Bakers everywhere have been singing the praises for these brownies for quite some time. I have been meaning to bake them for an equally long period of time. Recently, a friend asked if I could bring dessert to a lunch gathering, nearly as I was walking out the door. I quickly scoured my ridiculously messy pile of recipe printouts to think of an easy and quick treat I could whip up at the last minute. A finalist in the Pillsbury Bake Off, these Mexican Crunch Brownies utilize ingredients that most of us already have in the pantry. I stress most of us, as not many adults sans children have a box of Cinnamon Toast Crunch in their pantry. We on the other hand, are cereal freaks.Ok, on to the recipe. These delicious brownies start with a Cinnamon Toast Crunch cereal layer topped with fudgy brownie batter, and finished with a sprinkling of cinnamon sugar. The cinnamon chocolate combination may seem a little odd at first, though it seems to compliment the chocolate and brings out a subtle sweetness. I guess it also helps that I love cinnamon in almost anything.

The recipe did come together quite quickly, though using a mini food processor to grind up nearly an entire box of cereal is no quick feat. According to Valerie, the recipe's author, ensuring the cereal is finely ground is quite important, so don't get lazy out there! Some other thoughts:
  • I also used cinnamon finishing sugar which I thought was quite pretty. If you don't have any, a combination of Turbinado sugar with cinnamon would be equally as nice.
  • Since there was already enough fudge chocolate goodness going around, I only sprinkled 1/3 cup (half the amount called for) on top of the brownies.
  • I try as much as possible to bake from scratch- who knows what they put in those boxed mixes! In the future, I may try combining the Cinnamon Toast Crunch base with a homemade brownie recipe I have.
  • Lastly, the recipe requests that you allow the brownies to cool for 2 hours(!) before slicing and eating. I'm not sure what your house is like, but waiting to dive in is nearly impossible as getting a man to go see the new Sex and the City. We did end up waiting and it was worth it. These brownies are even better the next day! Which means, yes I had one for breakfast :)
Click here for the recipe. Enjoy!

Monday, May 26, 2008

Peanut Butter Chocolate Chip Biscotti

Though I would have preferred to spend my weekend toasting in the sun, it seems that the weather never cooperates when needed. I'm sure the sunshine will make a triumphant return when I return to work in a windowless office. Figures. Well, welcome back to all that were away. I hope your journey into catching up on Google Reader posts has been as fun & entertaining as mine. Y'all were cooking away while I was gone!

After spending a rather chilly weekend in Scottsdale, we returned home to some similar cloudy, temperate weather. Isn't the saying, "If life hands you lemons, make lemonade?" Well, since the house is still rather cool & I'm no longer terrified of making biscotti, I decided that if I couldn't frolic in the sun, I'd spend some time baking a relatively healthy yet sinful treat for an after dinner treat.

Unlike other biscotti recipes I have made, this one uses reduced fat peanut butter as the main source of fat - no butter here. Similar to the others, a dry dough is rolled into a log and twice baked to result in a crunchy cookie wonderful with a cup of coffee or tea.

Biscotti Log after first bake:

After a cut & second bake, the biscotti are ready to eat!
Peanut Butter Chocolate Chip Biscotti
Adapted from One Smart Cookie
Yield: about 16 biscotti, depending on desired thickness

2 cups all purpose flour (can substitute 1 cup all purpose, 1 cup whole wheat)
1 teaspoon baking powder
1 /2 teaspoon baking soda
1/4 teaspoon salt
1/2 cup reduced fat peanut butter
1/2 cup sugar
1/2 cup packed golden brown sugar
1 large egg
2 large egg whites
2 teaspoon vanilla
1/4 - 1/2 cup of mini chocolate chips

1. Preheat oven to 350 degrees

2. In a medium bowl, combine flour, baking powder, baking soda and salt.

3. In a large mixing bowl, beat peanut butter, sugar, brown sugar, egg & egg whites, and vanilla until well combined and smooth. Add flour mixture and mini chips. Stir by hand until just combined. The dough will seem very dry and it'll work best to use your hands to combine.

4. Turn the dough out onto a lightly floured surface, divide in half. Shape each into an 8" log. Place the logs 2-3" apart on a cookie sheet that has been sprayed with nonstick spray. Flatten each log into a rectangle about 3" wide.

5. Bake for 25-30 minutes, until firm and cracking on top. Place on a wire rack to cool for 15 minutes. Meanwhile, reduce oven temperature to 275.

6. Place logs on cutting board, and cut each diagonally into 1/2 - 3/4 inch thick slices, using a serrated knife. Place biscotti cut side down onto the cookie sheet and return to oven for 20 minutes. Flip biscotti over and bake for an additional 20 minutes. Transfer to a wire rack to cool.