Showing posts with label bread. Show all posts

Wednesday, December 2, 2009

Soft Potato Quick Rolls

After consecutive days of being unable to breathe due to an unfortunate constriction in my waistband, I began to seriously second guess my holiday gluttony. I love my family but more importantly, my family loves to eat. After a yummy Thanksgiving feast and days of shuttling my parents around to each of our favorite restaurants in town, things were surely getting a little tight. Luckily, I awoke this morning to discover that my pants had finally granted me a freebie by stretching out so I can resume eating leftovers. {{sigh of relief}}.

Soft Quick Dinner Rolls
Last night hubby and I desperately wanted turkey sandwiches but could not subject ourselves to a 10th grocery store trip in a week. I scoured the internet for a quick sandwich roll recipe and found several using a common theme of potato flakes, onion powder, yeast and a muffin tin. With a total rise time of about 50 minutes (split between two sessions), these rolls were ready right before bed time, a perfect time to gorge on bread, dont you think?

I must say i'm desperately in love with this easy recipe. I added Parmesan cheese, used roasted garlic potato flakes and threw in a little extra sugar. Next time, I may try adding real garlic and some cheese. The possibilities are endless!

Soft Potato Quick Rolls
adapted from Allrecipes and King Arthur's Flour

2 1/4 teaspoons active dry yeast
1 cup warm water (110 degrees F/45 degrees C)
3 tablespoons white sugar
1/4 cup dry roasted garlic potato flakes
1 teaspoon salt
1 egg
2 tablespoons canola oil
3/4 teaspoon onion powder
1 tablespoon parmesan cheese
2 1/4 cups all-purpose flour


In a large bowl, dissolve yeast in warm water. Add sugar and stir. Add potato flakes, salt, egg, oil, onion powder, cheese and 1 cup of the flour. Beat until smooth. Stir in remaining flour. Continue stirring until smooth, scraping batter from sides of bowl.

Cover and let dough rise in warm place until doubled, about 20 to 30 minutes. Lightly grease 12 muffin cups.

Once risen, punch down dough. Spoon dough evenly into greased muffin cups. Let rise until batter reaches tops of cups, or about 20 minutes. Meanwhile, preheat oven to 400 degrees.

Bake for 15 minutes.

Monday, October 12, 2009

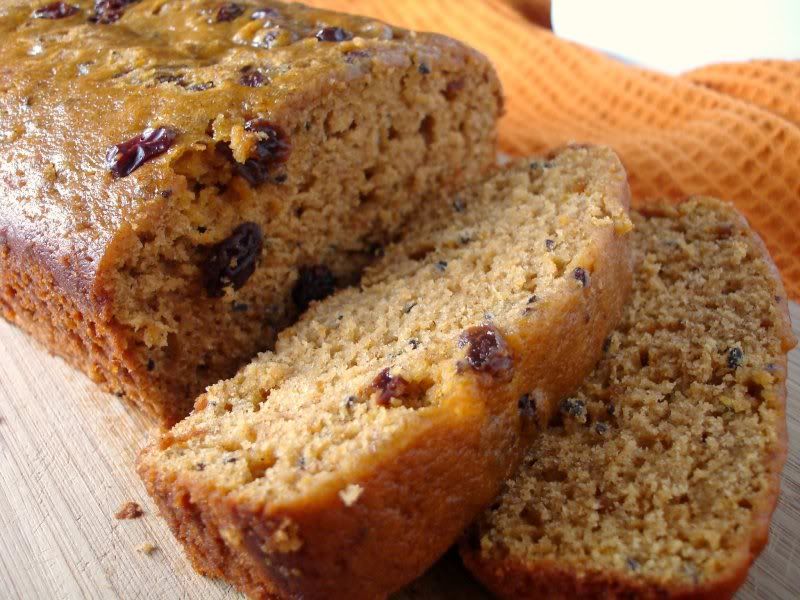
Pumpkin Honey Beer Bread

Let me caveat this post by noting that though this turned out to be the recipe from hell, it was utterly delicious and something I will make again and again- perhaps one of my favorite pumpkin recipes. And because you are probably much more attentive and organized than me, I presume you shouldn't experience one problem when baking and enjoying this super healthy bread.

Pumpkin Beer BreadSo, why the recipe from hell?

Monday: Measure out ingredients only to find I am out of sugar. Postpone making of bread.
Tuesday: Hubby buys sugar but I'm too lazy to make bread. Realize we only have IPA which is too hoppy for bread.
Wednesday: Go out to store in search of pumpkin beer to find they carry only 1 brand and its $11 for a 6-pack. I'm not made of money here, folks. Settle for using the Kirin Light in my fridge. Arrive home. Too late to make bread.
Thursday: Oops, where's the flax seed?. Send hubby out to store. Oops, food processor does not grind flax seed very well. Power through these setbacks. Decide to put raisins in one of the loaves only to have the entire package of raisins fall into the dough. DOH!This damn bread better be good....

So, there you have it! It may have taken nearly a week to make this pumpkin bread but it was clearly worth it. As a cold weather hater, fall has traditionally served as a sign of bad things to come. However, along with pretty fall leaves I've always loved the food that comes along with fall and just about anything pumpkin flavored.


Pumpkin Beer BreadThis bread makes 2 loaves so consider halving the recipe if you're unable to consume 2 whole loaves with your husband alone. We don't have these problems! Enjoy and don't forget to read the ingredient list before proceeding :)

Pumpkin Honey Beer Bread

adapted from Cooking Light

3 cups all-purpose flour
1/4 cup whole wheat pastry flour
2 teaspoons salt
2 teaspoons baking soda
1 teaspoon baking powder
1 teaspoon ground cinnamon
1 teaspoon pumpkin pie spice
1/2 cup water
1/3 cup ground flaxseed (try using a coffee grinder to grind the flaxseed)
2 cups sugar
2/3 cup canola oil
2/3 cup honey or pumpkin beer (at room temperature)
1 tablespoon honey
3 large eggs
1 15 oz can pumpkin
1/2 cup raisins
Cooking spray

Preparation

1. Preheat oven to 350°.

2. Lightly spoon flour into dry measuring cups; level with a knife. Combine flour,

salt, baking soda, baking powder, cinnamon and pumpkin pie spice in a medium bowl. Stir with a whisk.

3. Combine 1/2 cup water and ground flaxseed.
Combine sugar, oil, beer, honey and eggs in a large bowl; beat with a mixer at

medium-high speed until well blended. Add flaxseed mixture and pumpkin.

4. Beat at low speed just until blended. Slowly add flour mixture; beat just until combined. Stir in raisins. Divide batter between 2 (9 x 5–inch) loaf pans coated with cooking spray. Bake at 350° for 55 minutes -1 hour or until a wooden pick inserted in center comes out clean. Cool 10 minutes in pan on a wire rack; remove from pans. Cool completely on wire rack.

Tuesday, August 4, 2009

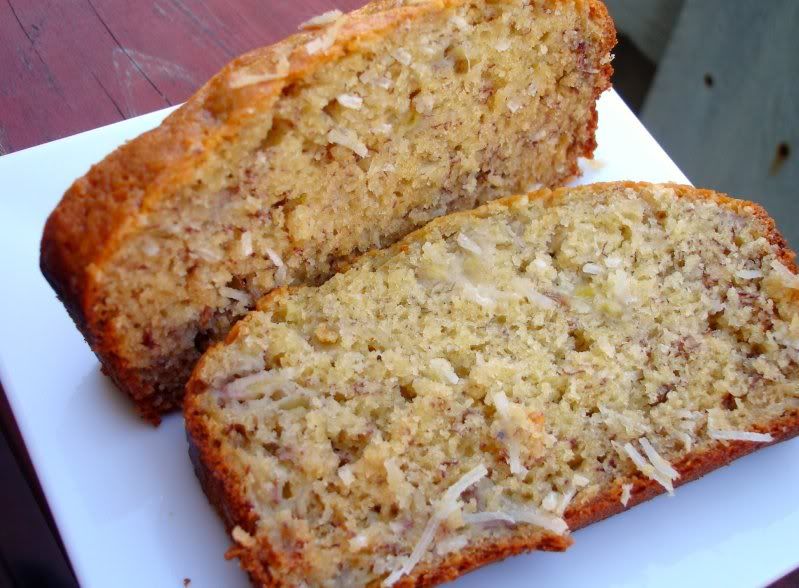
Coconut Banana Bread with a Boozy Twist

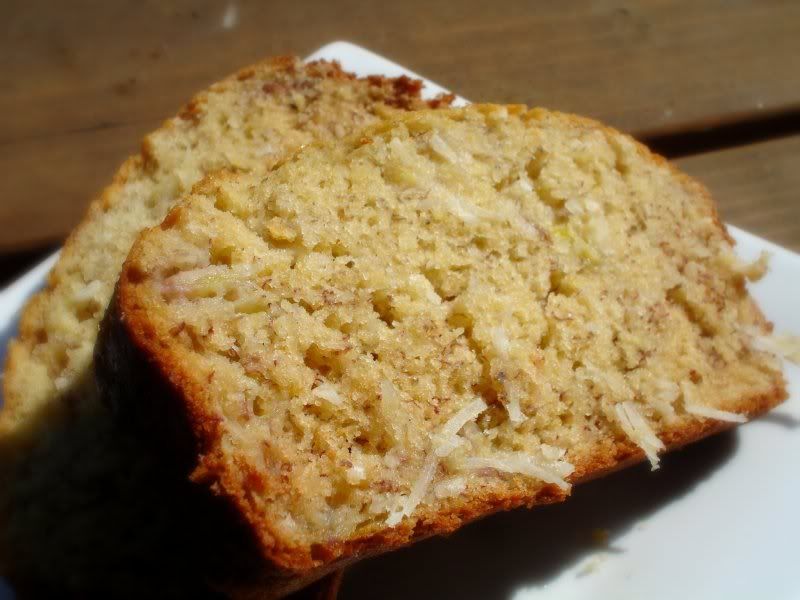
coconut banana breadSome days I wonder if my sweet tooth mysteriously disappeared, would I become a supermodel?? OK, ok. I'd have to grow about a foot, get a few tweaks here and there, find myself a new hairdo, but seriously...I live to eat dessert. Case in point - tonight I decided a slow leisurely jog would be best because of the hot temps. Upon arriving home a hot & sweaty mess, I decided it'd only be appropriate to satiate myself with a huge slice of Coconut Banana Bread. Do you think the slow jog canceled out the bread? Fat chance (no pun intended)!


coconut banana bread
Lucky for me, this bread is based on a Cooking Light recipe so all is not lost! I've made Coconut Banana Bread before, last time using coconut milk but no real coconut. This time, I decided to shake things up. With 3 bananas and lots of shredded coconut, this one is so full of flavor and quite tropical. You wouldn't even guess what kind of booze I snuck in there. It works, I promise.

I say if we can't be supermodels, eat bread baked with booze! :)

Coconut Banana Bread
Adapted from Cooking Light

1 1/2 cups all-purpose flour
1/2 cup whole wheat pastry flour
3/4 teaspoon baking soda
1/2 teaspoon salt
1 cup granulated sugar (use baker's sugar if possible)
1/4 cup butter, softened
2 large eggs
3 mashed ripe banana
1/4 cup vanilla yogurt
3 tablespoons Kentucky Whiskey (can use dark rum)
1/2 teaspoon vanilla extract
1/2 cup flaked sweetened coconut + 1 tbsp coconut, divided
Cooking spray

1. Preheat oven to 350°.

2. Combine flour, baking soda, and salt in a medium bowl and stir with a whisk.

3. Place granulated sugar and butter in a large bowl; beat with a mixer at medium speed until well blended. Add eggs, 1 at a time, beating well after each addition.

4. Add banana, yogurt, whiskey, and vanilla; beat until blended. Add flour mixture; beat at low speed just until moist. Stir in shredded coconut. Spoon batter into a 9 x 5-inch loaf pan coated with cooking spray; sprinkle with 1 tablespoon coconut.

5. Bake at 350° for 1 hour or until a wooden pick inserted in center comes out clean. Cool in pan 10 minutes on a wire rack; remove from pan.

Sunday, December 14, 2008

Amish Friendship Bread...Revealed!

Congrats to the recipients of the Amish Friendship Starter: MaryBeth from Dunkin Cooking, Aleisha, and The Blonde Duck from A Duck in Her Pond! Hope you enjoy the bread and can pass along the starter to your friends.

Alexandra asked if I had the recipe for the starter and I sadly let her know that I didn't. The premise of the Amish Friendship Starter is that only the Amish know how to "start" it so you must receive it from a friend. Well, I'm 99.9% sure that a nice Amish lady wasn't the originator of the starter I received, but well...I suppose you never know.

Fast forward a couple of days, and I fortuitously happened upon a Friendship Starter Cookbook at our library's book sale. I couldn't believe it! Now I have a whole bevy of recipes to bake with my starter.

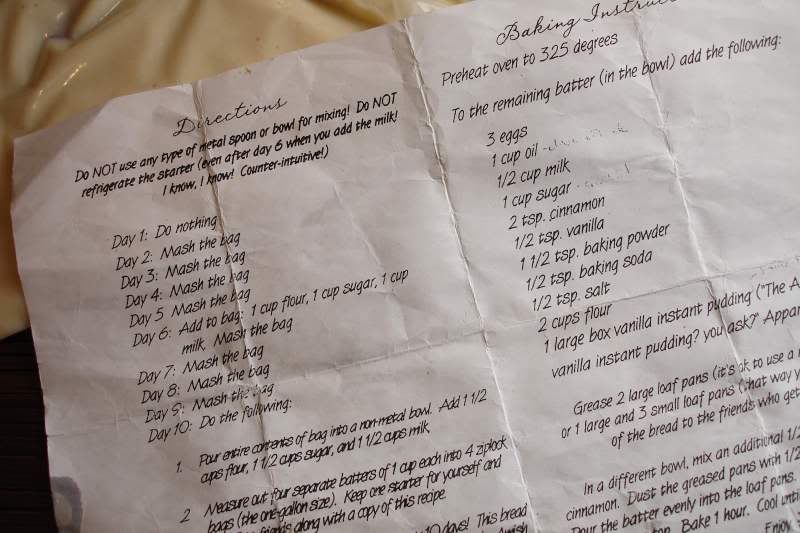
And without further adieu, here's the recipe for the Amish Starter:

Amish Starter RecipeSince I received my starter from my niece, I can't guarantee this recipe, though I'd like to give it a try. I'll be sure to post the results of any other baked goods I experiment with. Finally, here's the recipe and "feeding" instructions for your starter:

Starter Feeding Directions
DO NOT use any type of metal spoon or bowl for mixing. Don't refrigerate the starter

Day 1: Do Nothing
Day 2: Mash the Bag
Day 3: Mash the Bag
Day 4: Mash the Bag
Day 5: Mash the Bag
Day 6: Add to bag: 1 cup flour, 1 cup sugar, 1 cup milk. Mash the bag.
Day 7: Mash the Bag
Day 8: Mash the Bag
Day 9: Mash the Bag
Day 10: Do the following:

Pour entire contents of bag into a non metal bowl. Add 1.5 cups flour, 1.5 cups sugar and 1.5 cups milk.

Measure out four separate batters of 1 cup each into gallon size ziploc bags. Keep one starter for yourself and give the other 3 to your friends, along with a copy of the recipe.

Cinnamon Amish Friendship Bread
Preheat oven to 325 degrees.
To the remaining batter in the bowl (we measured about 2 cups) add:

3 eggs
1 cup oil
1/2 cup milk
1 cup sugar
2 tsp cinnamon
1 tsp vanilla
1 1/2 tsp baking powder
1/2 tsp baking soda
1/2 tsp salt
2 cups flour
1 large box vanilla instant pudding

Grease 2 large loaf pans or 1 large and 3 small loaf pans.

In a small bowl, mix an additional 1/2 cup sugar and 1/2 tsp cinnamon. Dust the greased pans with 1/2 the cinnamon/sugar mixture. Pour the batter evenly into the loaf pans. Sprinkle the remaining mixture on top. Bake 1 hour. Cool.

Look at the other fabulous vintage cookbooks I found at the library sale. The sale consisted of all the books you can fit into a bag for a dollar! What else can you buy for a dollar these days?

Amish Starter RecipeOh, and look at Betty Crocker's makeover:

Amish Starter RecipeHope you had a good weekend!

Tuesday, December 9, 2008

Free to a Good Home!

Are you a loving and caring cook? Will you mash me and feed me and care for me like your own? If so, let me know if you'd like to be the lucky recipient of a bag of Amish starter and a copy of this fabulously butter and flour stained, vintage-y looking recipe.


Amish StarterLike the chain letter of breads, Amish Friendship Bread is a great bread for the holidays or to coerce your friends into baking. It's also wonderful if you're a lover of cinnamon, sugar, or streusel toppings (pointing a finger at myself). After caring for & feeding your starter for about 10 days, you quadruple it, divide it up and bake yourself a ridiculously good cinnamon coffeecake type bread. You can bake several small loaves but we decided to make one ginormous cinnamon monstrosity. Pass along the starter to friends and the chain continues. It's all good fun until you use up all your precious baking supplies. This project requires a lot of flour and sugar!
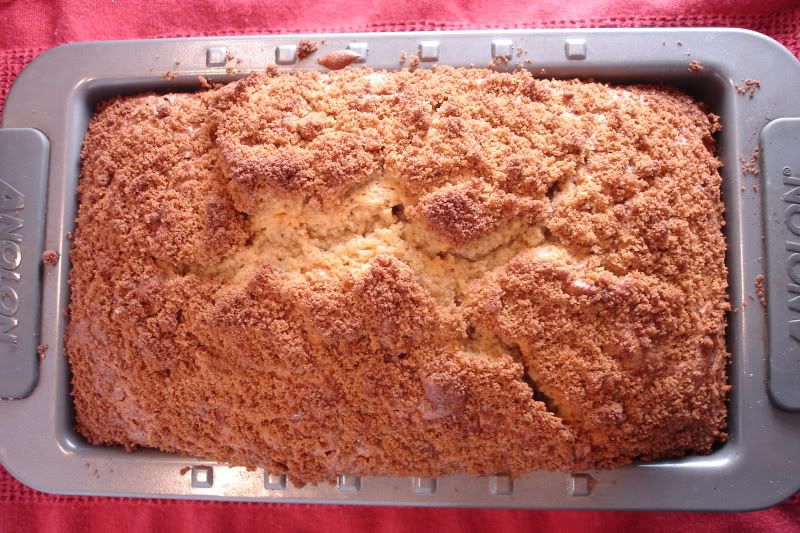
Amish Friendship Bread
** The giveaway is closed, but click here for a recipe to make your own***

If you'd like to be a recipient, just leave a comment by tomorrow morning (Wednesday). I have a few of these to give out. Just for kicks, let me know your favorite dessert to pass along to friends!

I believe there are other uses for Amish starter. I'll experiment and keep you posted!

Monday, December 1, 2008

Sweet Potato Buttermilk Dinner Rolls

It's not often that toilet paper is discussed on food blogs, but there's just something that's been perplexing me for awhile now. Does anyone else feel like toilet paper is the new gas? Well, OK that sounds funny. But with gas prices falling, I don't feel like crawling into a hole and quietly mumbling nonsense to myself every time I see the dreaded gas light taunt me. Unlike curbing my car for unnecessary trips, there's just no getting around needing to buy toilet paper for the house. Uh, and it's really expensive when you think about what you're getting for your money. People talk about conserving gas all the time but why has no one mentioned conserving toilet paper?


Sweet Potato Buttermilk RollsWell, in the spirit of penny pinching and today's earth shattering confirmation of our recession, here's a great way to use up all those leftover sweet potatoes from Thanksgiving's sweet potato pie. I found this fabulous recipe on Nicole's Pinch My Salt, an equally fabulous blog full of mouth watering goods.

These Sweet Potato Buttermilk Rolls are gorgeously colorful, fluffy and (believe me) easy to make. Oh, and they're delicious too. What more could you want from your carbs??

Nutrition, of course. Packed with sweet potato's vitamin A, you've got yourself a healthy carb to feel good about & enjoy with all that turkey haunting your refrigerator.

Sweet Potato Buttermilk Rolls
The rolls keep pretty well, and we have been making turkey sammies daily since Thanksgiving. Since Nicole does such a wonderful job with the recipe and is so kind and talented to provide step by step photos, I'll just send you over to her for my new favorite bread recipe. I almost didn't change a thing, but decided to add a little more sugar than 1/4 cup.

After allowing to rest for a mere hour, the dough easily doubles. Make sure it's ready by poking two fingers and making sure the indentation doesn't go anywhere (tip courtesy of Nicole).

Sweet Potato Buttermilk Rolls
Shape into an a round ball and cut dough into equal portions. Roll into cute balls.

Sweet Potato Buttermilk Roll DoughSprinkle with flour and bake until golden brown!

Sweet Potato Buttermilk Roll Dough
The rolls keep pretty well but taste amazing when popped into the toaster oven for a few minutes. For anyone still tentative on baking with yeast, I used the sometimes hard to find SAF Perfect Rise yeast. It doesn't require proofing and has never failed me. I can sometimes find it at Trader Joe's though they'll have it one day and the next they won't!

For more tasty bread inspirations, visit Yeastspotting!

Tuesday, September 30, 2008

Homemade Pitas from the Archives


The other day I was driving behind a garbage truck for about a short distance and was horrified to watch the amount of trash fly out the back. One huge cardboard box here, some dirty wrappers there, and an icky looking mass of garbage-goo ended things before I quickly turned off on a side street to avoid anything hitting my windshield.

I don't often drive behind garbage trucks, but it caused me to wonder how often garbage truck mishaps contribute to our streets' and highways' litter . Though I could face fines of $500 for littering, what happens when one garbage truck emits more litter in 5 minutes than could fit in a grocery bag? Doesn't the driver see all of the debris flying out of his truck? Hasn't garbage technology improved to address fly-away trash issues? If any of you happen to have knowledge of the industry, I'd love to know.

Well, enough about trash. I'm sure that doesn't make any of you hungry. What should make you hungry is the thought of fluffy, homemade pitas.

I spotted these awhile ago on Brown Eyed Baker and nearly forgot about how much I wanted them until Elle decided to give them a go. After seeing Elle's fluffy pillows of goodness I couldn't resist. Well, I forgot I even made these & took photos until I started going through my old files. Oh, often forgotten pitas, I have not forsaken you! You're delicious! ...though time consuming!

These guys require quite a lot of rise time, but other than that they're easy to make. You'll be hard pressed to find store bought pitas that are as fluffy and fresh as these so try 'em out.

We ate the pitas the first night with Chicken Shawarma and Tahini Sauce from Cooking Light.

The next day, I used the leftover chicken and added peas, chopped up red bell pepper, onions and sauteed mushrooms to make stuffed pita sandwiches. Topped with Trader Joe's absolutely amazing Cucumber Tzatziki sauce, I was in leftover heaven.

Homemade Pitas from Brown Eyed Baker served with Chicken Shawarma with Tahini Sauce
adapted from Cooking Light
2 tablespoons fresh lemon juice
1 teaspoon curry powder
1/2 teaspoon tumeric powder
2 teaspoons extravirgin olive oil
3/4 teaspoon salt
1/2 teaspoon ground cumin
3 garlic cloves, minced
1 pound skinless, boneless chicken breast, cut into 16 (3-inch) strips
1 tablespoon olive oil
1/2 cup red or yellow bell pepper, sliced
1/2 cup frozen peas
1/2 cup sliced mushrooms
Sauce:
1/2 cup plain 2% reduced-fat Greek yogurt
2 tablespoons tahini paste
2 teaspoons fresh lemon juice
1/4 teaspoon salt
1 garlic clove, minced

1. To prepare chicken marinade, combine first 7 ingredients in a medium bowl (lemon juice through garlic cloves). Add chicken to bowl; toss well to coat. Let stand at room temperature 20 minutes.
3. To prepare sauce, combine yogurt and next 4 ingredients (through 1 garlic clove), stirring with a whisk.
4. Over medium high heat, heat oil until glistening. Add chicken and saute until browned, about 5-6 minutes. Add peppers and cook 2 minutes. Add peas and mushrooms and cook until all vegetables are cooked through.
5. Either cut a pocket in homemade pitas or place mixture on top of pita for a wrap. Serve with tahini sauce or Trader Joe's Cucumber Tzatziki sauce.

Thursday, September 11, 2008

Leftover Coconut Milk?

After making a glorious coconut curry dish (which I'll be sharing soon) I found myself left with just a 1/2 cup or so of coconut milk. I usually freeze leftover coconut milk, only to find it in the back of my freezer 5 months later. Typically it's covered in ice chips and hubby pitches it before I can even think of how I'd like to use that last little bit of goodness.


Last night, I decided to use the coconut milk before it had a chance to rendezvous with Mr. Freezer Burn. Having 3 smelly and mottled bananas on the counter, I decided to combine the two to make banana bread.

Not knowing how the bread would turn out, I was pleasantly surprised to find that the coconut milk adds a distinctive taste and texture to the bread, reminiscent of an Asian cake I've had from a bakery in Chinatown. The bread is less "crumby" than a typical banana bread and much more rich. Finally, the banana taste isn't as prominent as usual though still "banana-y" enough to warrant using up my bananabreadperfect-bananas. Oh, don't you love my adjectives today? It's been a long one.


Thanks to the wonders of Blogger future posts, I should be on vacation when you read this post! We're going on a week long camping road trip, exploring the sights of the Southwest. I'll be back in a week or so with updates on our trip and a backlog of goodies I've made the past few days. Have a great week!

Coconut Milk Banana Bread
2 1/2 cups all purpose flour
2 teaspoons baking powder
1 teaspoon ground cinnamon
1/2 teaspoon cardamom
1/2 teaspoon salt
2 eggs
1 cup granulated sugar
3 mashed bananas (large)
1/2 cup coconut milk
2 Tbsp butter, melted and cooled
2 Tbsp unsweetened applesauce
1 teaspoon pure vanilla extract

1. Preheat oven to 350 degrees. Lightly grease a loaf pan
2. In a medium bowl, sift together flour, baking powder, cinnamon, cardamom & salt
3. In a separate large bowl, whisk eggs and sugar until combined. Whisk in bananas, coconut milk, butter, applesauce and vanilla.
4. Slowly add flour mixture to wet ingredients and stir with a spatula until just combined.
5. Pour batter into loaf pan and bake for 60 minutes or until a toothpick entered into the center of the loaf comes out clean.

Thursday, September 4, 2008

A Focaccia Quickie

I've detailed my love affair with the KitchenAid mixer so much that you're probably a little tired of it and perhaps think I'm a wee bit crazy. Well, I won't argue with you there, but I will say that since I've been home that baby has been working hard mixing, beating,stirring and kneading on a daily basis. I've been on a yeast bread kick, and my first recipe is a quickie focaccia. A lot of things in life are worth a little patience and waiting, but if you can have an equally satisfying quickie, why complain? Mind out of the gutters, please.

Focaccia has always been one of my favorite breads. Full of flavor and having just the perfect balance of crisp crust and soft interior, I eat way too much of this stuff when tempted. This Rosemary Focaccia will only take about 2.5 hours of your life: one to allow it to rise, about a half hour to bake, and another hour just to devour the entire pan.


How simple could bread baking really be? Olive oil is drizzled on the bottom of the baking pan to give the focaccia a crisp and flavorful crust. The dough is poured in, sprinkled with rosemary & garlic salt, and left alone to rise for an hour. After a brief stint in the oven, your house will smelly dreamy and you'll be happy.


The following day, we used our ungodly delicious focaccia to make grilled paninis with turkey, red pepper, tomato and goat cheese. I couldn't have been any more jubilant once I realized we had both eaten approximately 1.5 cups of flour per person in a 24 hour time period. Eat me, Dr. Atkins.


Quickie Rosemary Focaccia
Adapted from King Arthur Flour
1 1/2 cups (12 ounces) warm water
3 tablespoons (1 1/4 ounces) olive oil (plus additional for drizzling)
1 1/4 teaspoons salt
3 1/2 cups (14 ¾ ounces) All-Purpose Flour
1 tablespoon instant yeast (I used 4 teaspoons of active dry yeast, proofed for 10 minutes in 1/2 cup of water)
2 tablespoons fresh Rosemary, chopped
1/2 teaspoon coarse garlic salt

1) Lightly grease a 9" x 13" pan, and drizzle 1 to 2 tablespoons olive oil in the bottom.
2) Combine all of the ingredients, and beat at high speed with an electric mixer for 60 seconds.
3) Scoop the sticky batter into the prepared pan, cover the pan, and let it rise at room temperature for 60 minutes, till it’s become puffy.
4) While the dough is rising, preheat the oven to 375°F.
5) Gently poke the dough all over with your index finger.
6) Drizzle it lightly with olive oil, and sprinkle with Rosemary and garlic salt.
7) Bake the bread till it’s golden brown, 35 to 40 minutes.
8) Remove it from the oven, wait 5 minutes, then turn it out of the pan onto a rack. Serve warm or at room temperature.

Monday, June 9, 2008

The Carnivore's Gone Veg!

sweet potato streusel bread

That's right, folks. The Carnivore and his wife have decided to go vegetarian! Well, for a little bit at least. Before the Poultry farmers of America & the Cattleman's Beef Board begin fretting for their livelihood, this meat-free household is a temporary experiment. One night after much thought & prodding, Hubby couldn't remember the last time he went a day without eating meat:

"Hmm, maybe when I was a baby?!"
Wrong Answer.

As valiant as my meat eating efforts have been, we figured it was prime time to incorporate some more vegetables in our diet and an excellent opportunity for me to experiment with vegetarian cooking. So far, this challenge hasn't been too difficult. I've enjoyed exploring all the great vegetarian blogs (here or here, for example) & cookbooks. I haven't been tempted until I went out with a friend for a bite to eat at Girard Gourmet. Out came our food: a fragrant, hearty lamb stew that smelled like heaven (for her), a Greek salad with limp lettuce and oily cucumbers (for me). I've never lusted for meat quite like that! mmm...well, that sounds wrong, huh?

I'm happy to report back that my first vegetarian dinner was a great success. So much so that I didn't have time to take a photo as we quickly devoured our meal. After being overwhelmed by all the veggie options I had bookmarked, I decided to make the Sweet Potato and Black Bean Enchiladas from Karina's Kitchen.

While I wasn't initially sure about the flavor combination, its hard for me to describe how delicious the recipe turned out. The enchiladas were light and summery & I think they'd be great in the future with a little bit of fruit - maybe pineapple or mango. I gratuitously complimented my vegetarian culinary skills during the entire meal; Hubby enjoyed them, but he also seemed a little bit in shock at what I had somehow committed him to.

Since I had some leftover sweet potato (...or yam, whatever. Don't get me started!), I decided to make a Sweet Potato Streuseled Bread. Ginger, cinnamon, and orange zest add a nice spice, while the walnut brown sugar streusel lends the right amount of sweetness and crunch to this hearty bread. The streusel definitely makes the bread, so don't skip it as I usually do with quick breads! A good quality orange juice as also a must as the orange flavor definitely stands out in the bread.

While I don't think I'll be replacing my favorite banana bread quite yet, the bread was a great way to use up leftover sweet potatoes and sneak in some Vitamin A into our diets (think of it as a multivitamin in dessert bread form, it'll make you feel better!)

Sweet Potato Walnut Streusel Bread
adapted from Southern Living

1 large sweet potato (about 12 ounces)
1 tablespoon butter
1/4 cup chopped walnuts
2 tablespoons dark brown sugar
1 1/2 cups all-purpose flour
1/2 cup whole wheat flour
3/4 cup packed dark brown sugar
2 teaspoons baking powder
1 teaspoon ground cinnamon
3/4 teaspoon salt
1/4 teaspoon ground ginger
2/3 cup fresh orange juice (you may need a few extra tablespoons to moisten the dough sufficiently)
3 tablespoons vegetable oil
1 large egg, lightly beaten
1/2 teaspoon fresh orange zest (approximate, about 3-4 swipes of the grater)

Cooking spray
cinnamon finishing sugar (optional)

Preheat oven to 350°.
Cook potato in either microwave or by boiling. Once softened, mash the potato to measure about 1 cup.

Place butter in a microwave-safe bowl. Microwave for 20 seconds or until soft. Stir in walnuts and 2 tablespoons brown sugar.

Lightly spoon flours into dry measuring cups; level with a knife. Combine all-purpose flour and next 6 ingredients (all-purpose flour through ginger) in a large bowl. Add mashed sweet potato, juice, oil, egg, and orange zest. Stir with a spatula until well blended. Add more orange juice by the tablespoon, if dough seems to dry.

Spoon batter into an 8 x 4-inch loaf pan coated with cooking spray. Drop walnut mixture by spoonfuls over top of loaf; gently press into batter. Sprinkle with cinnamon finishing sugar, if using.

Bake at 350° for about 50-55 minutes or until a toothpick comes out clean. Cool in pan 5 minutes on a wire rack. Remove from pan; cool completely on wire rack

Thursday, April 3, 2008

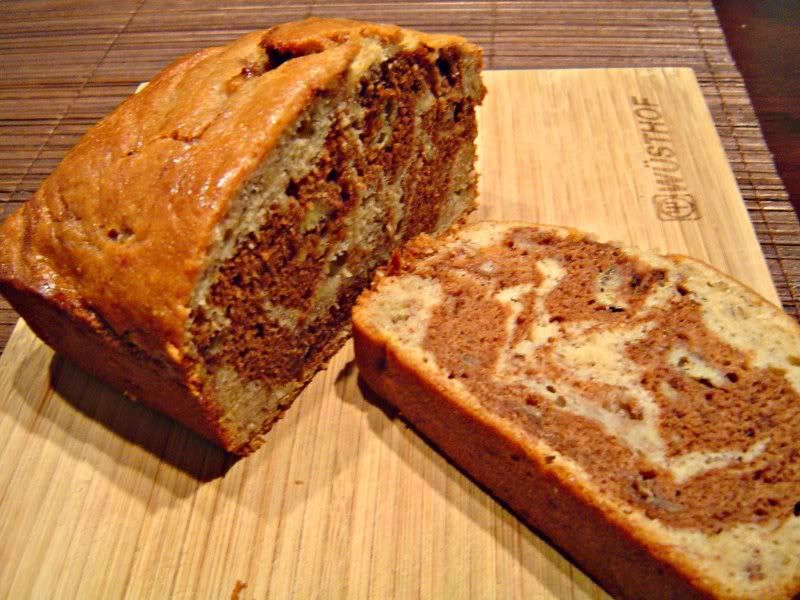
Chocolate and Banana Marbled Bread

Chocolate and Banana Marbled Bread Well, we're out of town yet again. Feels like we're never home, but we're attending a wedding of two of hubby's close friends and running a half marathon this weekend, so at least we make the most of our time away! Unlike many, I actually enjoy visits to the grocery store (is it sad to list it as one of my hobbies?!) and as a result overpurchased this week, forgetting that we'd only be home for a few days. In an effort to clear the refrigerator and pantry, I made Chocolate and Banana Marbled Bread instead of packing. Oops.

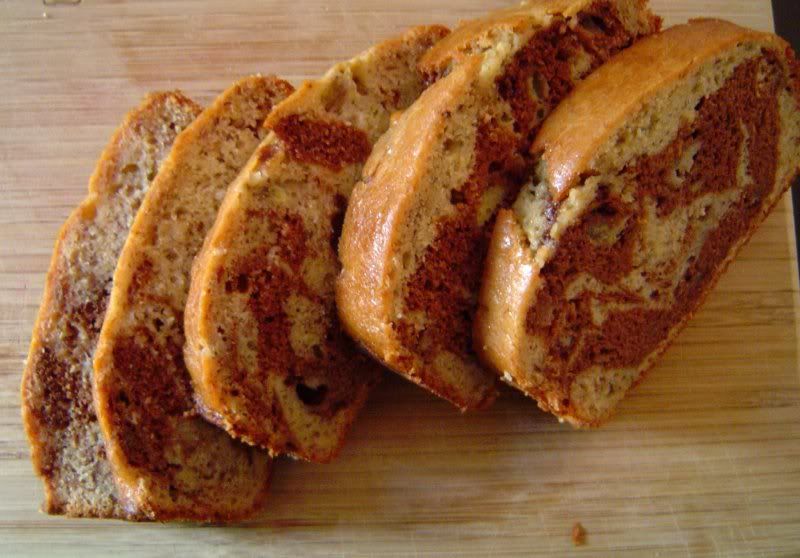
I have stuck by a classic banana bread recipe for ages, but thought I should branch out, though somewhat OCD hubby is always a little skeptical. Boy, am I glad that i did. This bread is sweet, moist & flavorful. Because I was afraid the chocolate would overpower the banana taste, I made sure to use big, ripe bananas that would hold their own. I also added vanilla and cinnamon to ensure the banana-only bites were not too bland. Next time, I might add in some chocolate chips or even peanut butter chips to add an extra kick. Yum! Hmm, and maybe I'll work on my 'marbling' technique as well.
Chocolate and Banana Marbled Bread Slices Oh, and if you're wondering why the loaf pictured above is so small, it's not a mini loaf. It's what was left after a few minutes out of the oven :)
Since this is my new favorite banana bread recipe, I'm entering it into the Not Quite Nigella Banana Bread Bake-Off. Click the link for more details!

Chocolate and Banana Marbled Bread
Adapted from Cooking Light
1 1/2 cups all-purpose flour
1/2 cup whole wheat pastry flour (ok to use all purpose flour)
3/4 teaspoon baking soda
1/2 teaspoon cinnamon
1/2 teaspoon salt
1 cup Baker's sugar (ok to use granulated)
1/4 cup butter, softened
1 1/2 cups mashed ripe banana (about 3 large bananas)
1/2 cup egg substitute (or 2 eggs - I found this to be better)
1/3 cup plain low-fat yogurt
1 teaspoon pure vanilla extract
1/2 cup semisweet chocolate chips
Cooking spray

1. Preheat oven to 350°.Lightly spoon flour into dry measuring cups, and level with a knife. Combine the flours, baking soda, cinnamon and salt, stirring with a whisk.
Place sugar and butter in a large bowl; beat with a mixer at medium speed until well blended (about 1 minute). Add banana, egg substitute, yogurt and vanilla; beat until blended. Add flour mixture; beat at low speed just until moist.

2. Place chocolate chips in a medium microwave-safe bowl, and microwave at HIGH 1 minute or until almost melted, stirring until smooth. Cool slightly. Add 1 cup batter to chocolate, stirring until well combined.

3. Spoon chocolate batter alternately with plain batter into an 8 1/2 x 4 1/2-inch loaf pan coated with cooking spray. Swirl batters together using a knife. Bake at 350° for 1 hour or until a wooden pick inserted in center comes out clean. Cool 10 minutes in pan on a wire rack; remove from pan. Cool completely on wire rack and try not to eat entire loaf in one sitting.

*Note-if you don't have whole wheat pastry flour, just use a total of 2 cups of all purpose flour.

Sunday, January 27, 2008

A Love Affair with Soft Pretzels


Soft Pretzel Rolls Soft, buttery pretzels make me salivate. I must shut my eyes when passing by soft pretzel stands to avoid purchasing one, so I’ve had my fair share of the good, the bad, and the well, just terrible (i.e. pretzel stand in Phoenix airport – stay away). According to essortment.com, pretzels have a long and storied history: “Somewhere straddling the border of northern Italy or southern France, pretzels were invented by an ambitious monk baking unleavened bread for the Christian Lent. Possibly out of boredom, he made some little shapes with leftover bread dough. Because Christians in those days prayed with their hands crossed over their chests, he tried shaping the dough to mimic that action. They were baked to a soft bread consistency and given as a treat to children that memorized their prayers. The monk named his new treat 'pretiola' - a Latin word meaning 'little reward'.

Pretzels have their characteristic dark color, and their unique ‘pretzel’ taste from a lye bath. Professional (or ambitious) bakers use a bath combining
sodium hydroxides (NaOH), sodium carbonate (Na2CO3), or sodium bicarbonate (NaHCO3). Sounds like a chemical experiment, huh? Pretzel recipes calling for a lye bath also strongly suggest using goggles and rubber gloves as the resulting alkaline is so caustic it can burn skin and ruin clothing. Once the pretzels begin baking, a Maillard reaction then gives the pretzel its characteristic brown color and distinctive flavor.

I’m ambitious, but I didn’t feel like purchasing any of my baking ingredients at the local hardware store -- lye is the main ingredient in drain cleaners like Drano and Red Devil. So, I've tweaked a recipe using a much milder alternative – a baking soda bath. I usually fail at attempts at making the cute prayer shaped pretzels, so I’ve come to make pretzel rolls instead, which make the most AMAZING turkey swiss sandwiches. If you’re not a fan of salt, experiment with adding raisins and cinnamon sugar during the kneading. I hope you enjoy as much as I enjoy cooking and eating these. A whole batch never lasts for more than a day and a half between the Mr. and myself.

Soft & Buttery Pretzels
*adapted from allrecipes.com
4 teaspoons active dry yeast
1 teaspoon white sugar
1 1/4 cups warm water (110 degrees F/45 degrees C)
4 cups all-purpose flour
1/2 cup white sugar
1 1/2 teaspoons salt
1 tablespoon vegetable oil
1/2 cup baking soda
4 cups water
1/4 cup kosher or pretzel salt, for topping

In a small bowl, dissolve yeast and 1 teaspoon sugar in warm water. Let stand until mixture is foamy, about 10 minutes. In a large bowl, mix together flour, 1/2 cup sugar, and salt. Make a well in the center; add the oil and yeast mixture. Mix and form into a dough. If the mixture is dry, add one or two tablespoons of water. Knead the dough until smooth, about 7 to 8 minutes.
Lightly grease a large bowl with oil or cooking spray, place the dough in the bowl and turn to coat. Cover with plastic wrap and let rise in a warm place (I use the oven) until doubled in size, about 1 hour.
Preheat oven to 415 degrees F. In a medium sized pot, combine the baking soda and water and bring to a simmer over low heat.
When the dough has risen, turn dough out onto a lightly floured surface and divide into 12 equal pieces. Lightly knead dough to remove air bubbles and shape into a roll. Using a serrated knife, cut a small incision to allow bread to split. I experimented below with both a cross and one vertical cut (the cross came out better).


Soft Pretzel doughOnce all of the dough is all shaped, dip each pretzel into the baking soda solution using a spatula to flip and remove.
Pretzel Lye BathPlace pretzel on a kitchen towel to allow water to drain. Place all dipped pretzel rolls on a greased cookie sheet. Bake in preheated oven for 10 minutes, or until browned. After removing from the oven, brush the rolls with melted butter and sprinkle with kosher or pretzel salt, to taste. Yum!